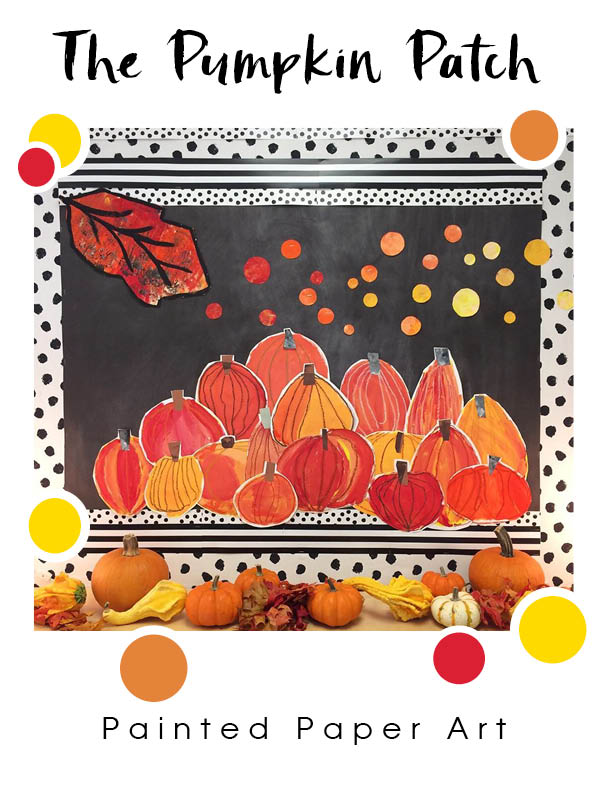
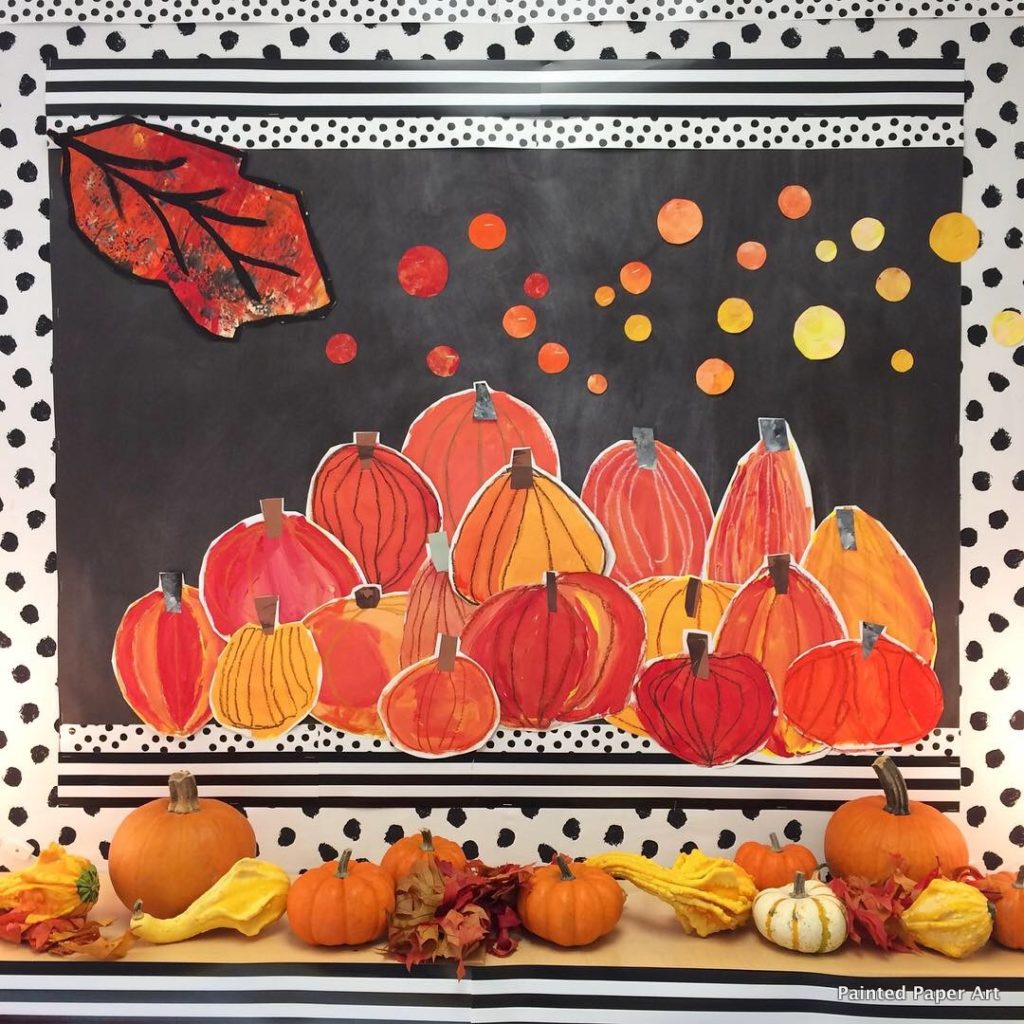
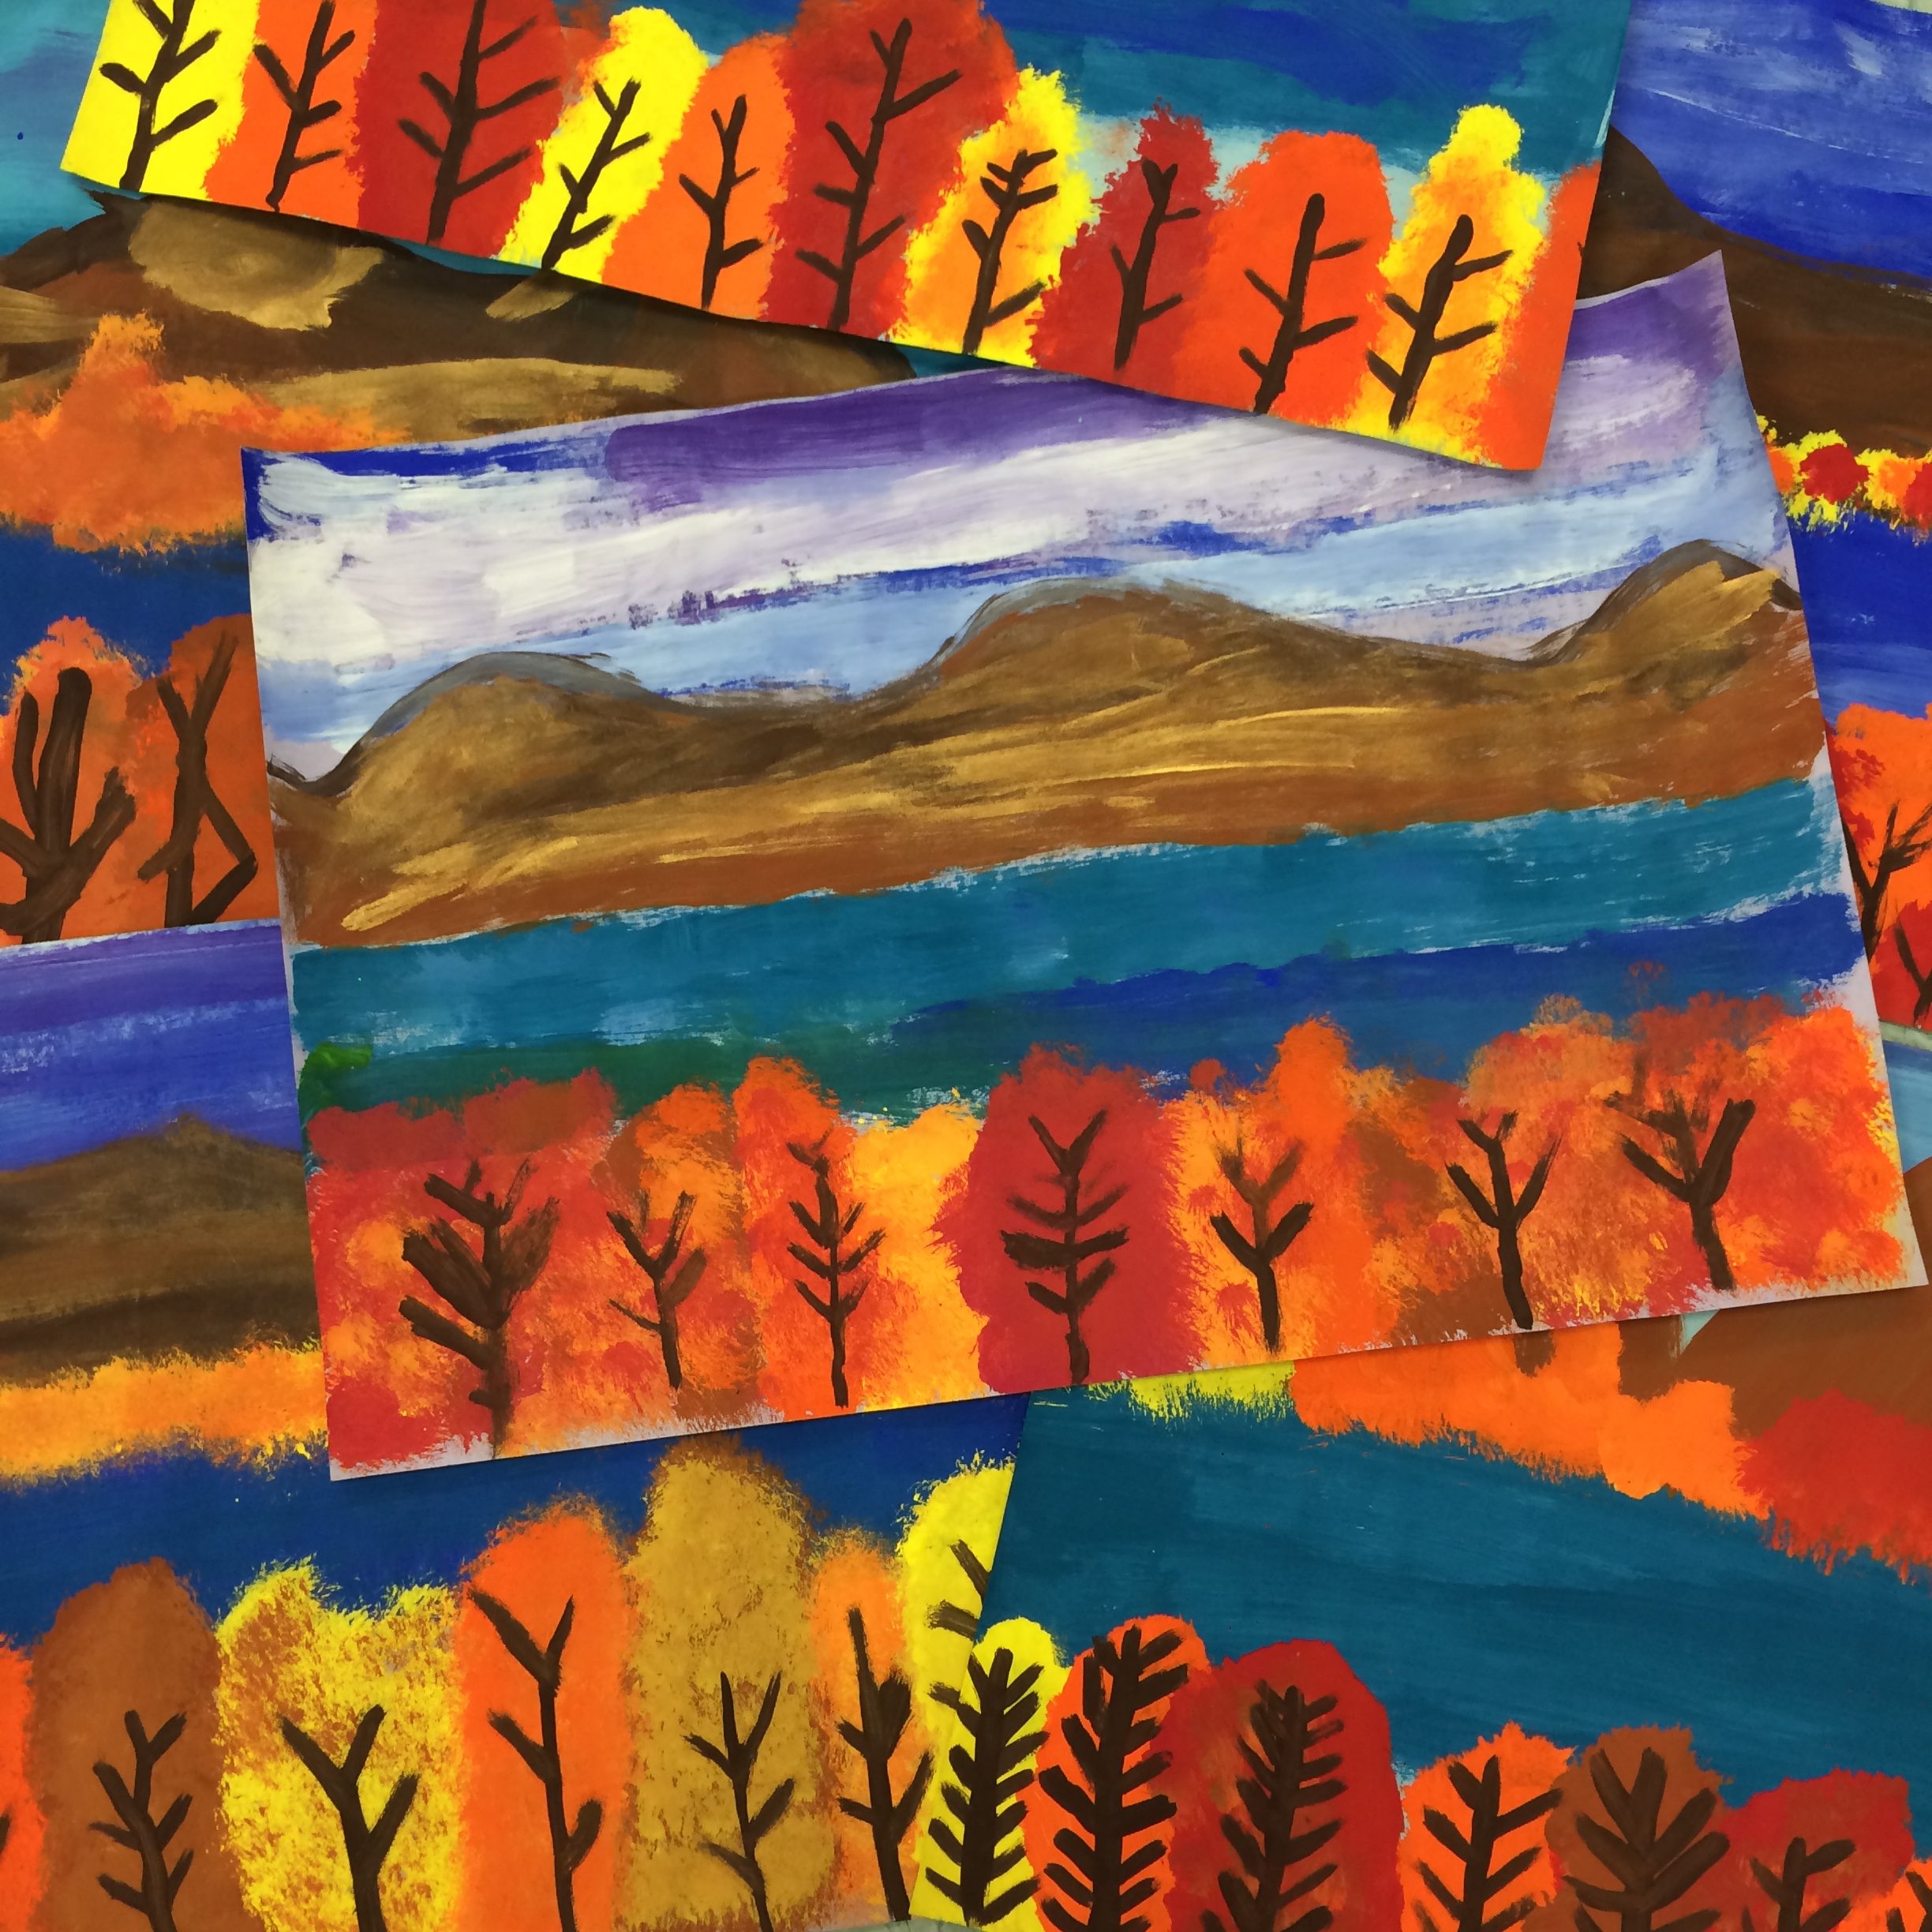
Hey folks, it’s that time of year! Apple cider, hayrides, harvest time, beautiful changing leaves, and of course pumpkins! My 1st grade artists created these colorful painted pumpkins in 1 – 40 minute class.
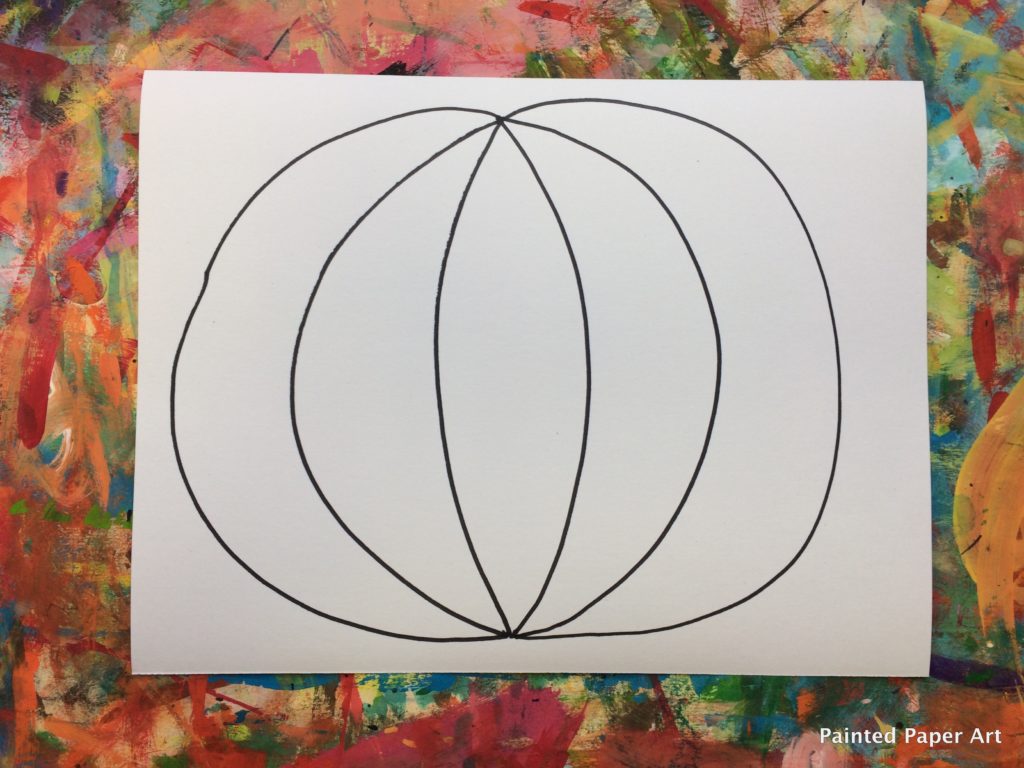
Creating the Pumpkin
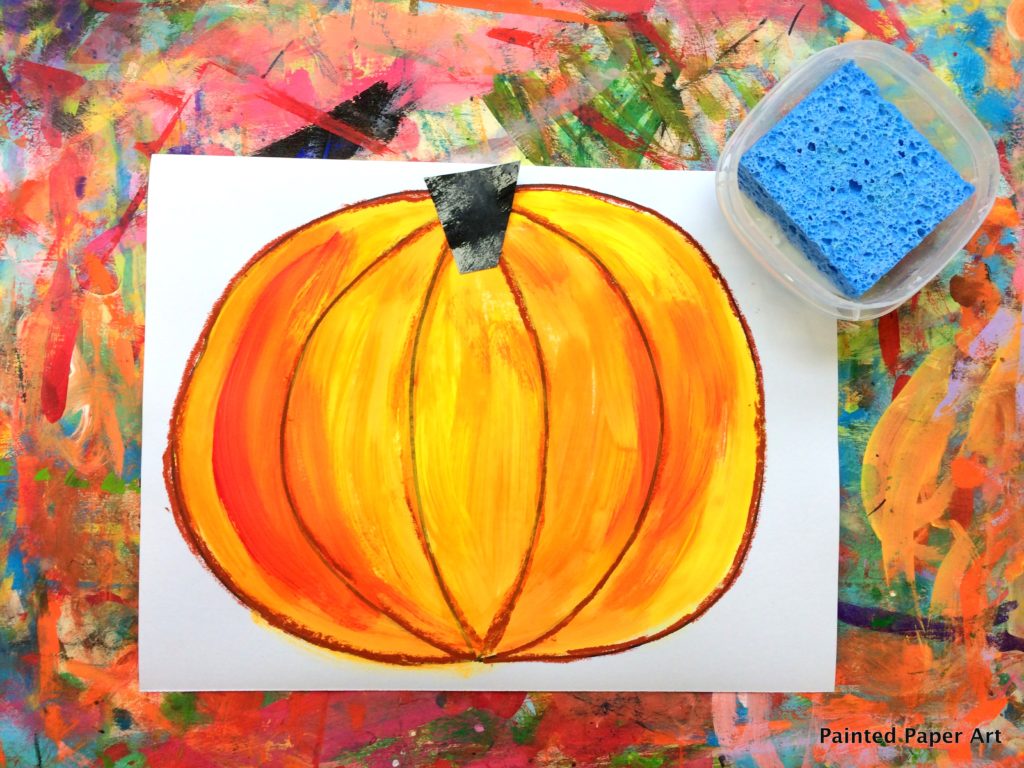
With a pencil or sharpie, make two dots. One on the top and one on the bottom, close to the edge of the paper. Next create the edge of the pumpkin using the letter “C” for the left side and the letter “D” for right side. Continue making the lines that represent the C and D to create the ridges on the pumpkin.
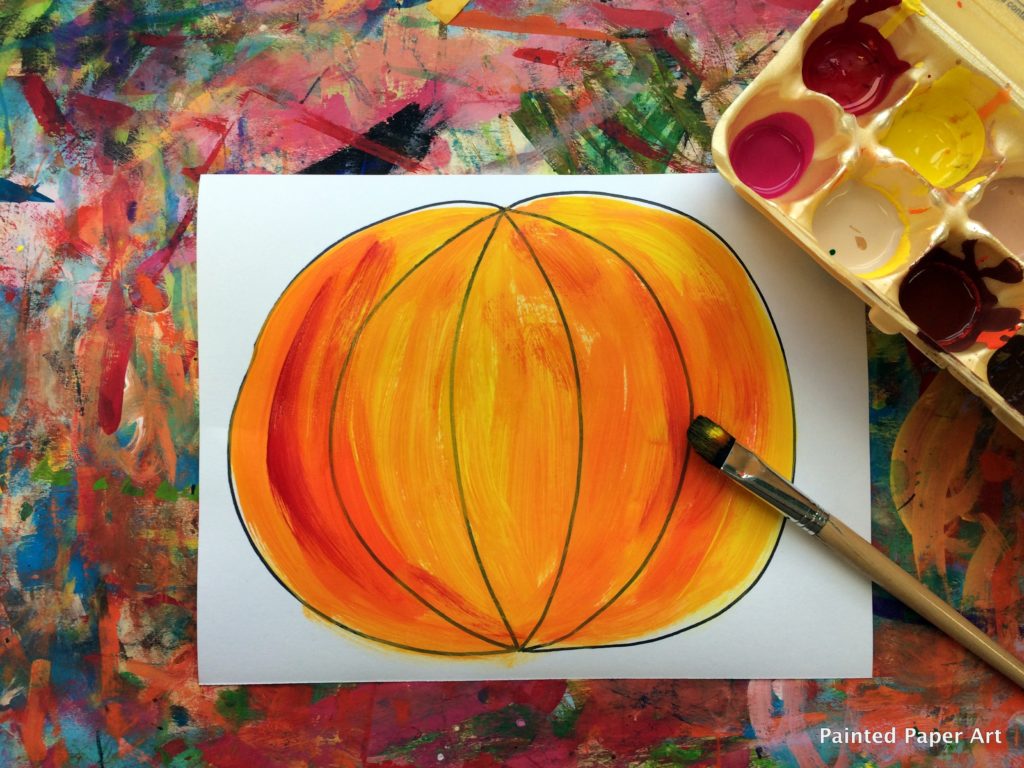
Painting the Pumpkin
Use yellow, orange, and/or red tempera paint and start filling in the pumpkin shape. Make sure to show brushstrokes for a painterly look.
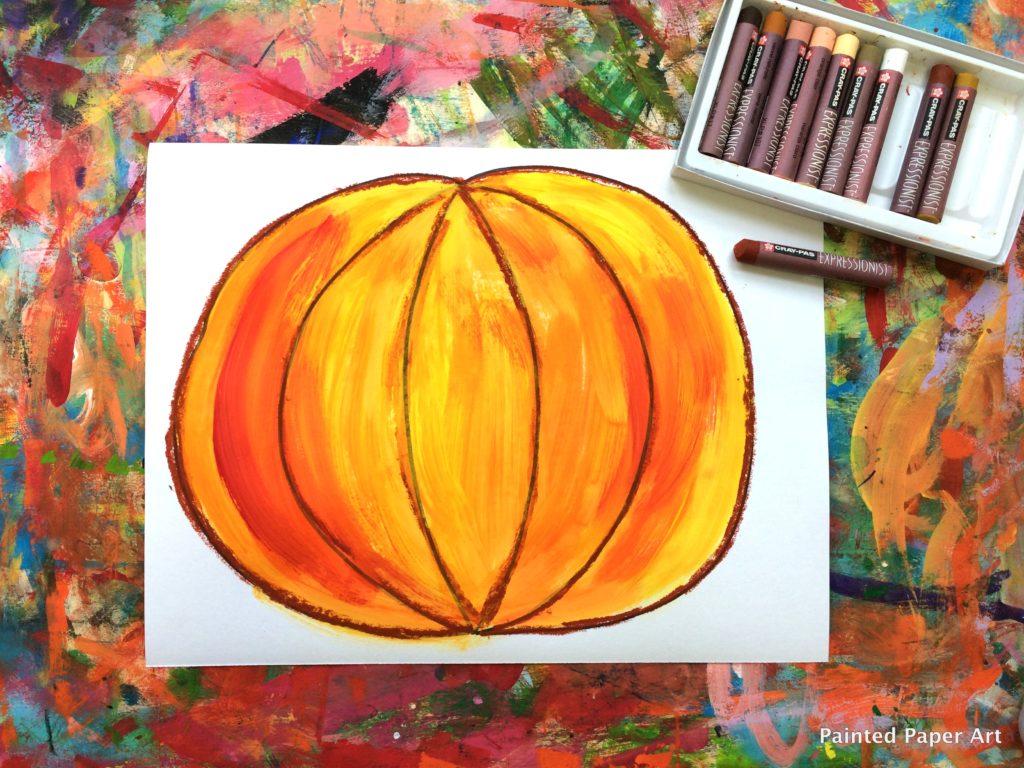
Add the Oil Pastels
Use one color oil pastel and trace over the pencil or sharpie lines that represent the ridges.
Add the Stem
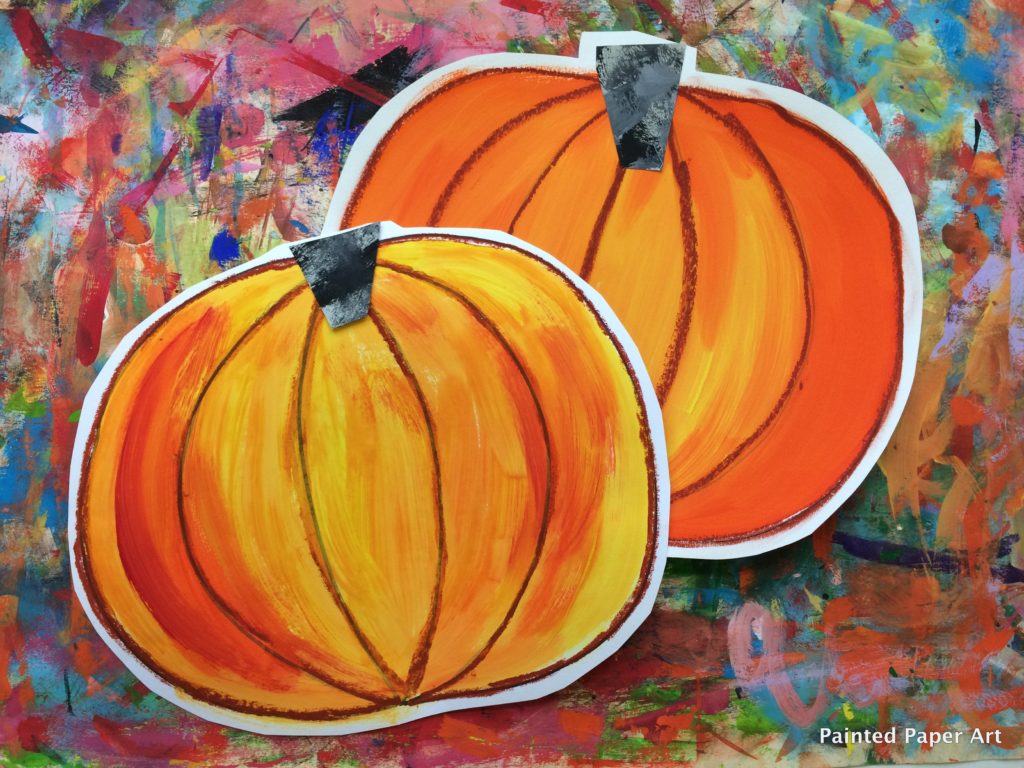
With a piece of painted paper or dark color construction paper, create a trapezoid shape to represent the stem. Glue the stem down on the top of the pumpkin. I use glue sponges to help my younger students with gluing. These sponges work great! Cut out the finished pumpkin. Make sure to leave a little bit of white paper as a border around the painted pumpkin.
(To make glue sponges: Cut a sponge in half and put in an inexpensive plastic bowl with sealable lid. Pour glue on top of the sponge and let set over night.)
Display
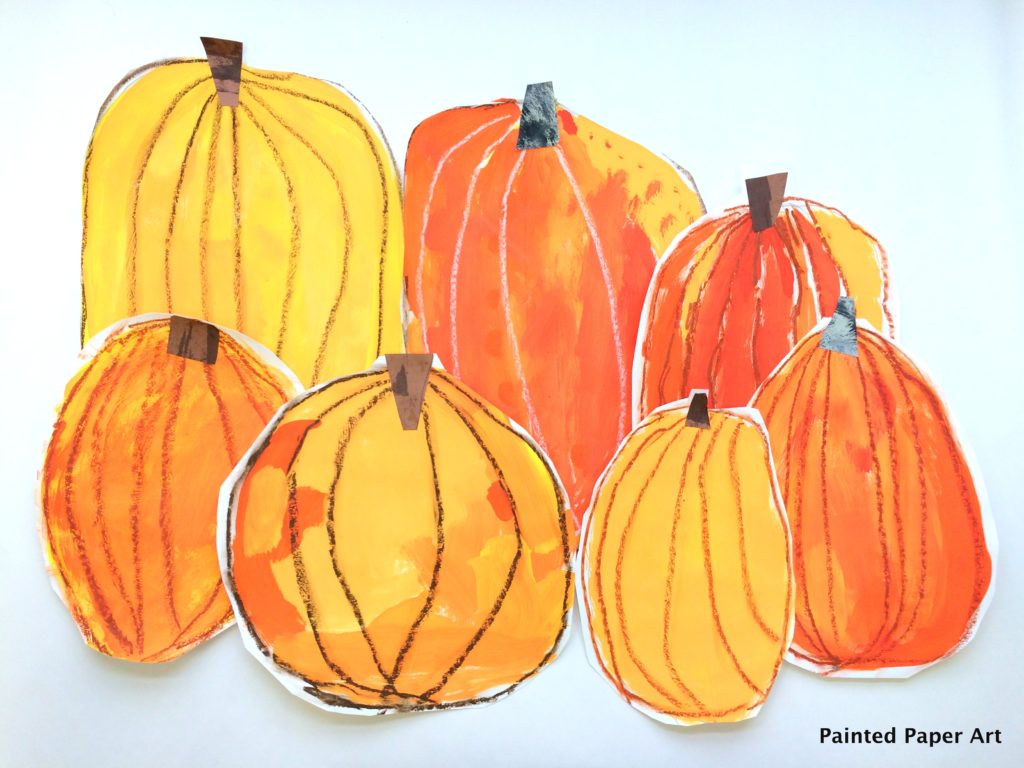
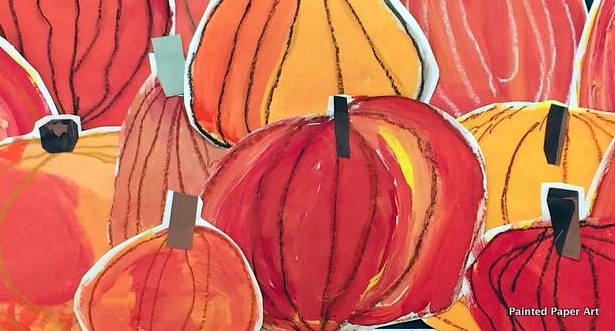
Stack the painted pumpkins to create a realistic pumpkin patch. I love Pacon’s Chalkboard Black Display paper for the background and SchoolGirl Style Borders to finish off my displays.
Welcome Autumn!

What a fabulous and fun project. I did this in my first grade classroom as a fun Friday project and the children loved it!!
Love the display in the end! How do you attach the pumpkins to the paper so that it is easy to return the pumpkins to the artist after you’re done displaying them?
Thank you so much for all the wonderful ideas on your website! My second graders love all of the projects and they fit nicely into the seven elements of art that they have been learning about. The pumpkins came out beautifully and we were able to use the concept of value when painting them. LOVE, LOVE, LOVE!