The Art of Stories Vol. 3: Twinkle Twinkle Little Star
Welcome Fall and all the beautiful colors that it produces!
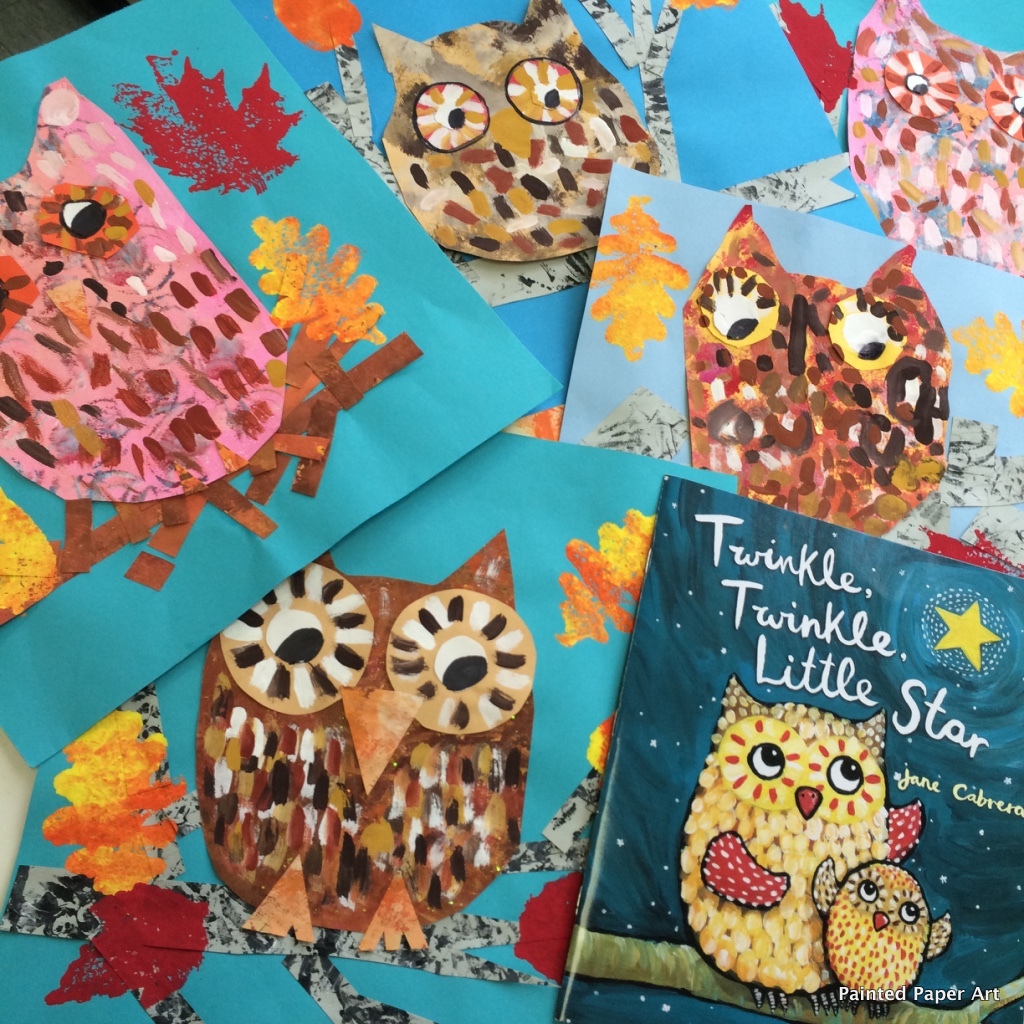
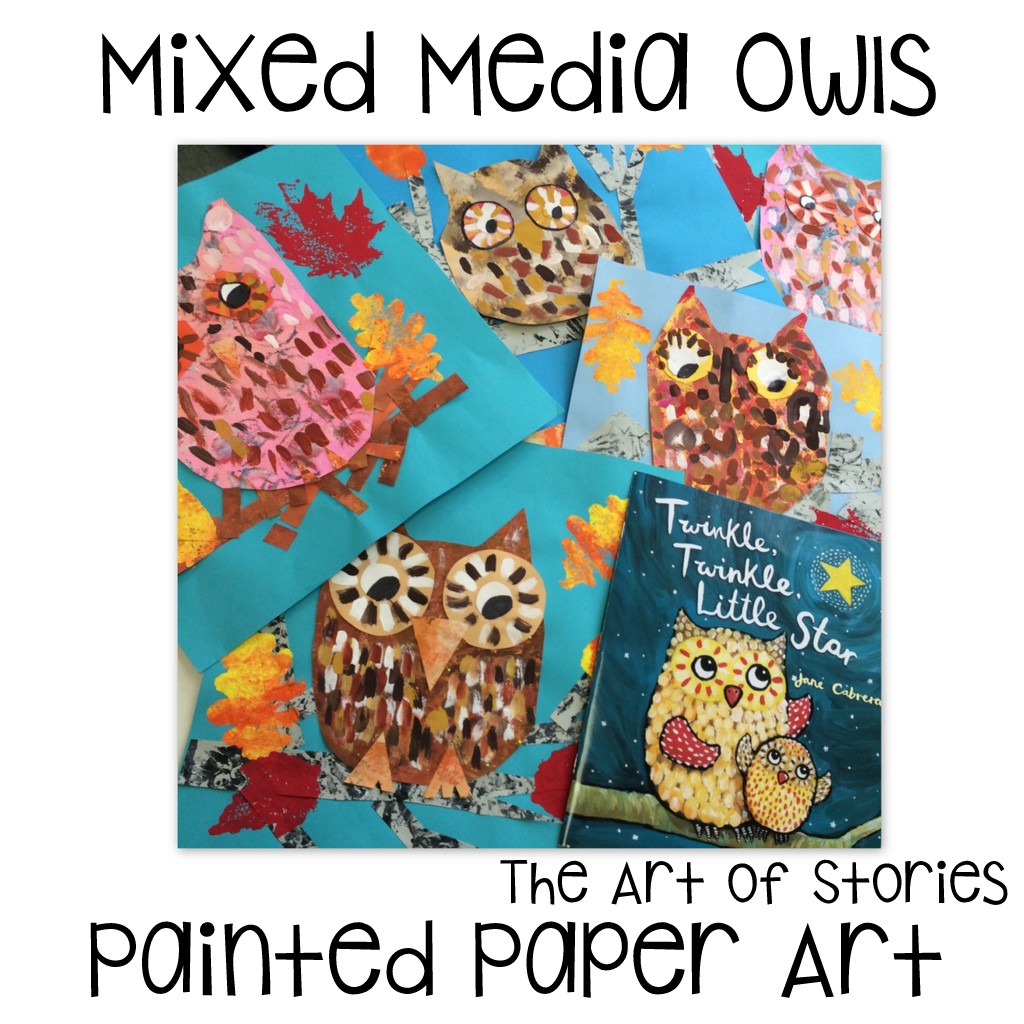
I saw this adorable book at the book fair ~ also known as take all my money experience-lol ~ and I knew I had to do a project with my little artists based off these illustrations. This is a perfect mixed media project that has painted paper, cutting, gluing, painting, and printmaking. This was process oriented which resulted in some beautiful projects at the end.
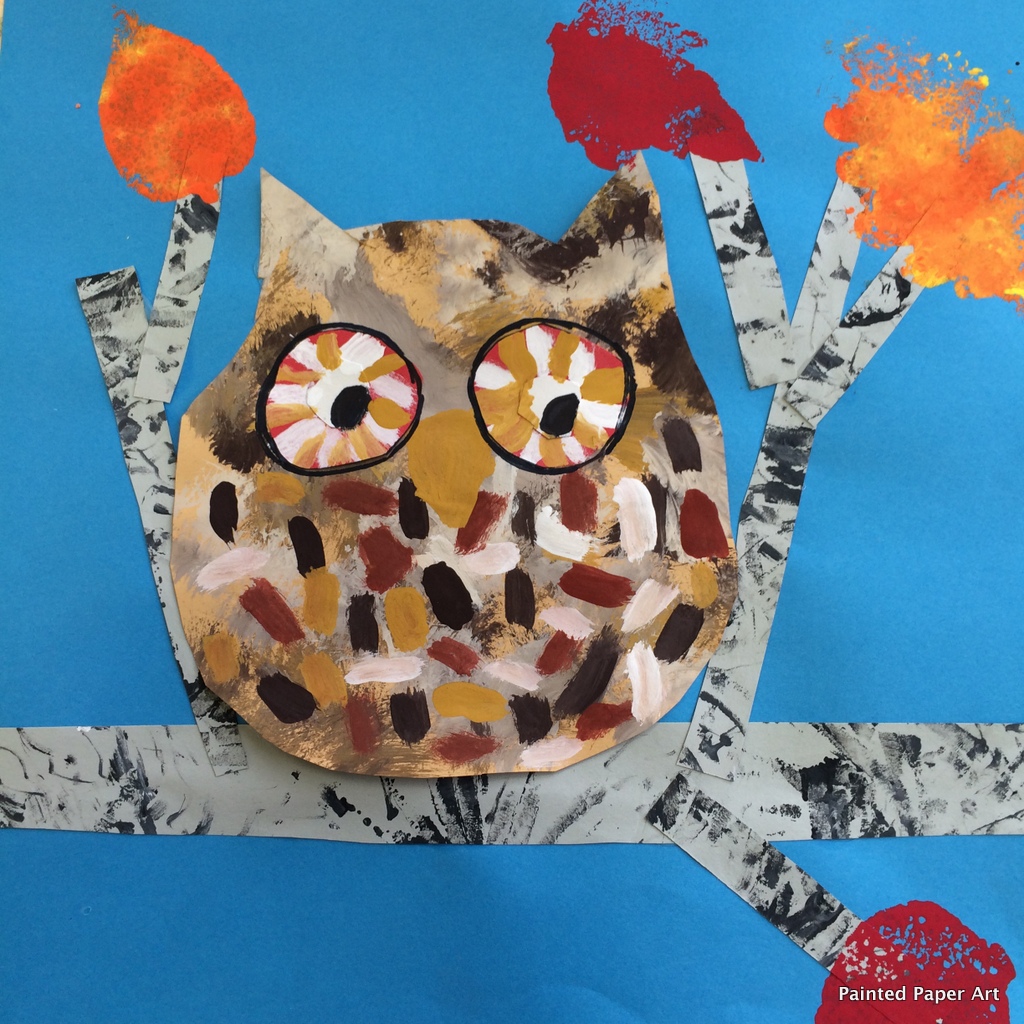
First, I read this adorable book Twinkle, Twinkle, Little Star by Jane Cabrera. I explained to the students that even though they may have heard this story when they were wee little, we are interested in the textures of the animals in the book. That piqued their interest and they really listened and looked at all the details of the creatures.
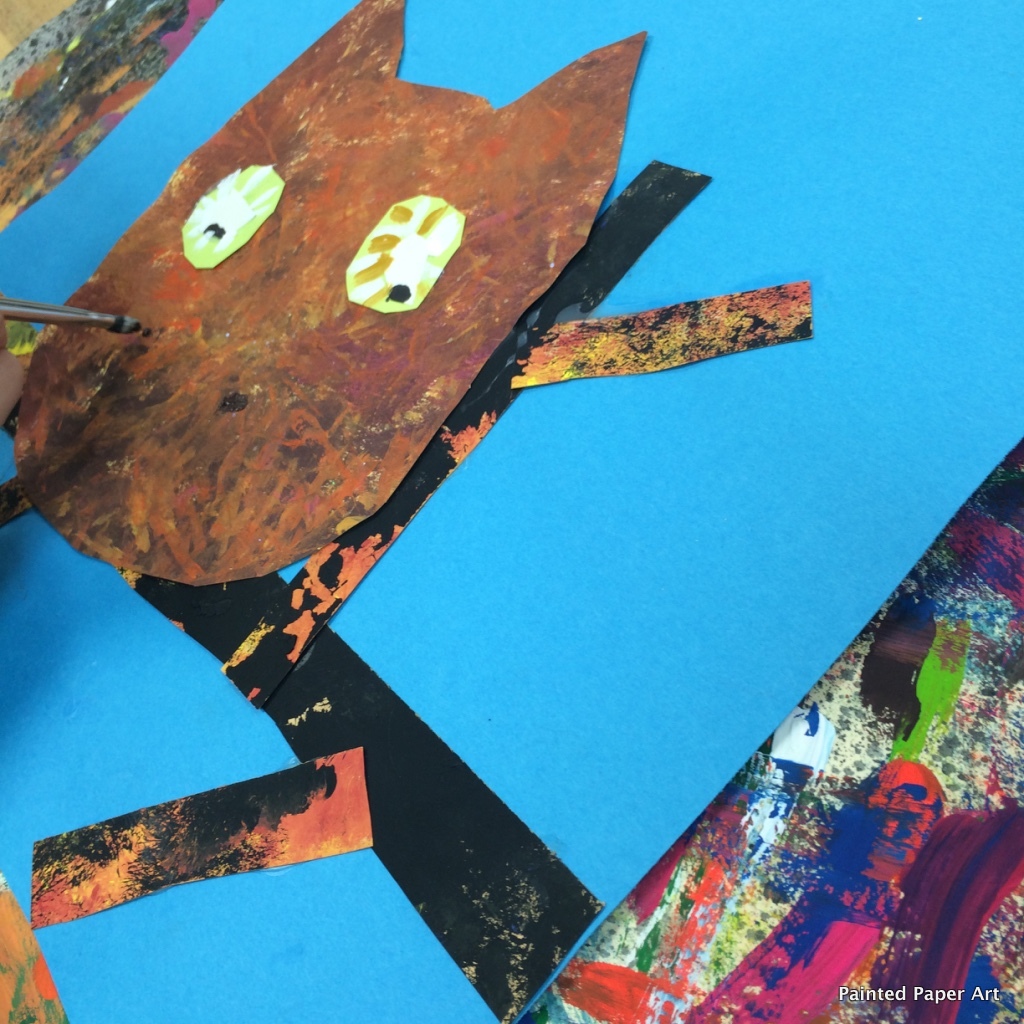
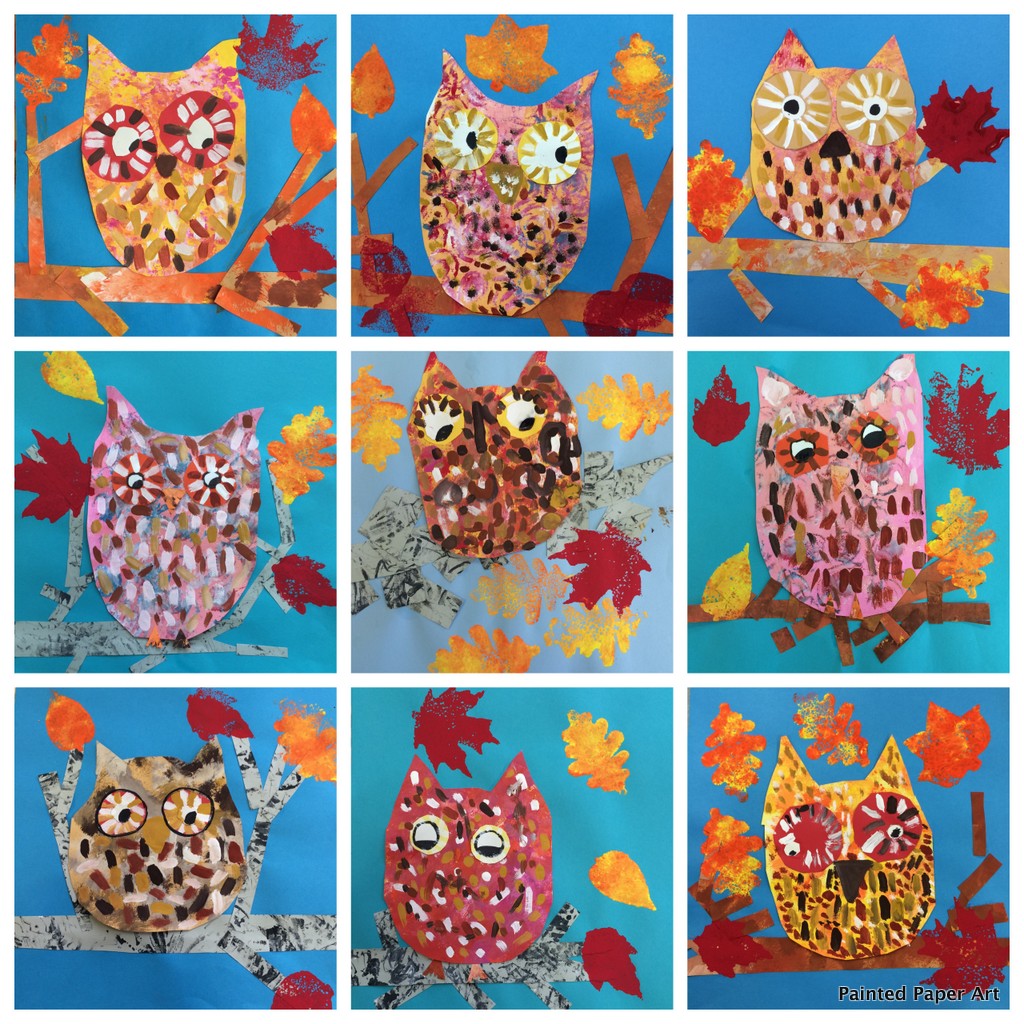
Next, we created our owls from previously painted paper. I had various templates of owls to get them started. Many of my students felt confident starting with a template and then jumping into the painting. It’s funny. I watched them start out with a template, just like a kid riding a bicycle with training wheels, then I took off the wheels. No more templates and they are off creating. Once they start pedaling there is no turning back. It works for me and builds their confidence, especially at the beginning of the year. Remember, what works for me, you may not want to do and vice versa. That’s ok! That is the beauty of different teaching styles.
Ok, back to the project. After the owl body was created, students added big symmetrical circle eyes from various color choices, and smaller symmetrical circles for the inner part of the eye. Lastly, we added black Sharpie to create the pupils. Again we used circle templates to help guide us with creating circles. After the circles were created and cut out they glued down all the shapes and let dry.
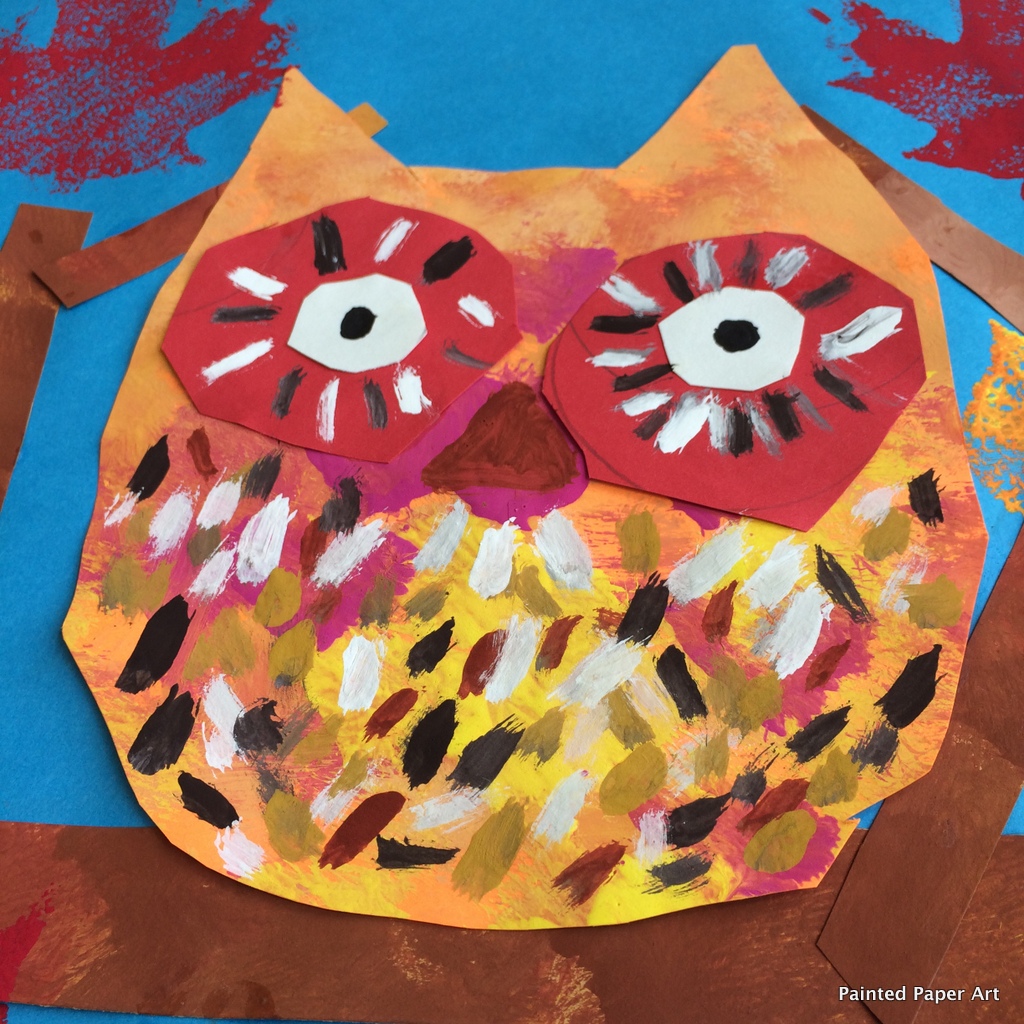
Next, have students use a 12″ x 12″ piece of construction paper as a background. Create a branch from a strip of painted paper. We discussed cutting the strip in half the long way, creating 2 long thinner strips. They glued one down to form the main branch and then cut the other strip into smaller pieces to form small branching twigs.
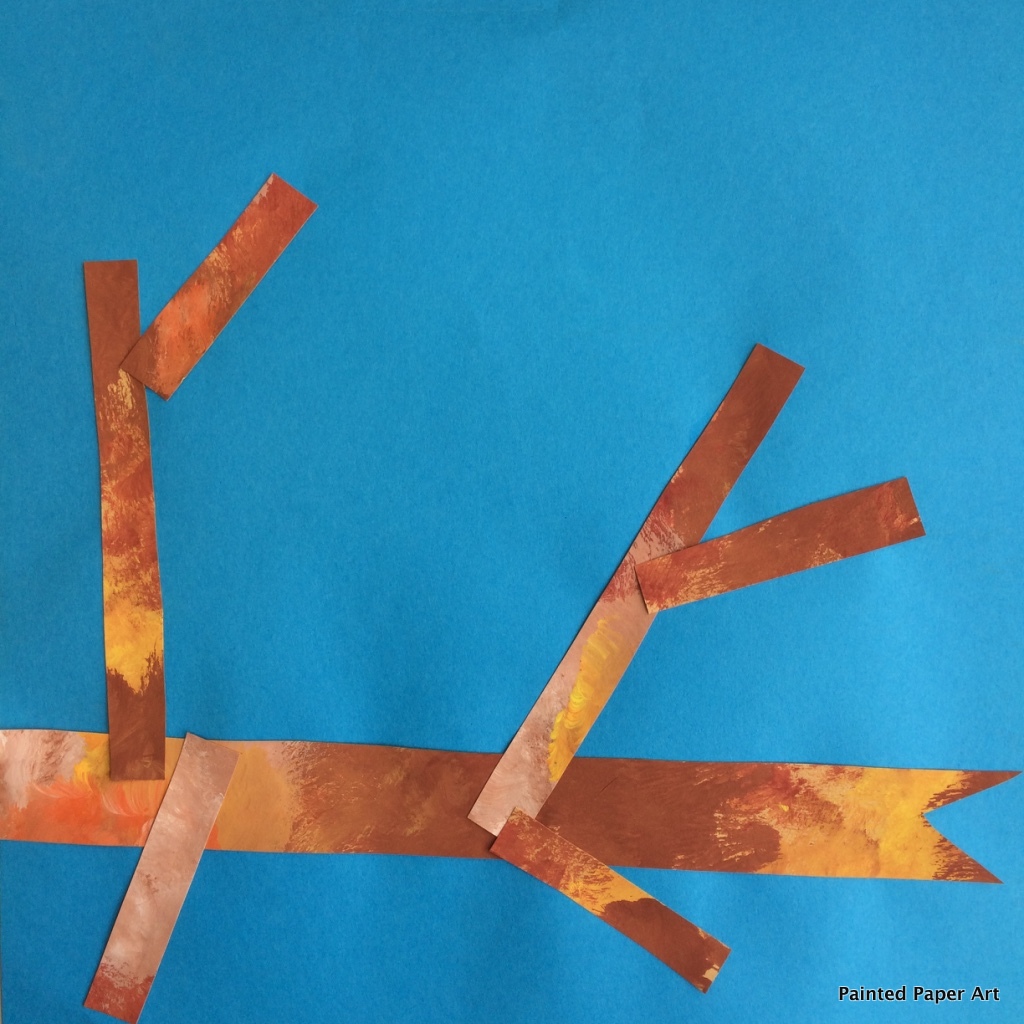
Glue down the owl after all the branches and twigs are glued down.
Next, have students add feather texture to the owl’s body. Use small brushes and tempera paint and create short, vertical lines.
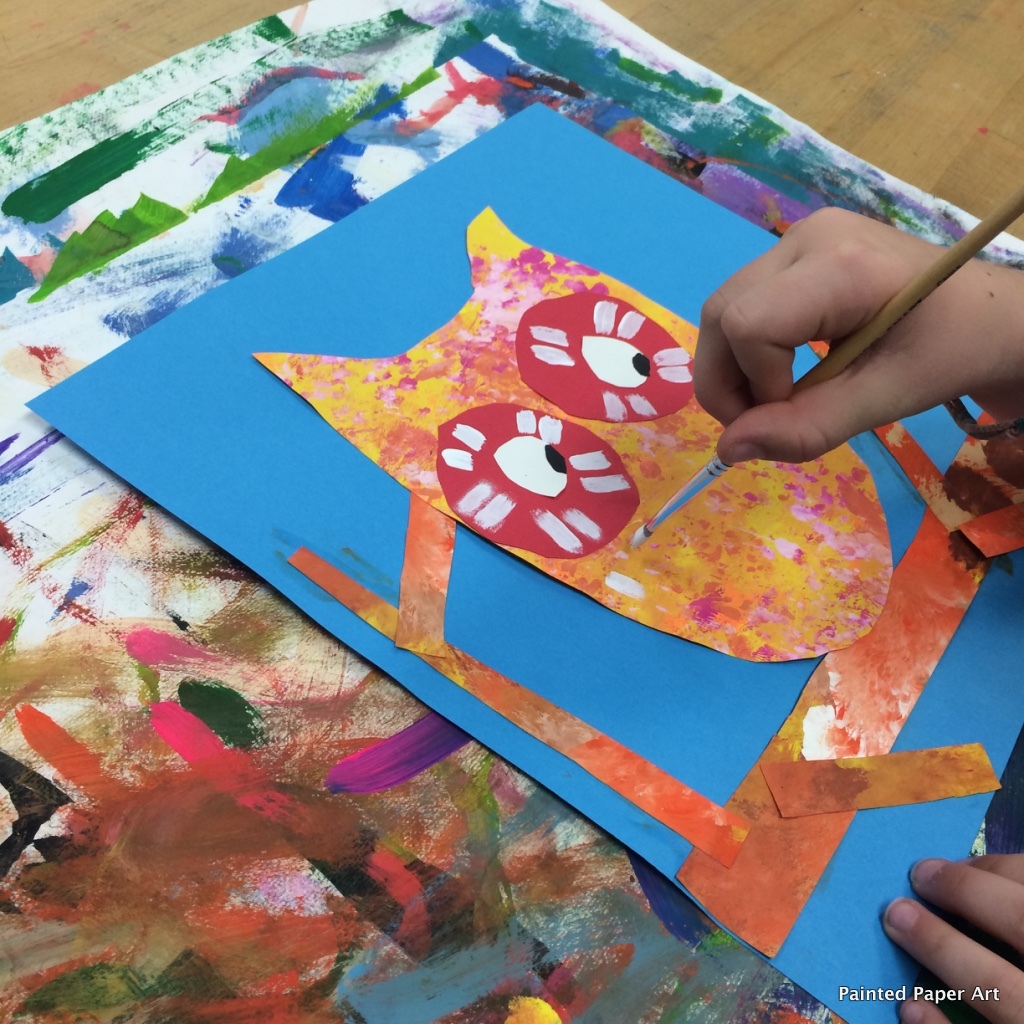
We used neutral color paints and applied the paint around the eyes and on the body. Some students added painted paper beaks and claws while other painted on their beaks.

The last step is to have students stamp various leaves on their papers. I purchased these fun leaf sponges thru Roylco. You can purchase here I had so many kids hug and tell me “This was the best project EVER”. Lots of different materials went thru their hands. I loved seeing little artists making a connection to their owls, naming them and saying sweet things about the creatures they created.
I’ll take those compliments, and it all started with building their creative confidence with a nursery rhyme.
Keep on creating!
Laura 🙂
8 Comments
Laura Lea
December 4, 2016 at 12:21 pm
Thank you for this lesson, it is wonderful! I can’t wait to try it with my students!
Laura
December 4, 2016 at 6:45 pm
Aww Thank you!
Kris
September 3, 2017 at 12:13 pm
Did you use actual leaves for the leaf stamping or did you have leaf shaped stamps?! Would love to do this with my little ones!
Laura
September 3, 2017 at 1:54 pm
Hi Kris I purchased these fun sponges thru Roylco. Here is the link http://www.roylco.com/product/R55004 They are very easy to use and clean. 🙂
valentina acava
November 28, 2018 at 11:09 am
Hello Laura, congratulations! Your work is amazing… it’s truly a great resources for educators and art therapist like me. I will start using your inspirational lessons with my students in Kenya. Thank you for this wonderful website. Valentina 🙂
Laura
November 29, 2018 at 6:59 am
Thank you!!! xox
Shelley Henrion
September 23, 2019 at 3:49 pm
Love your lessons, thank you.
How do you manage your paint supplies for the kids? What materials do you use, how do you distribute. Any good tricks based on grade level or do you do it the same for all your kids.
Thanks a million!
Laura
October 5, 2019 at 7:38 am
Check out my instagram stories I have a few tips archived there. 🙂