Printmaking I : City Skylines with Reflections
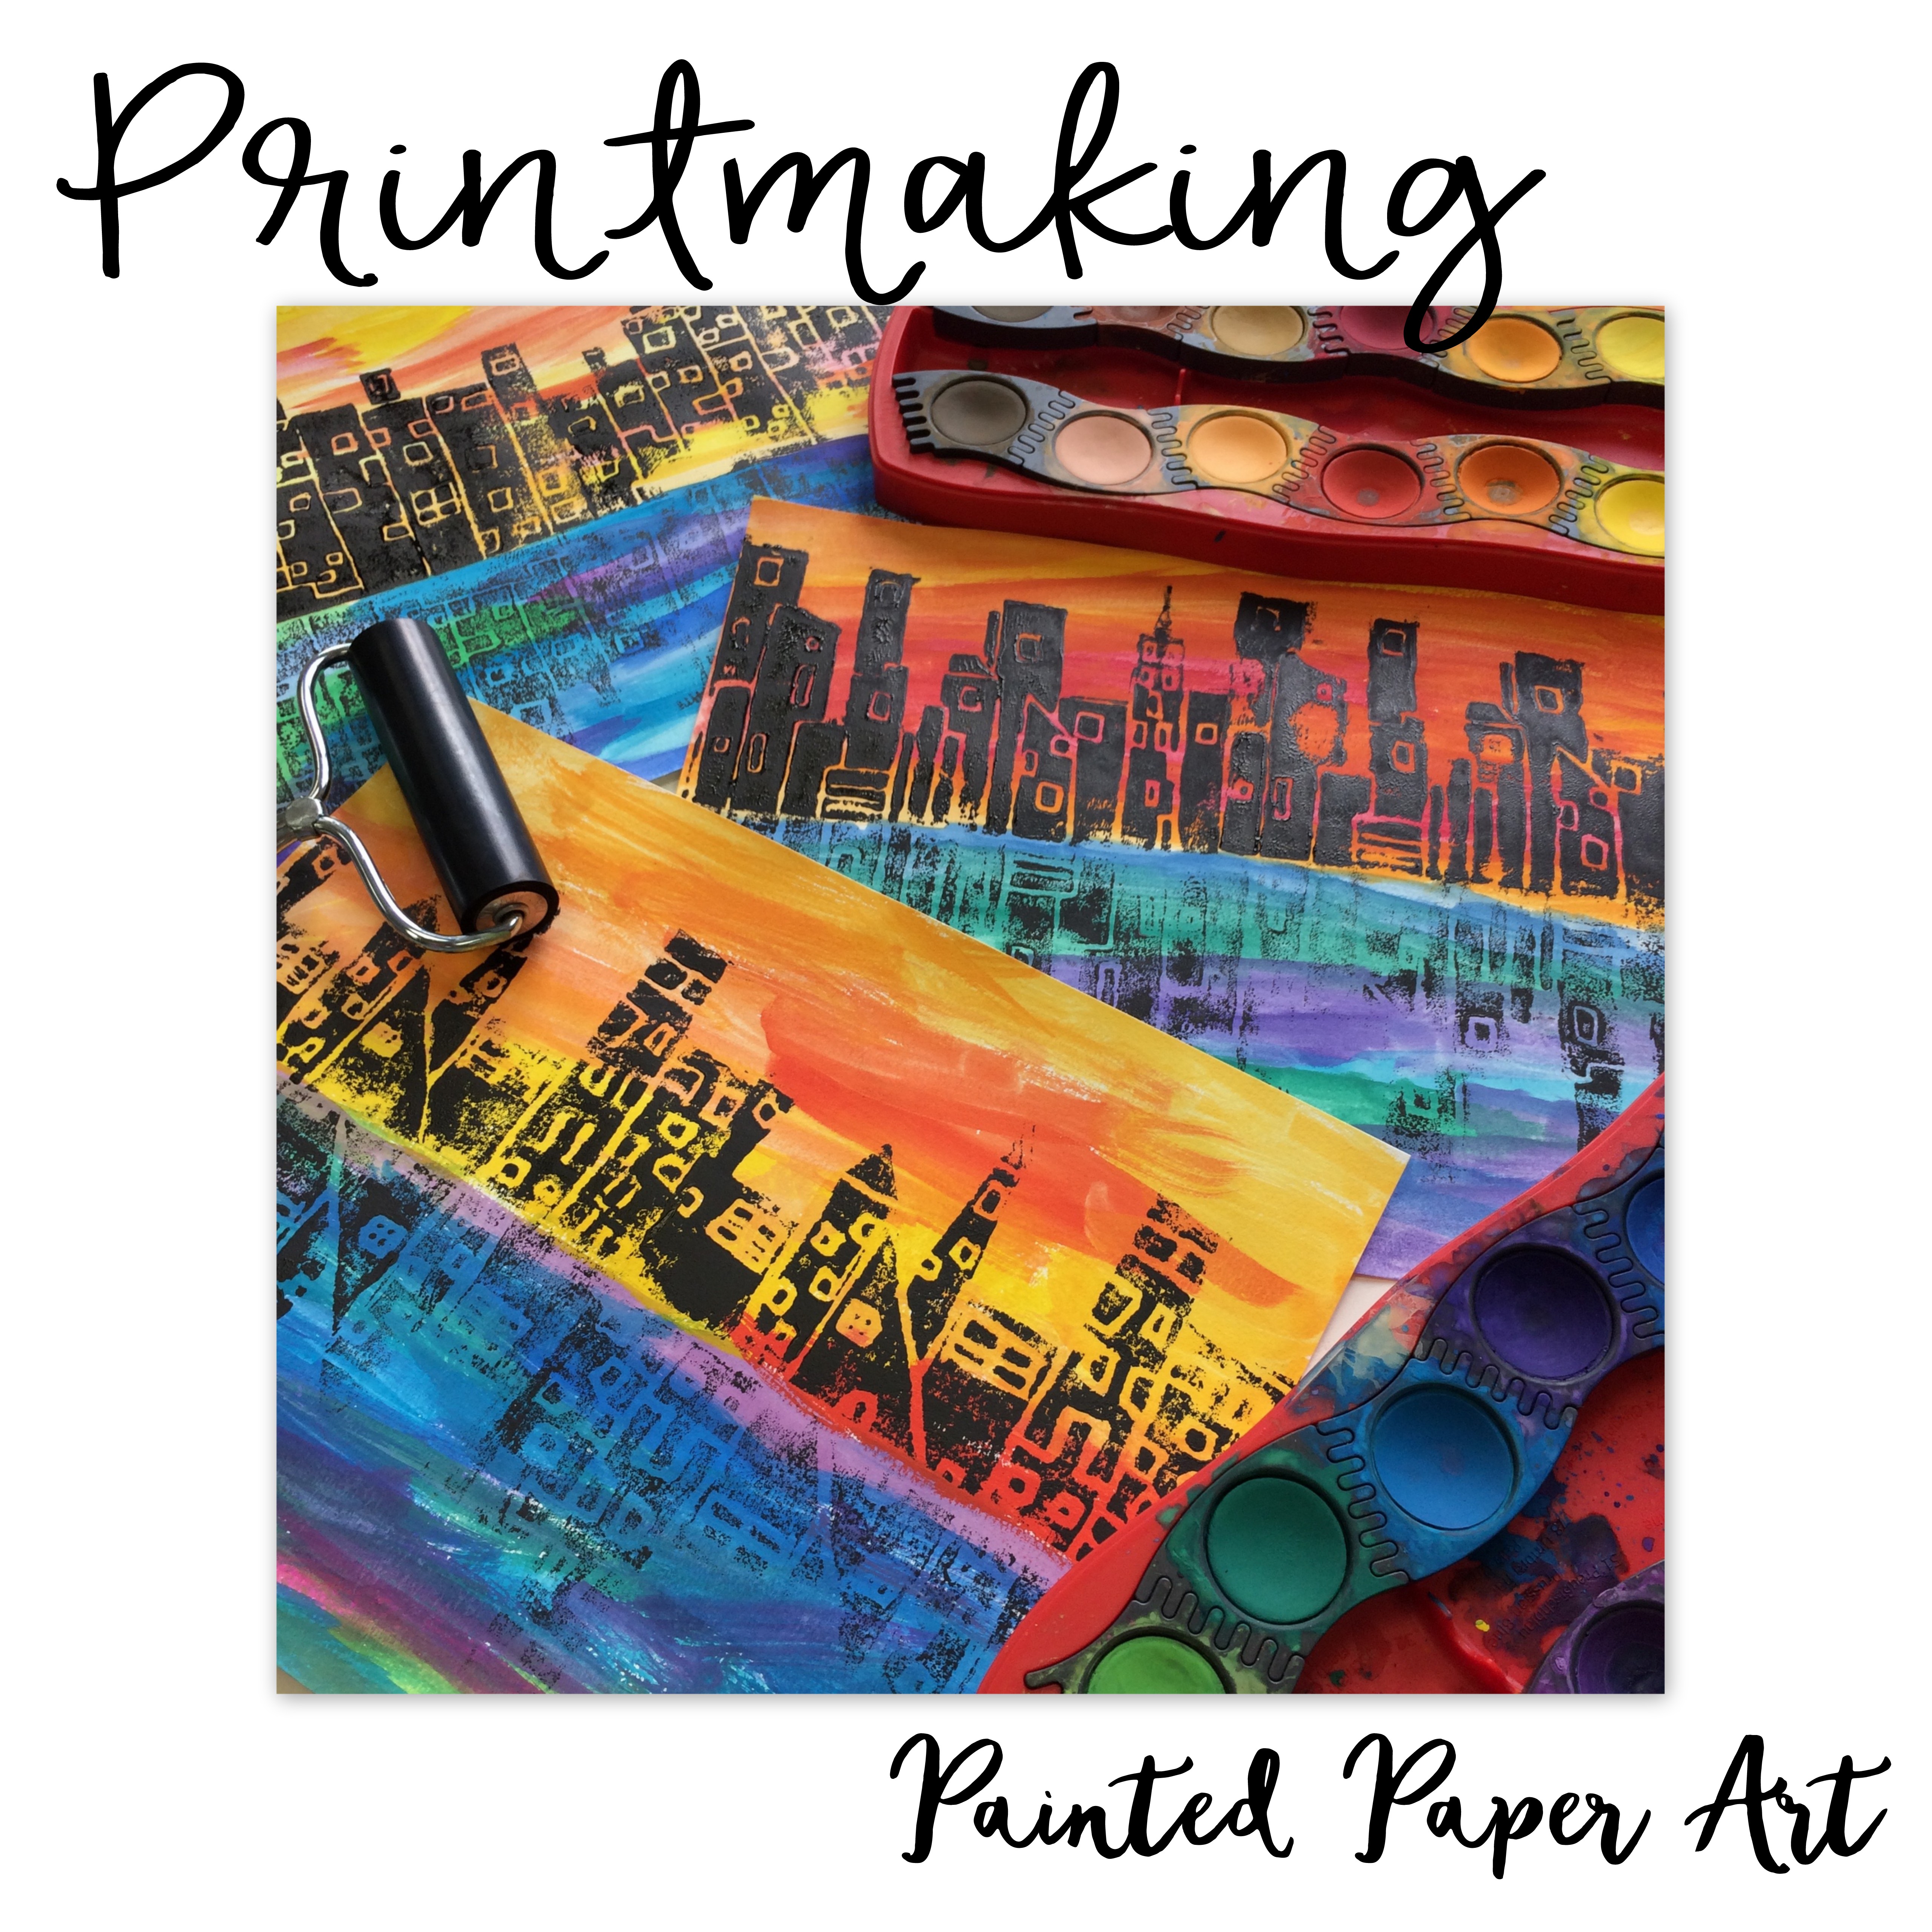
Printmaking is magical for kids and adults as well. The process of creating an image then transferring that image to another piece of paper is so exciting. There are so many different ways to print. This project focuses on using a foam printing plate then transferring the image to paper.
Supplies you will need:
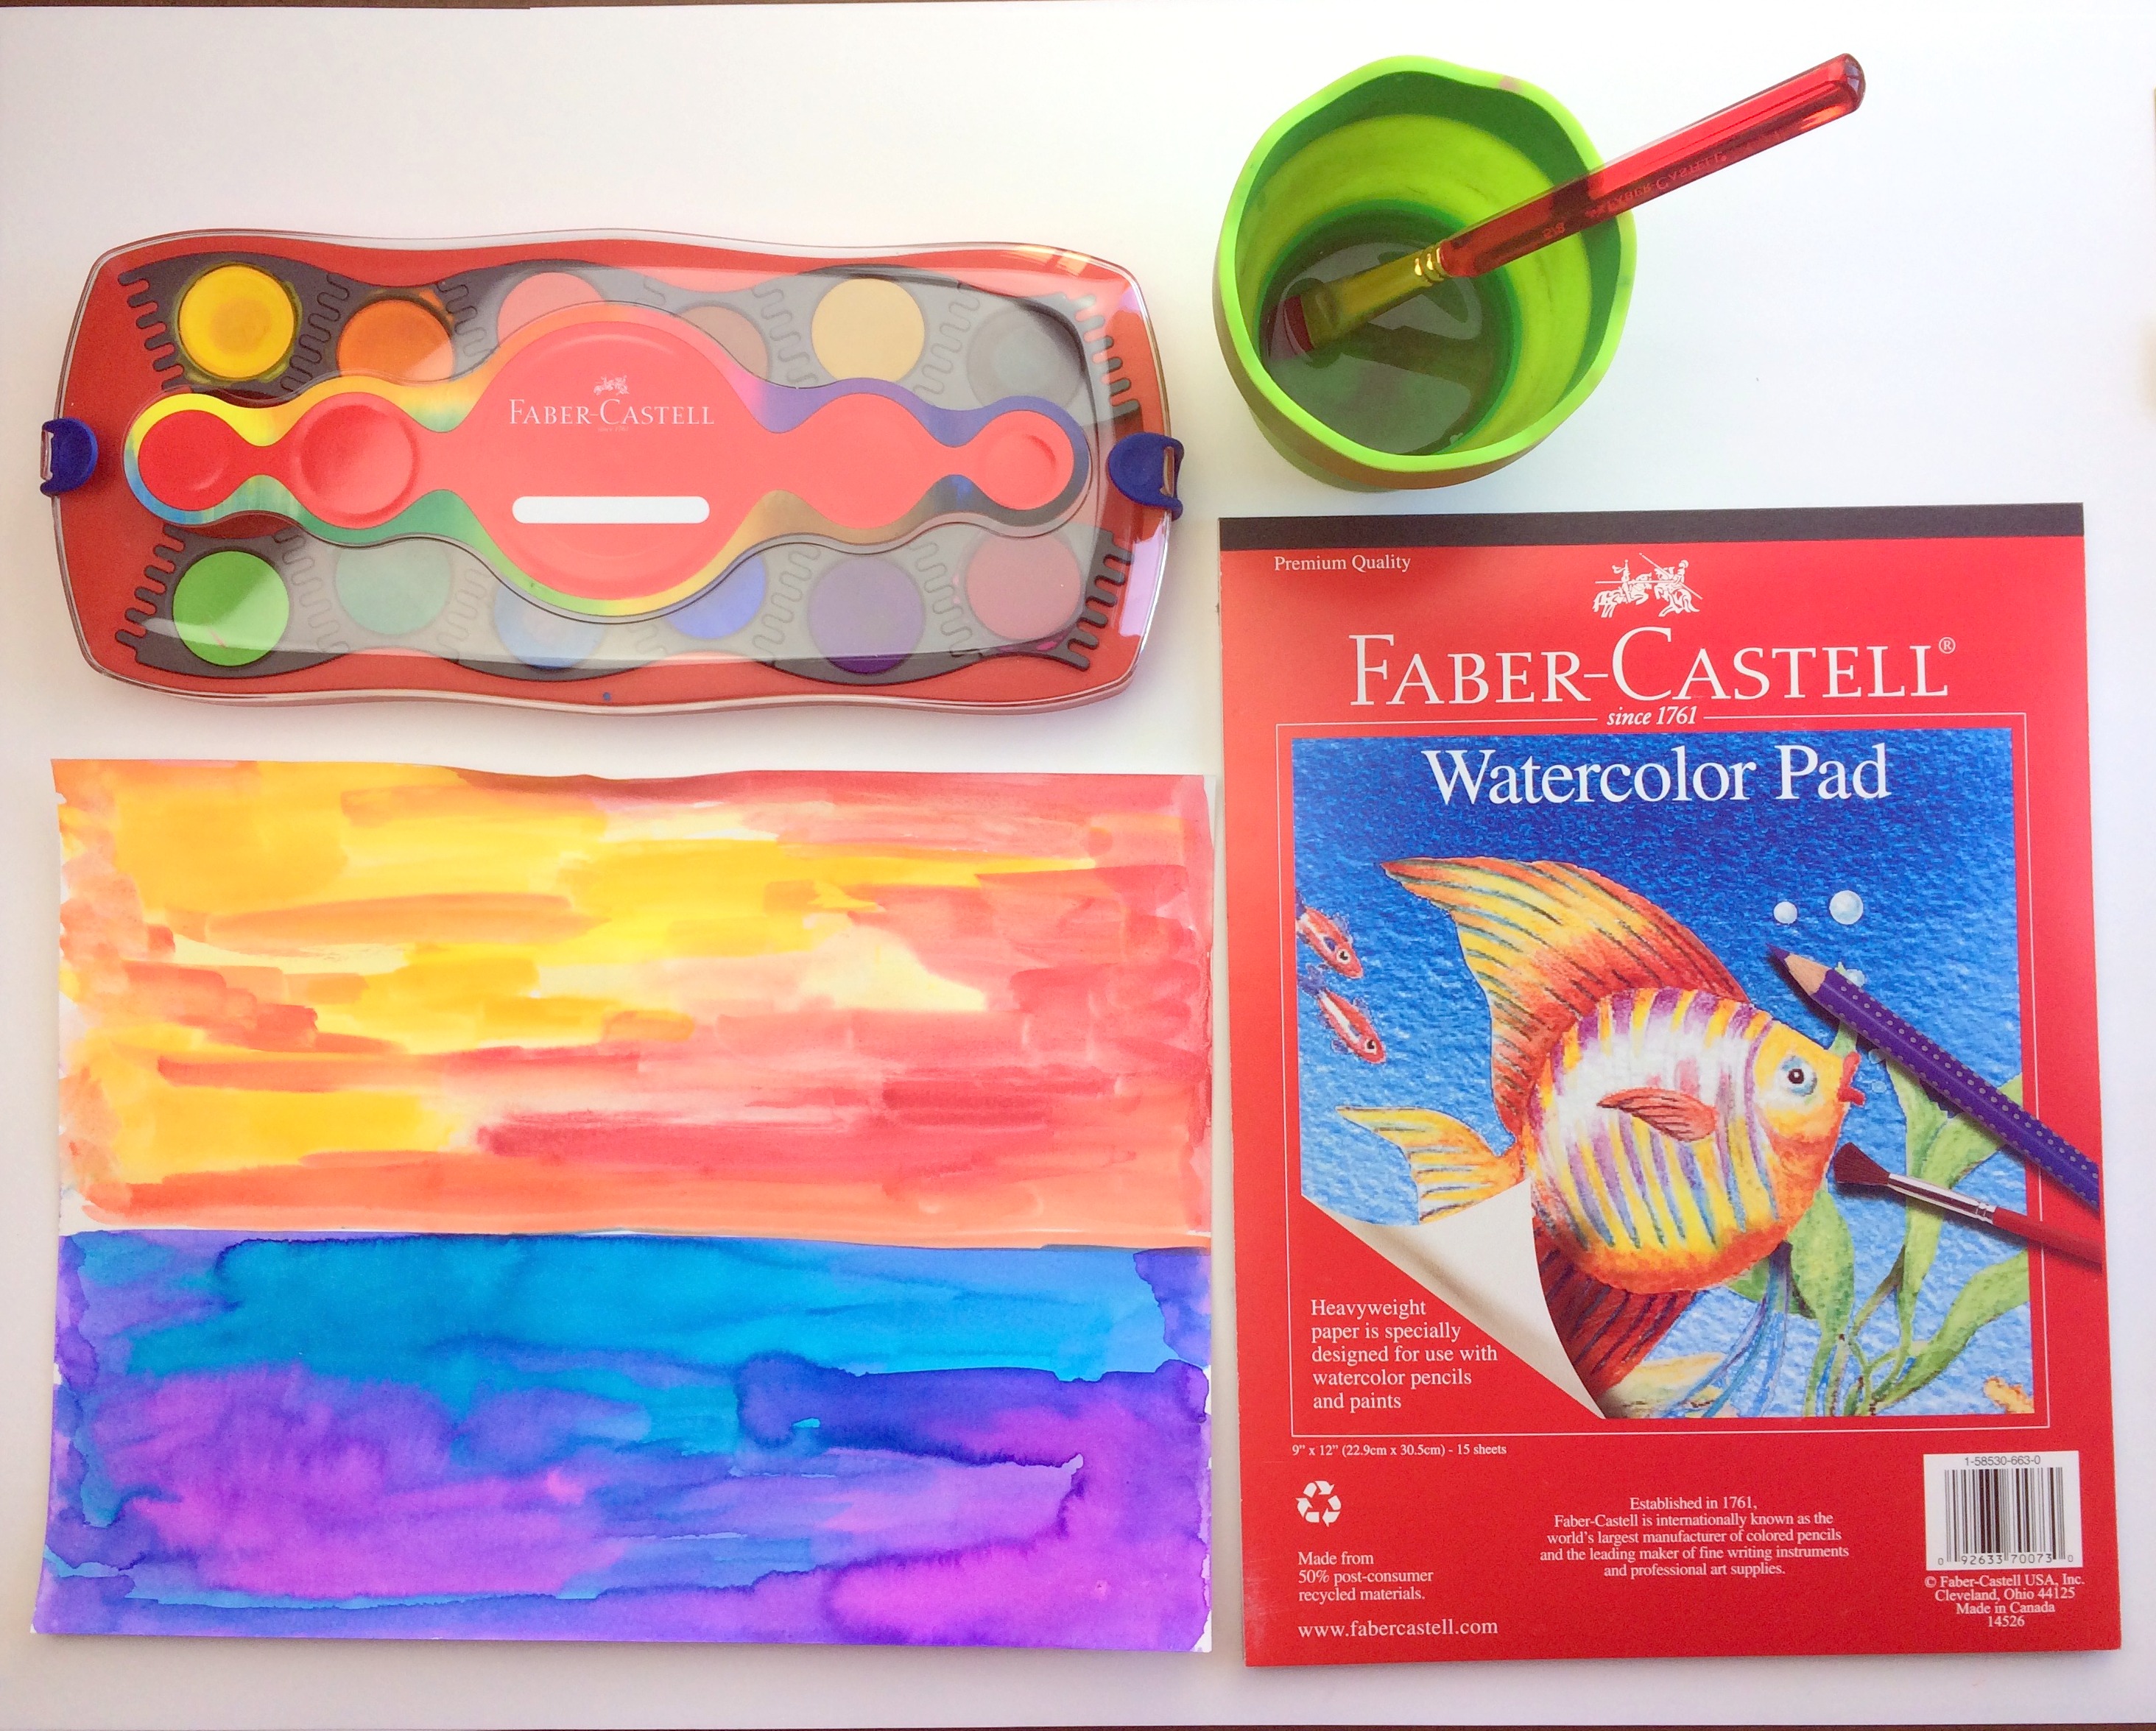
Watercolor paper (Option 1)
Tempera cakes or watercolors
Water container and brush
Brayer
4 x 6 White Sulphite paper
4 x 6 Foam plate
Pencil
Scissors
Printing Ink. I use Blick’s Water Soluble Printing Ink
Tape
80 lb White sulphite paper 12 x 20 (for Option 2)
Creating the Background (Option 1)
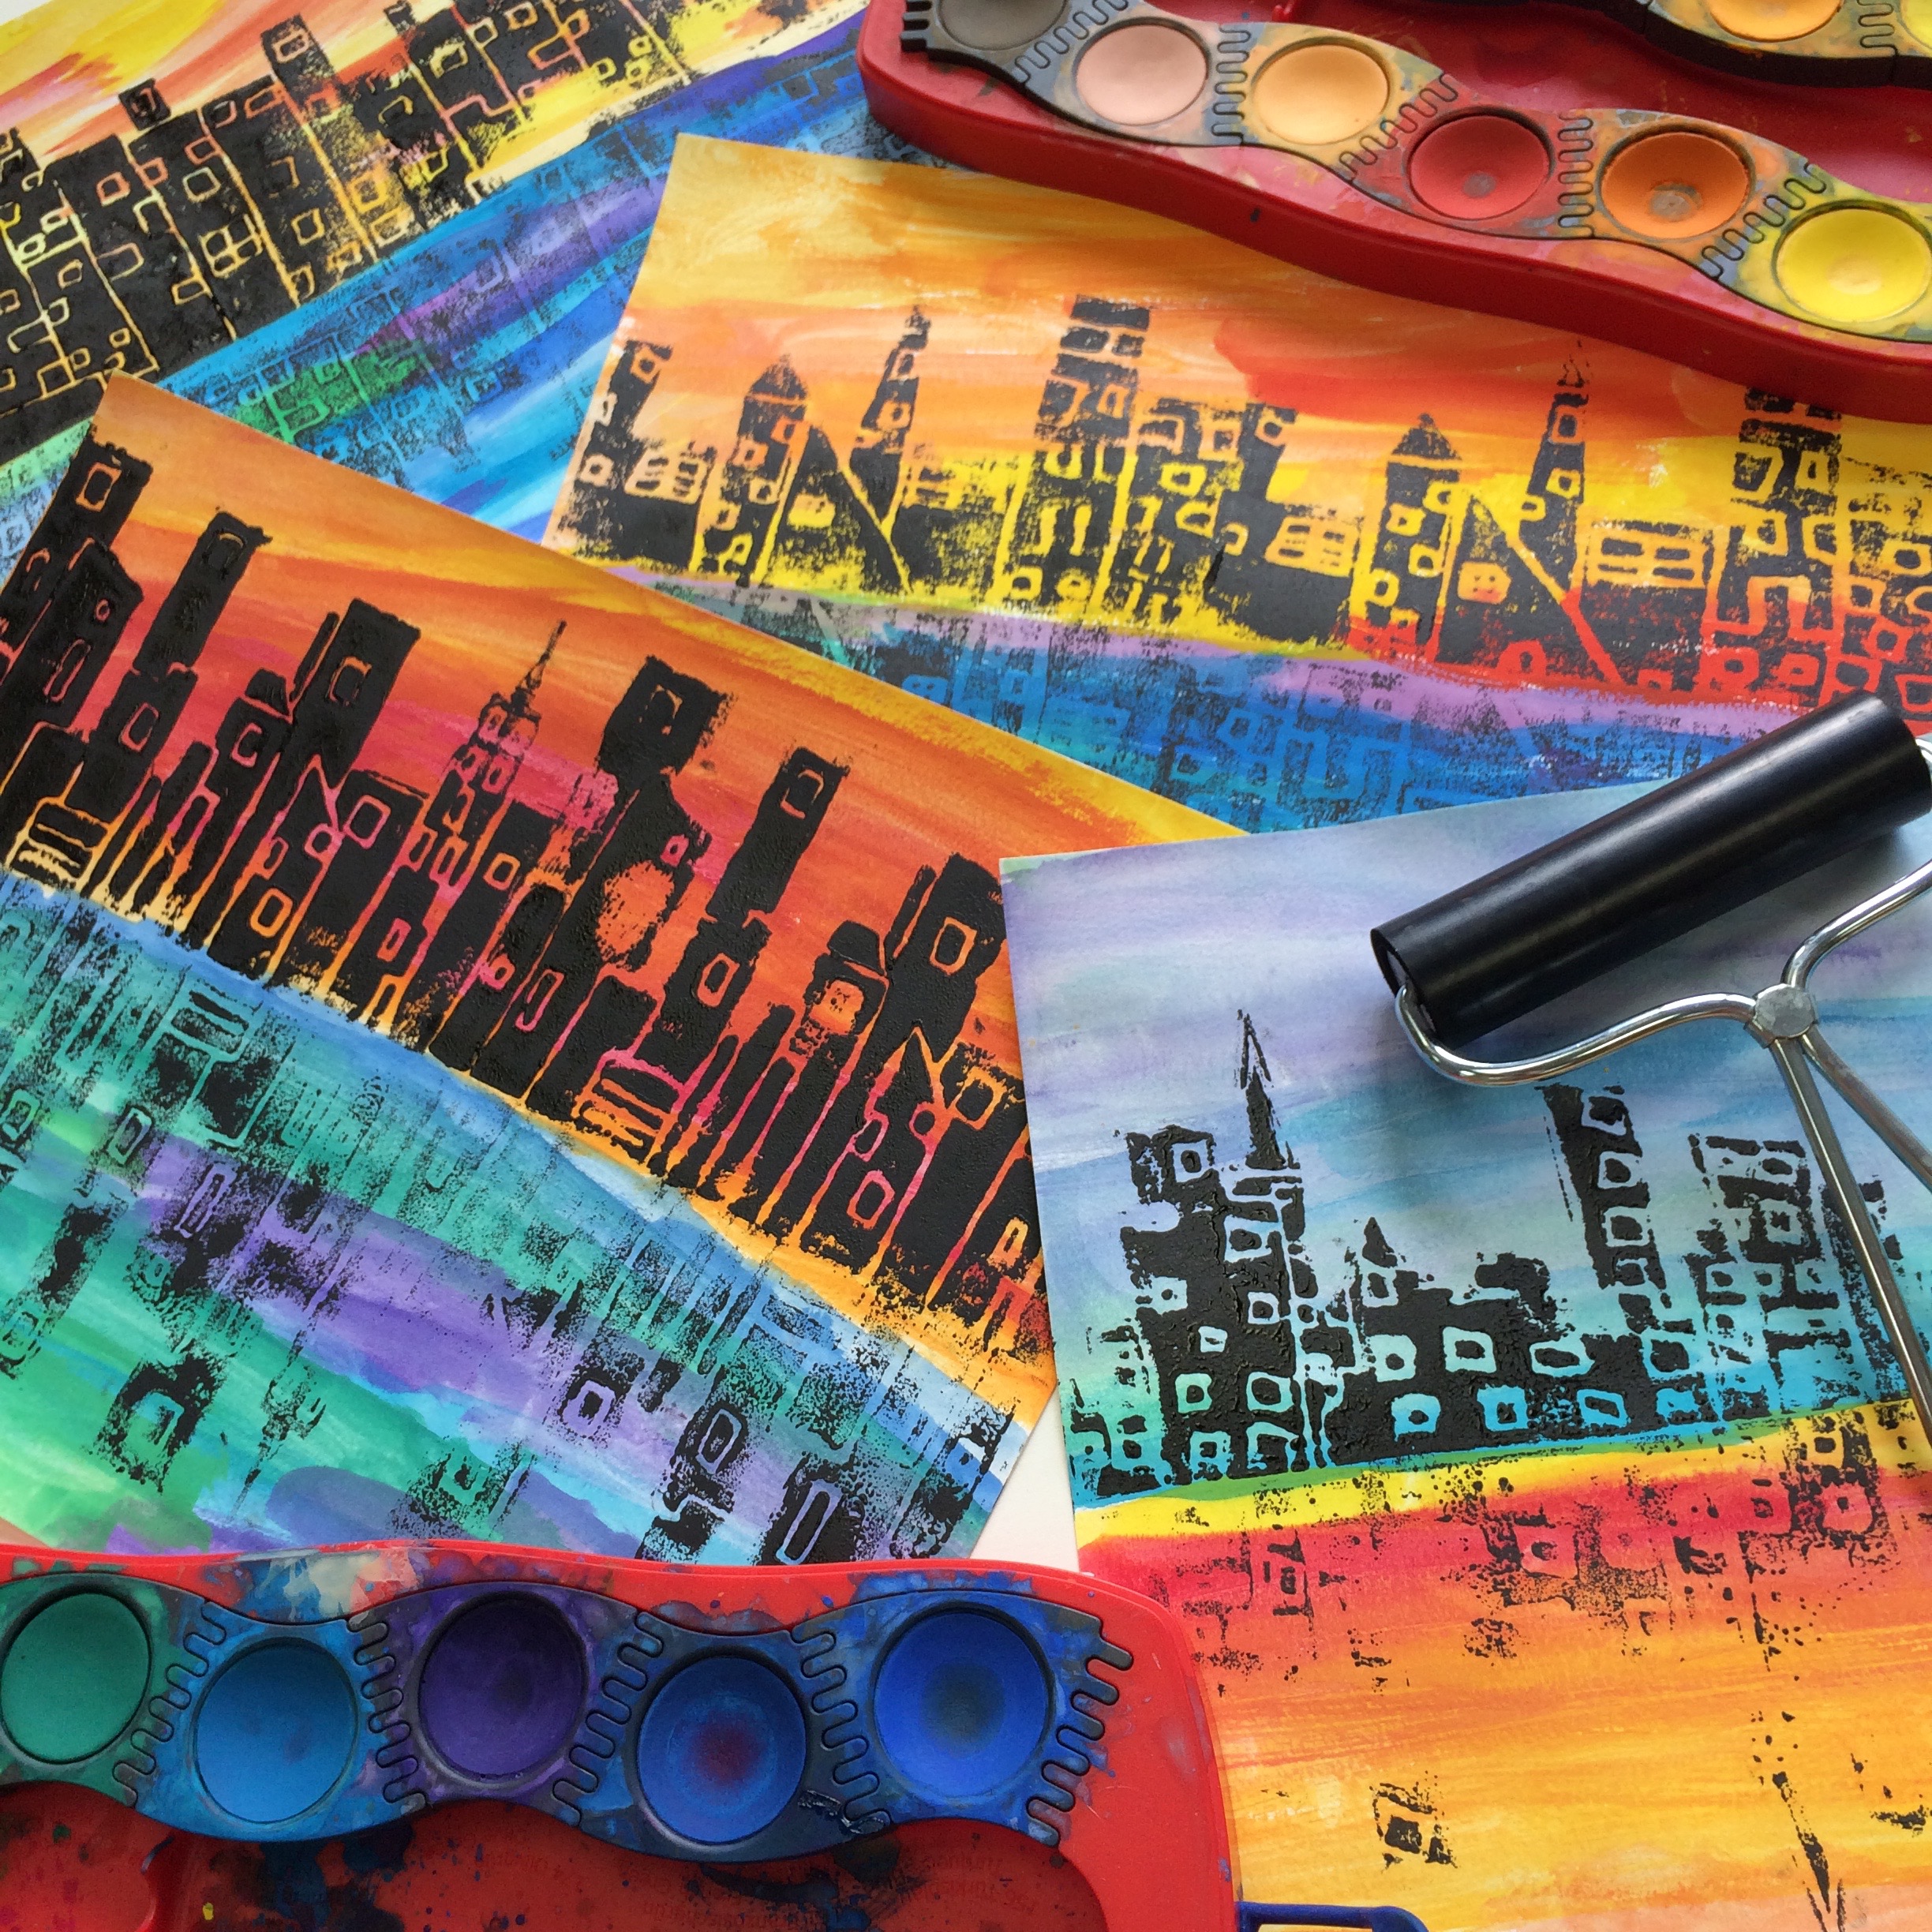
With a piece of watercolor paper- placed horizontal, apply the warm colors to either the top (sky) or bottom (water/ground) of the paper then apply the cool colors to the opposite area. Let Dry.
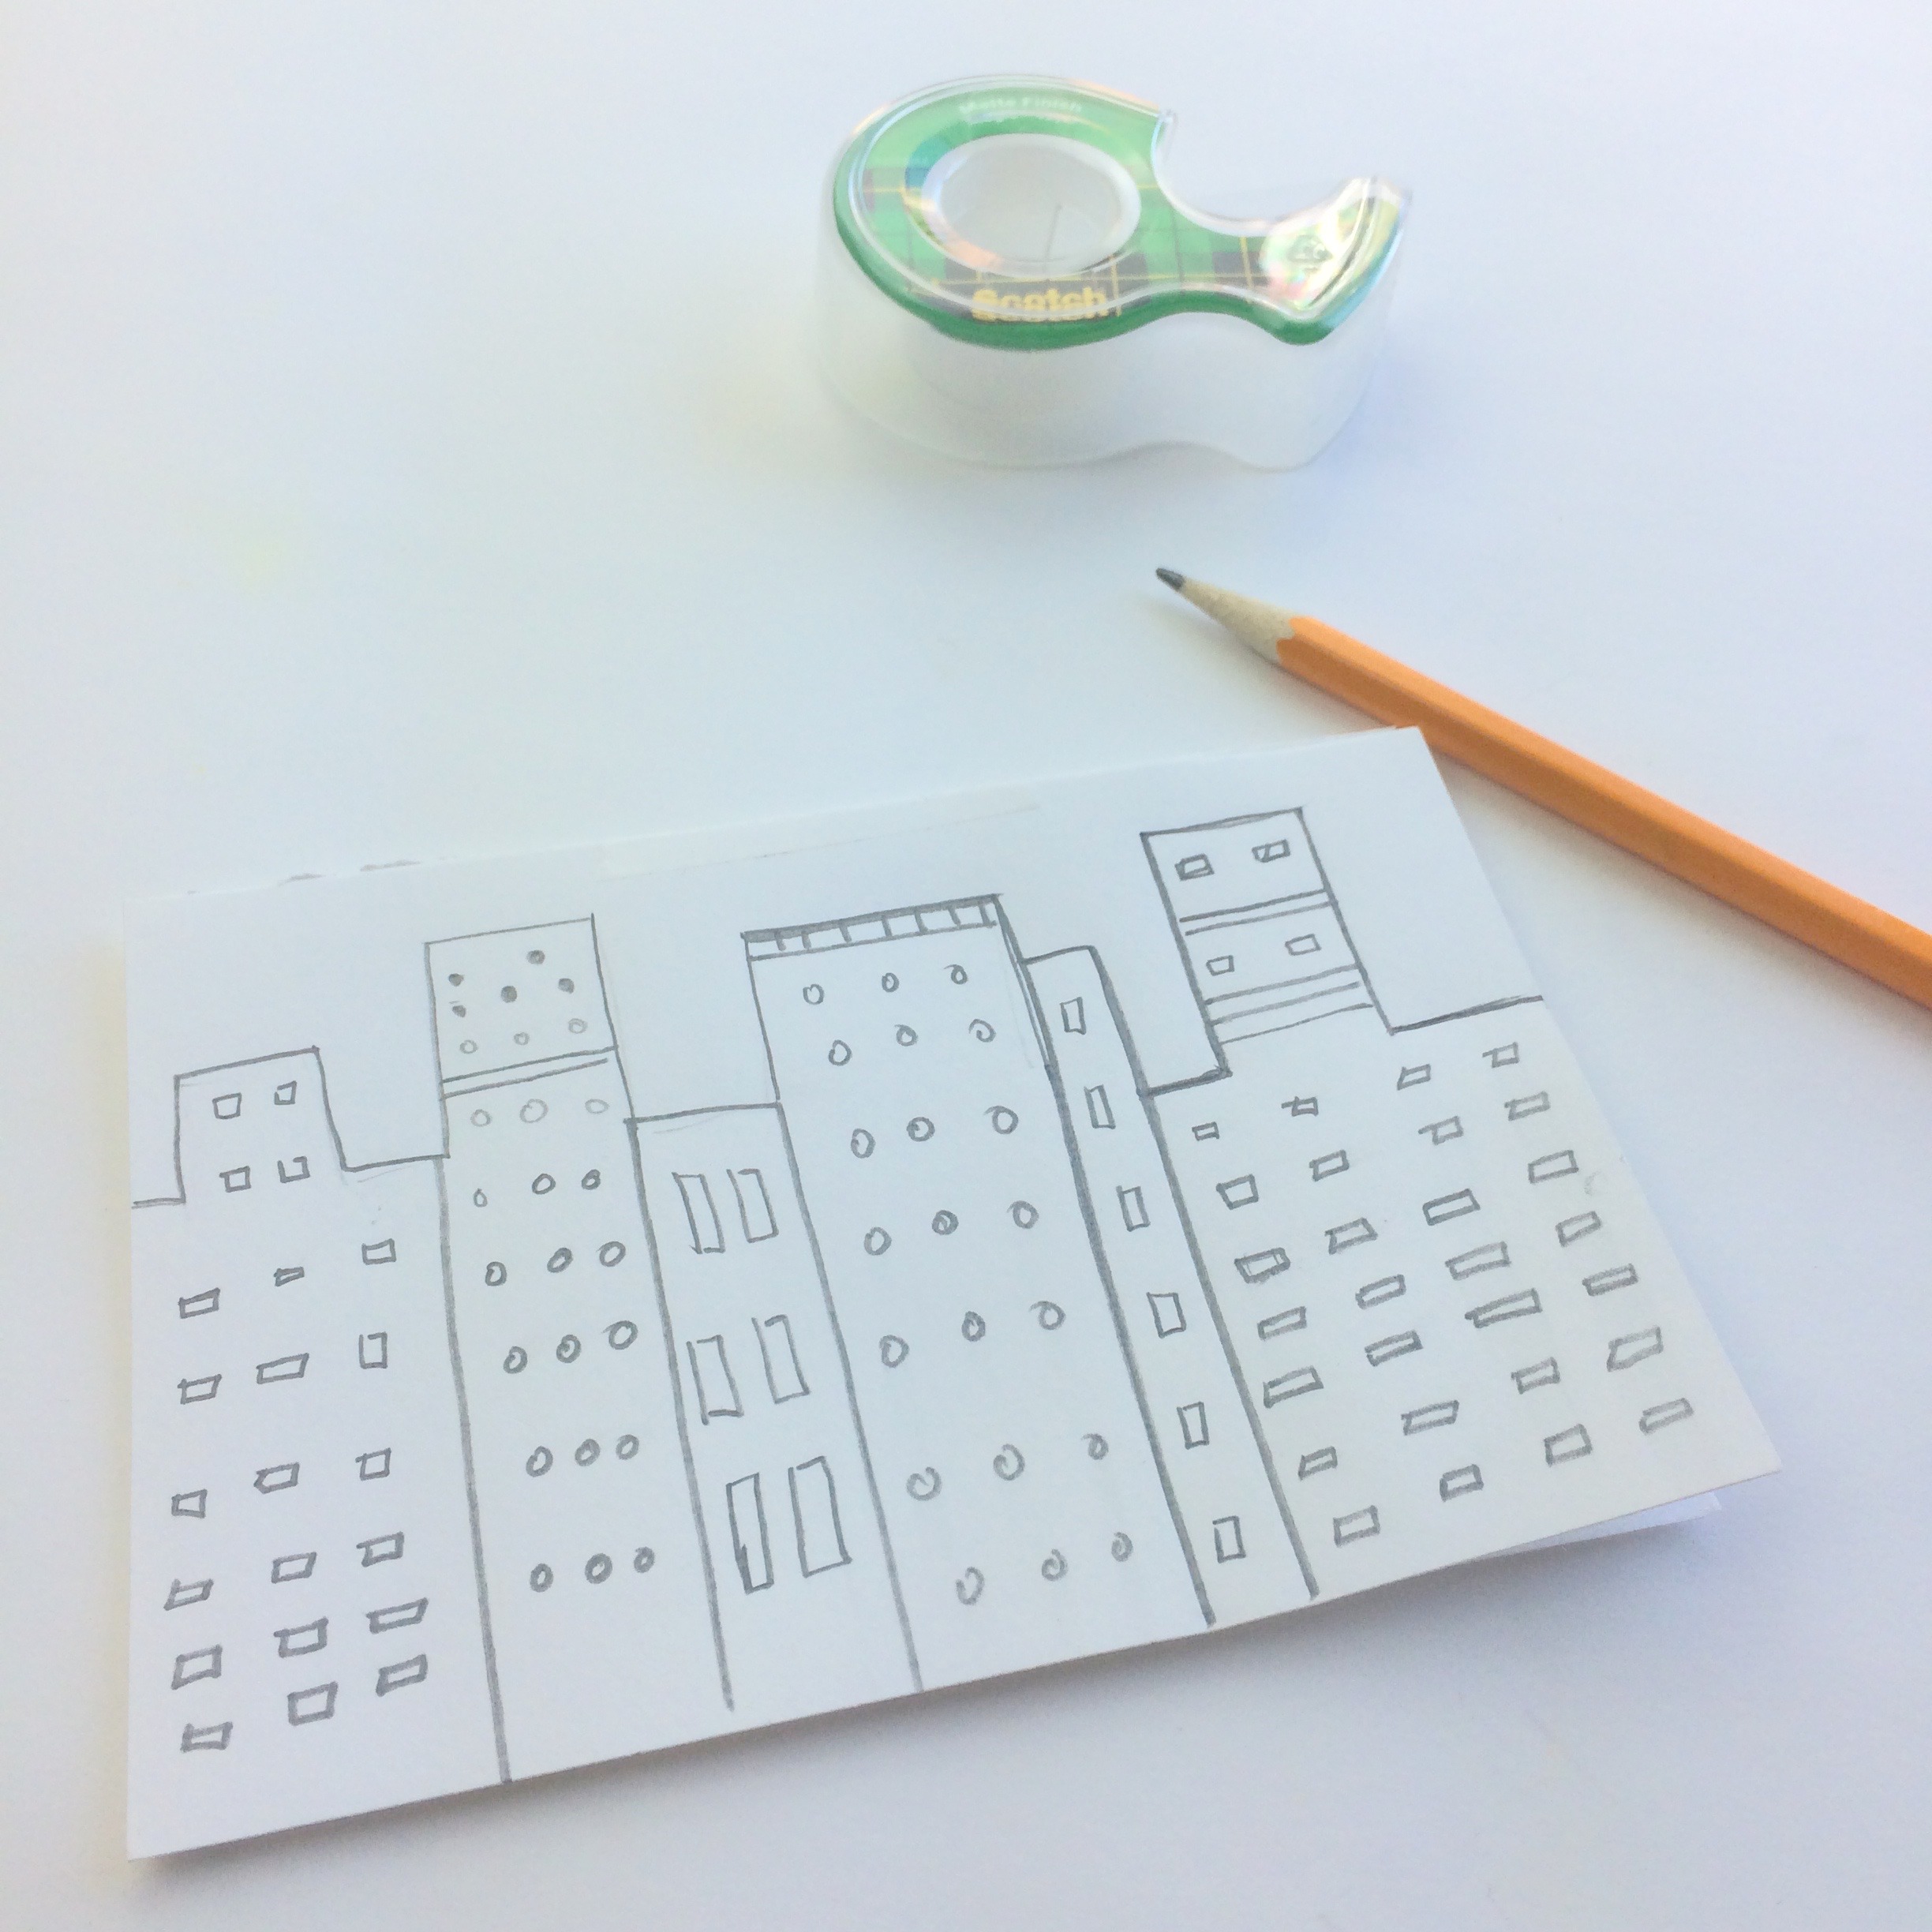
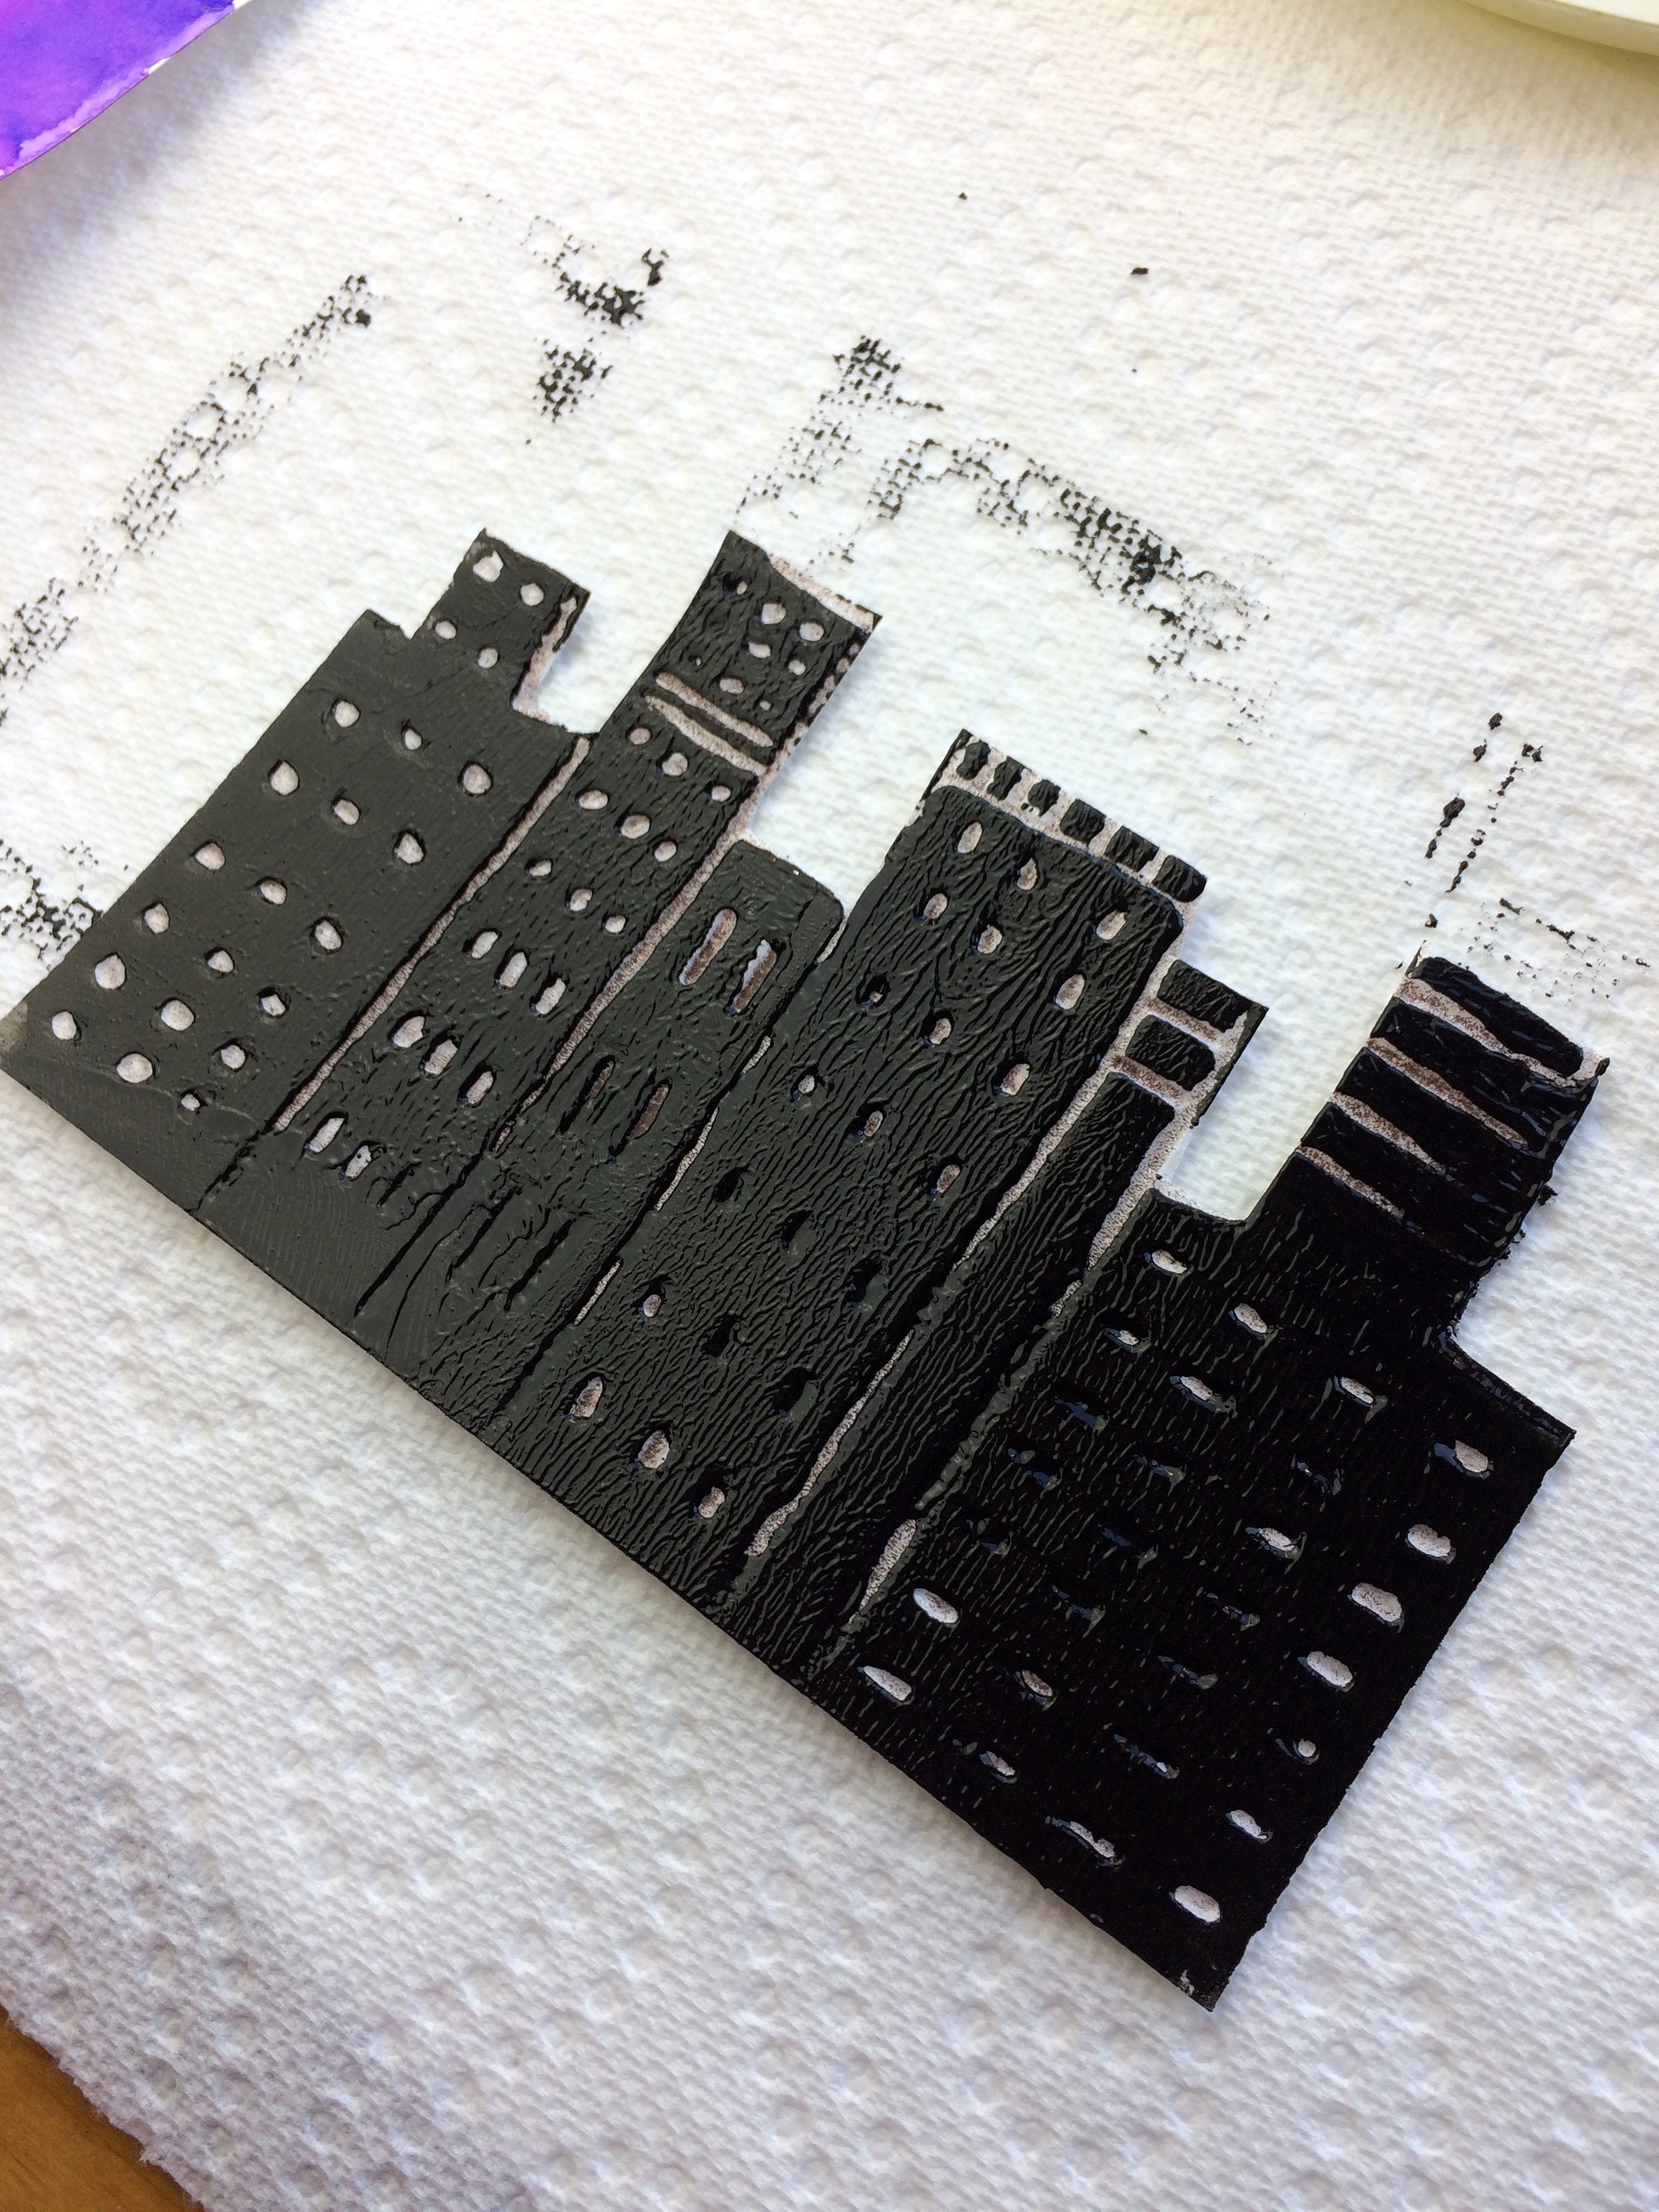
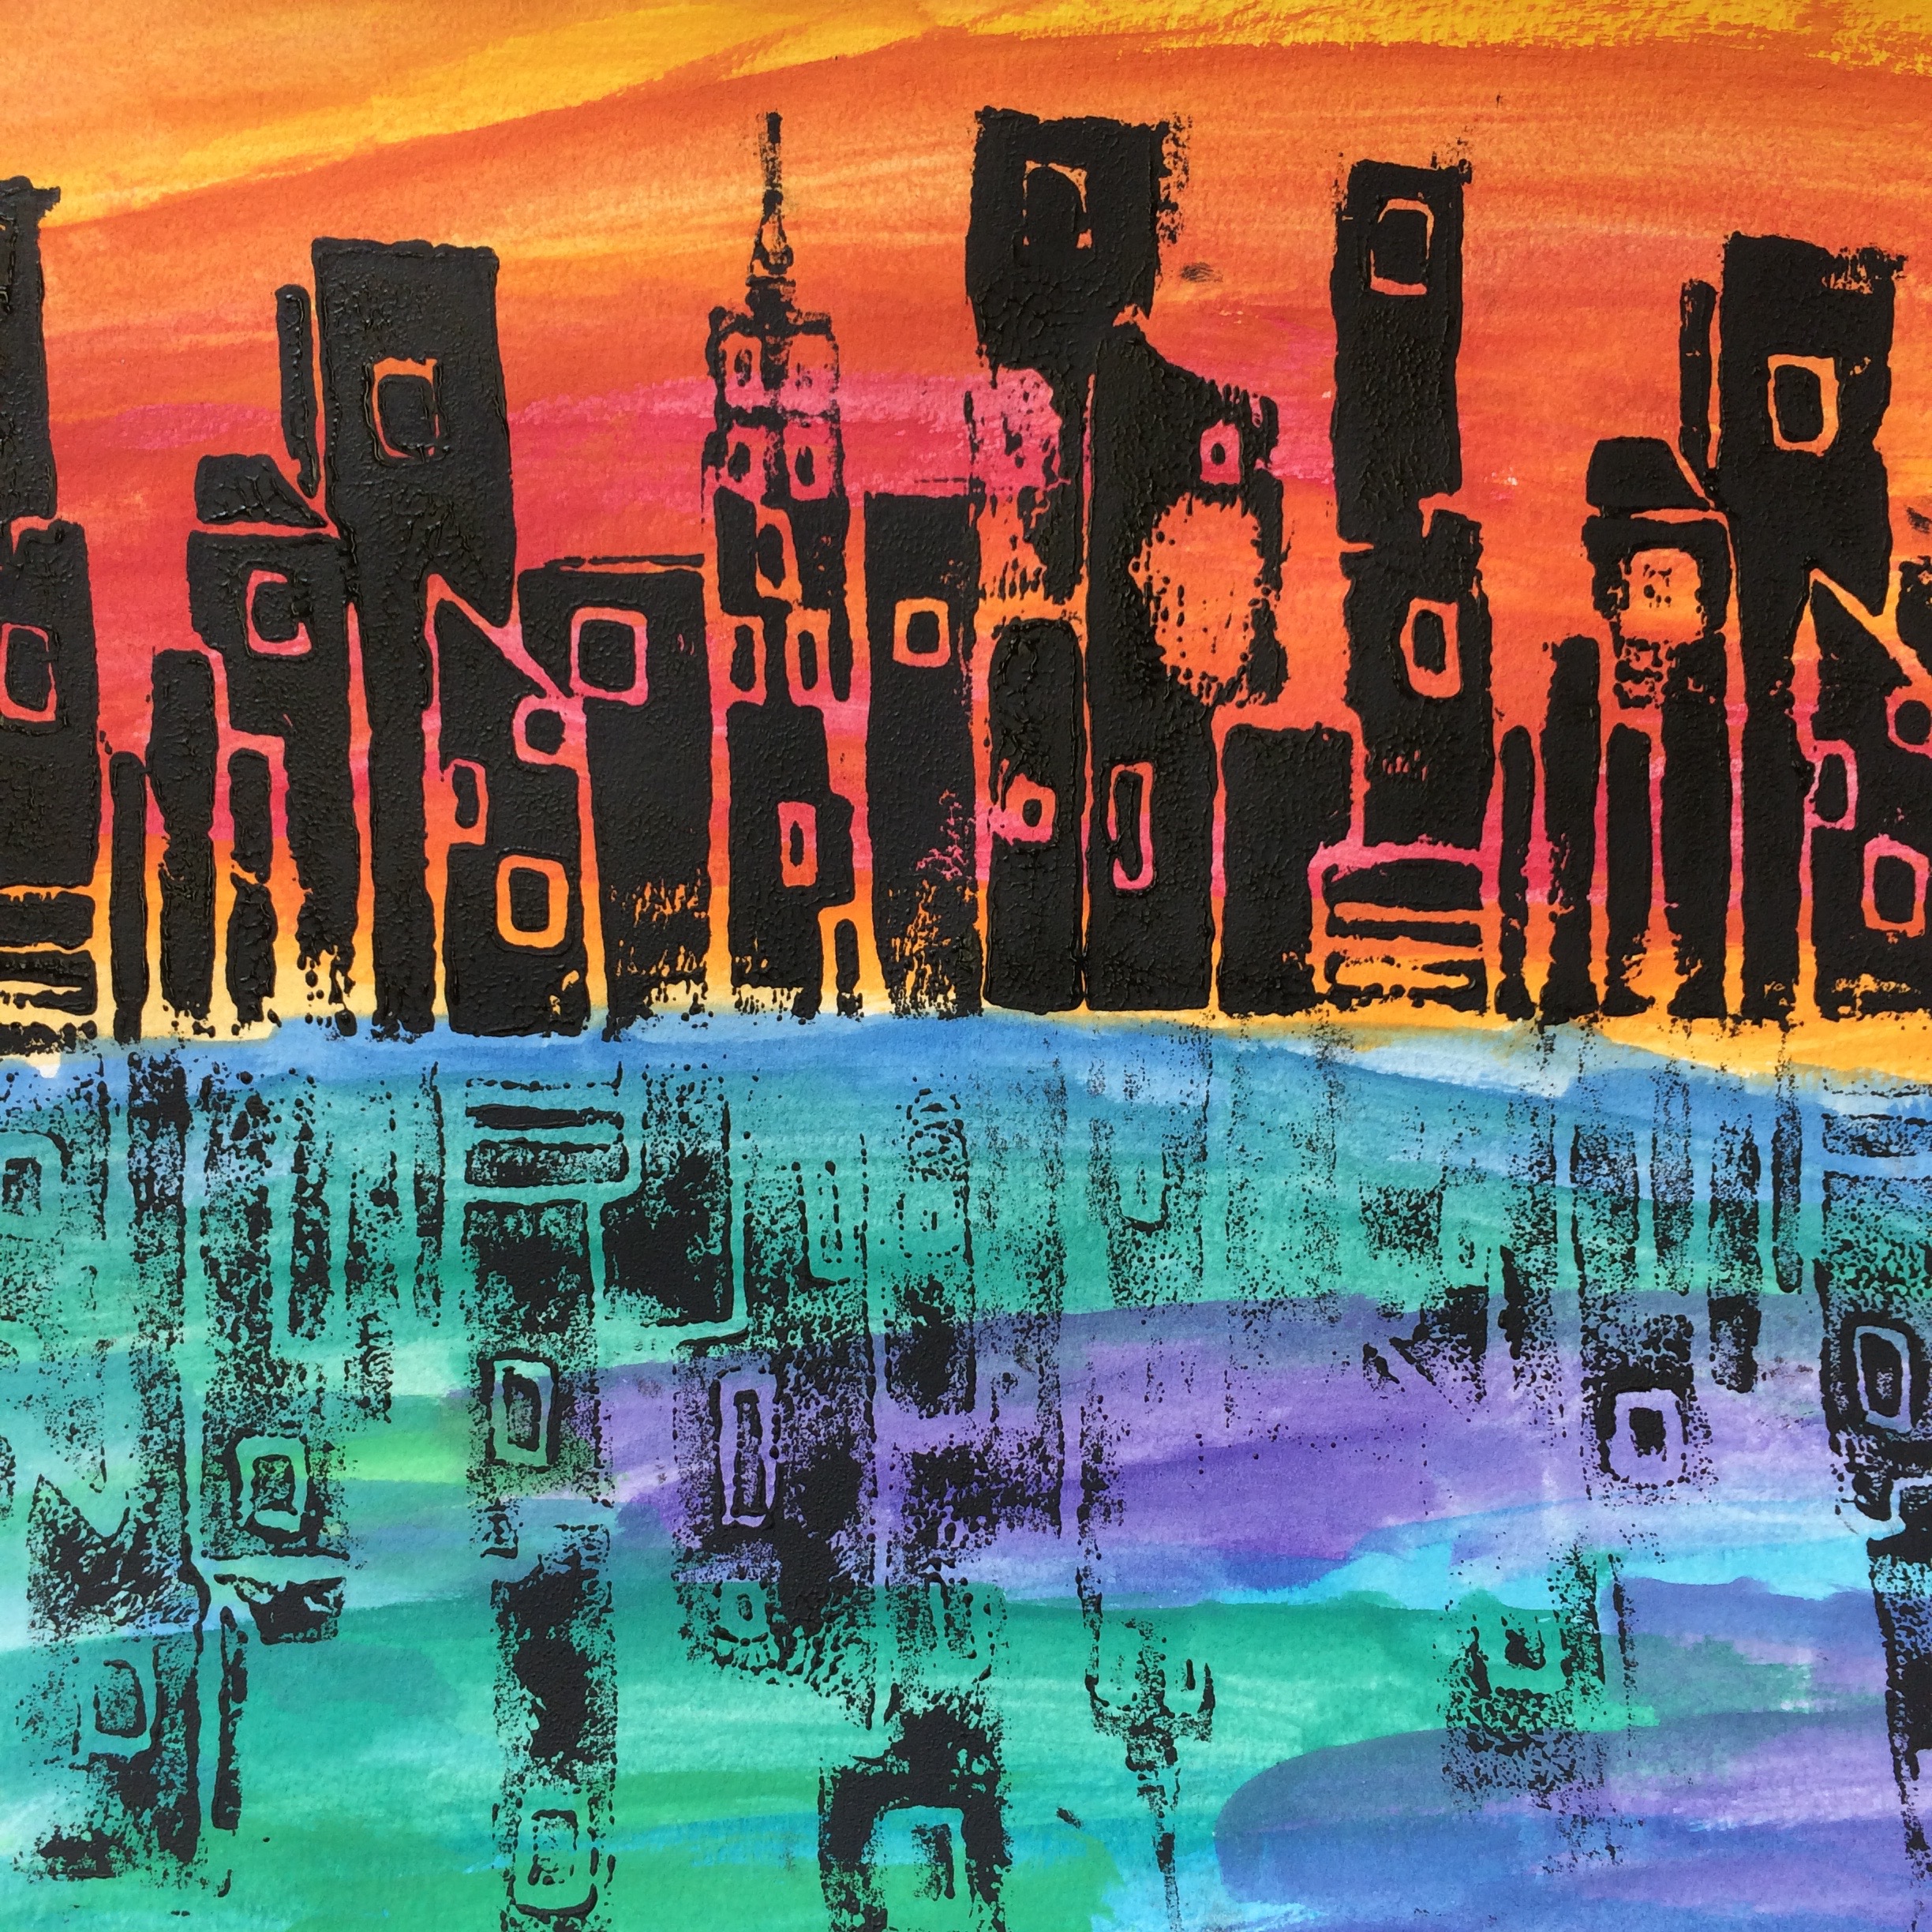
On the 4 x 6 sulphite paper paper draw a simple city sky line with pencil.
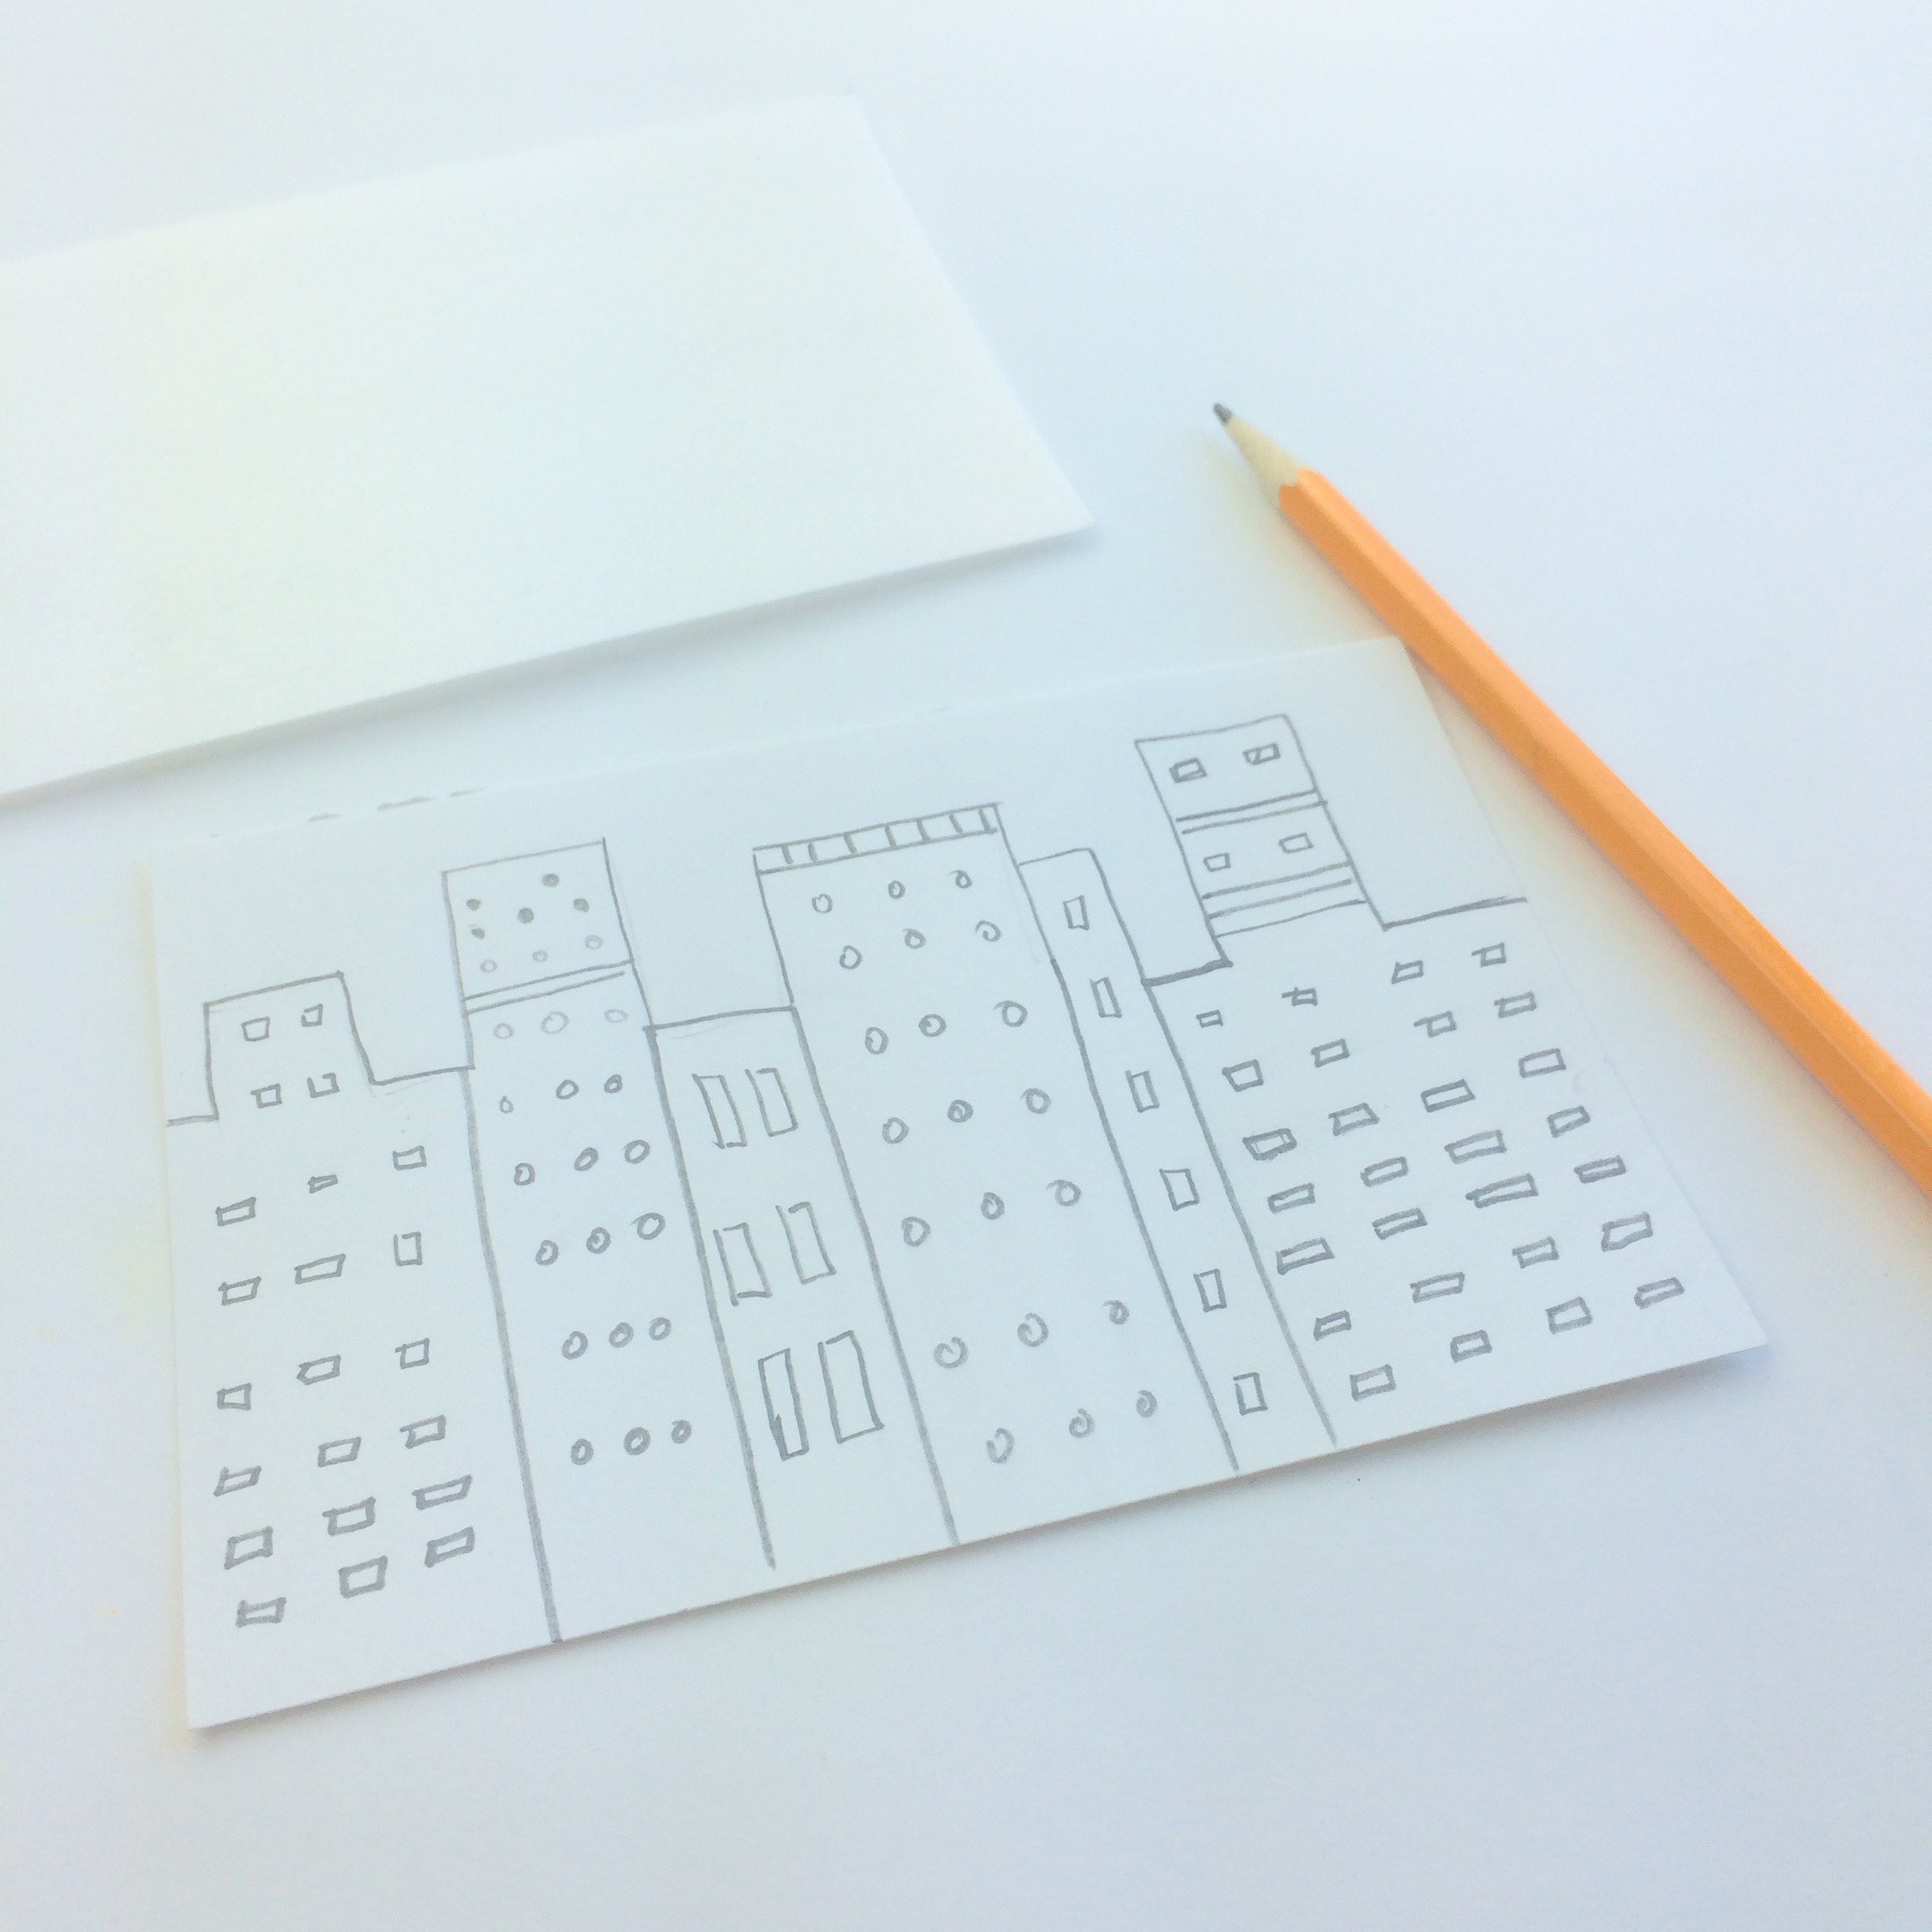
Once drawing is complete tape paper and foam piece together. Trace over the city skyline with a pencil. This will make a copy into the foam plate.
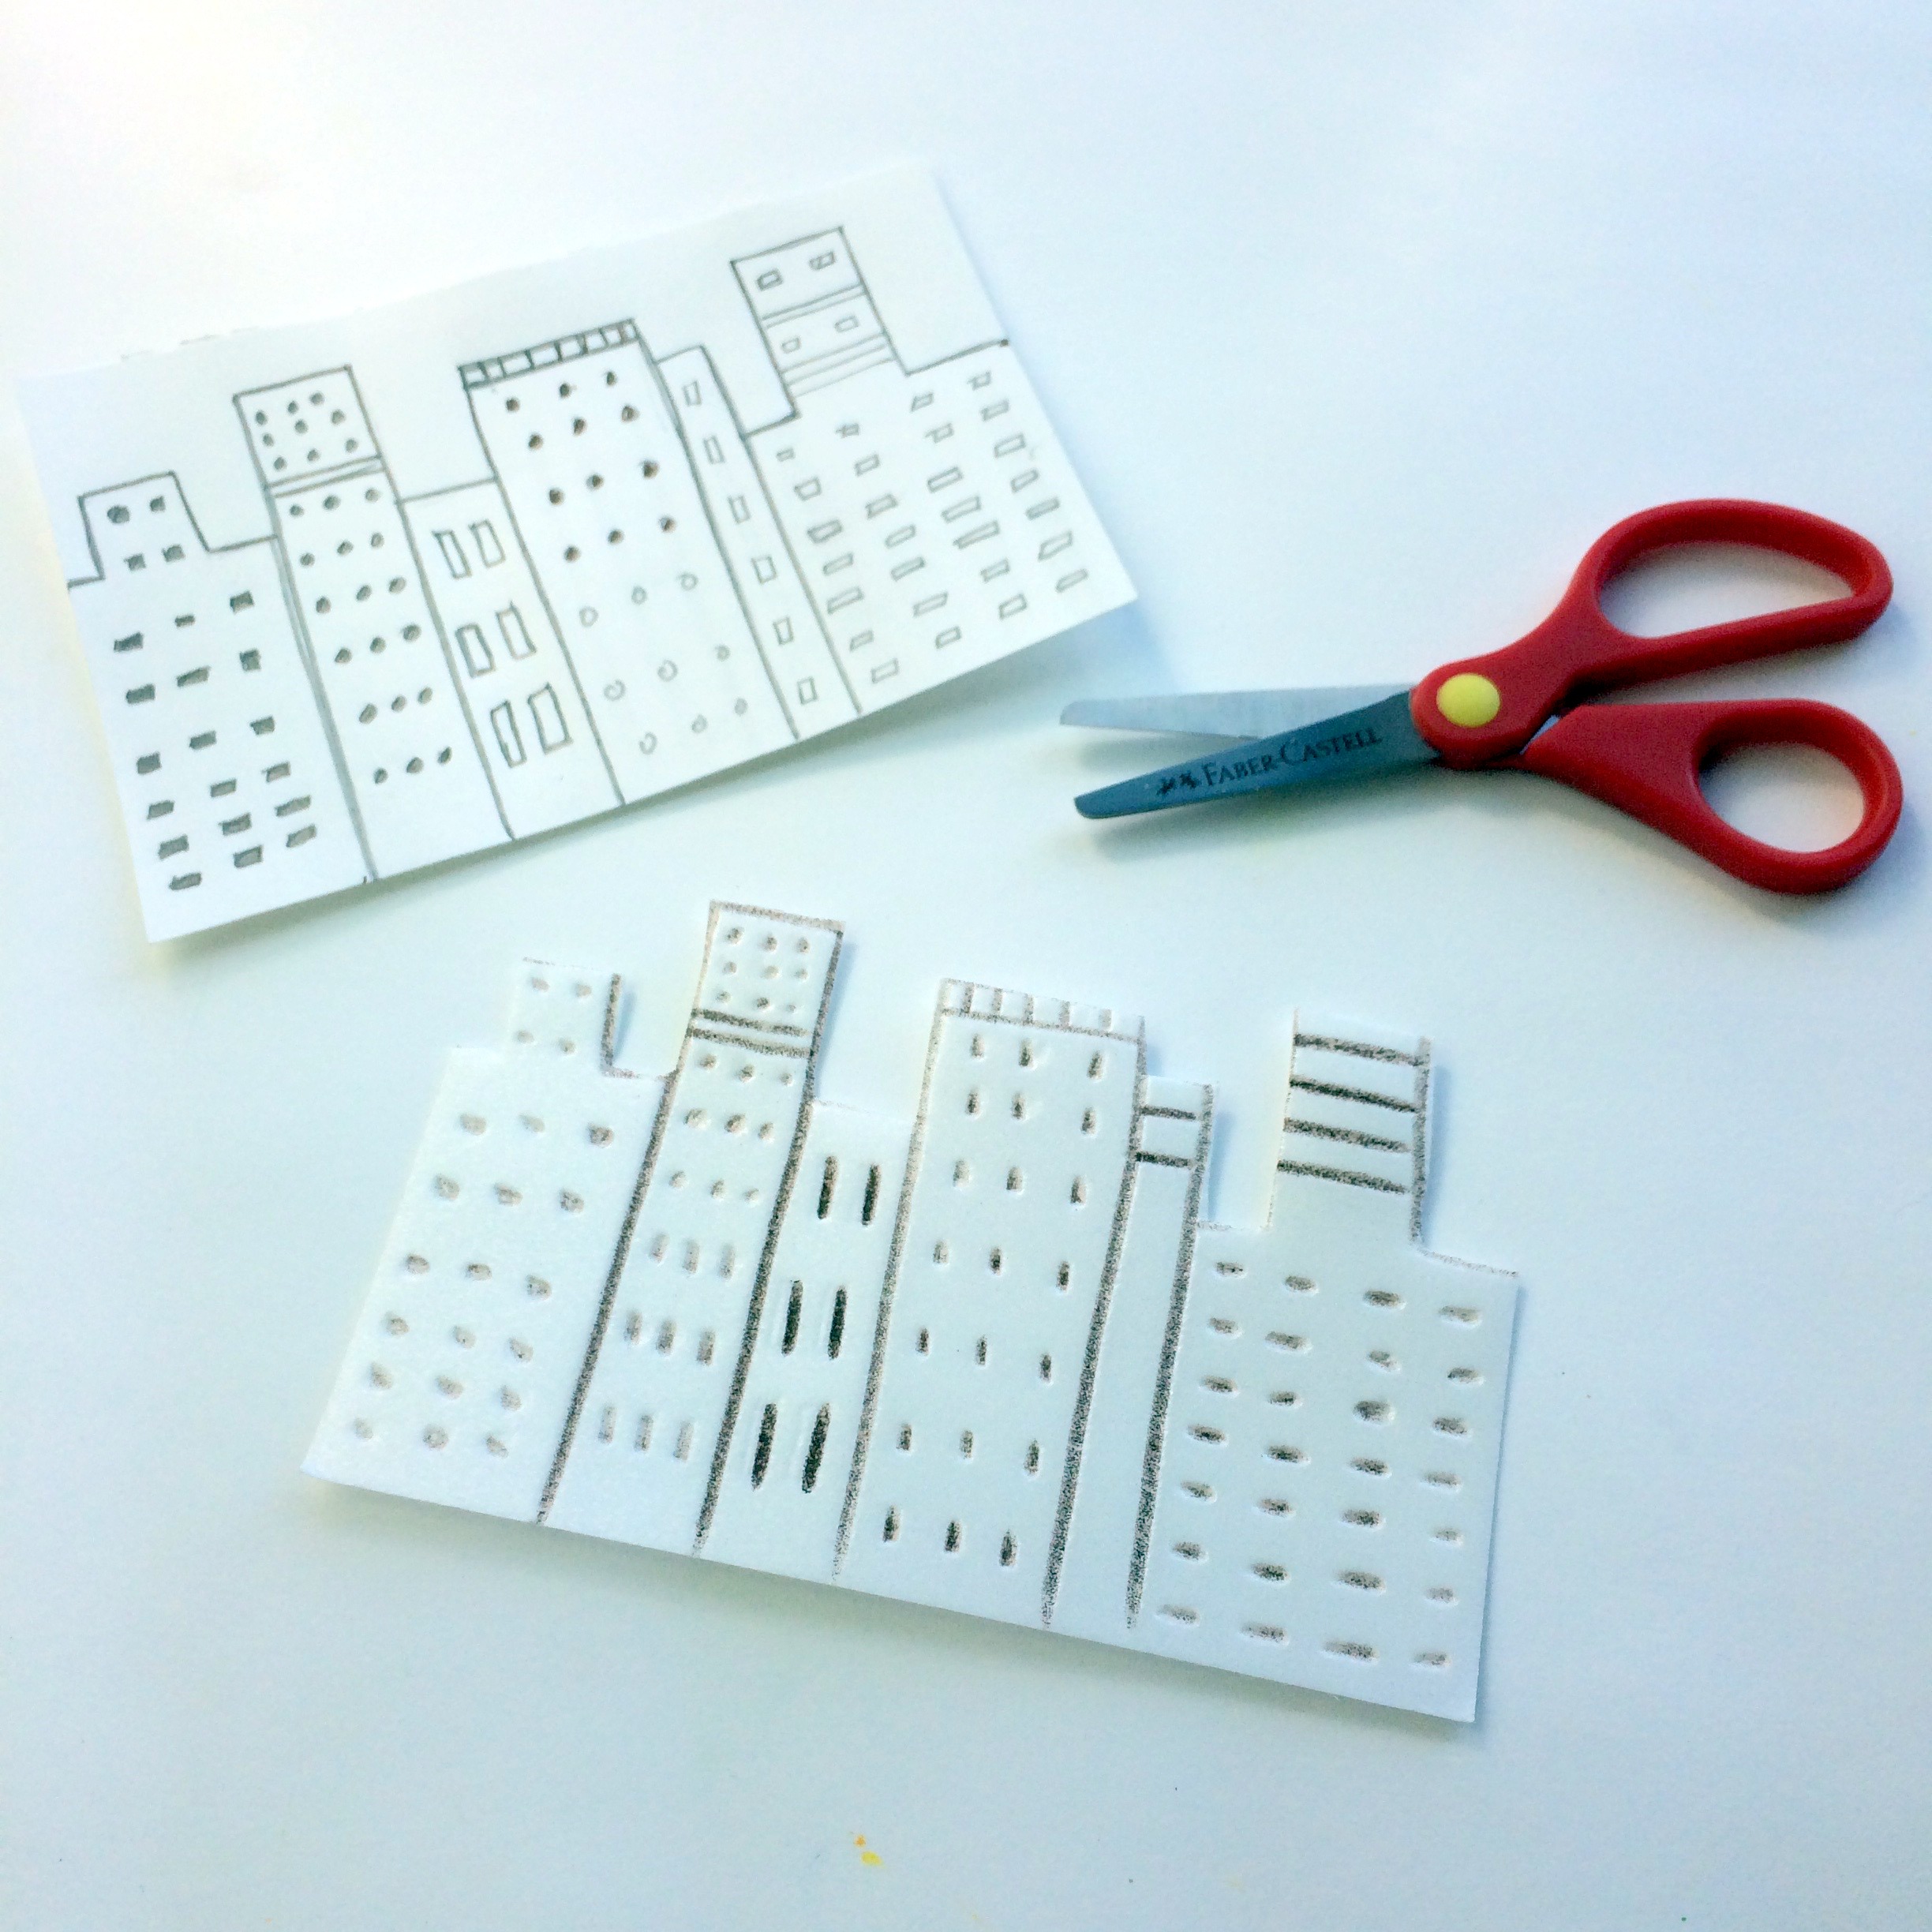
Once the tracing of the city skyline (image) is complete use scissors and cut the skyline out, making sure to cut only the top line of the building.
Setting Up the Printing Station:
Place the painting to the left and a plate with the printing ink to the right along with the brayer. Place the foam printing plate under the plate with the printing ink. I suggest using a paper towel to keep printing area clean.
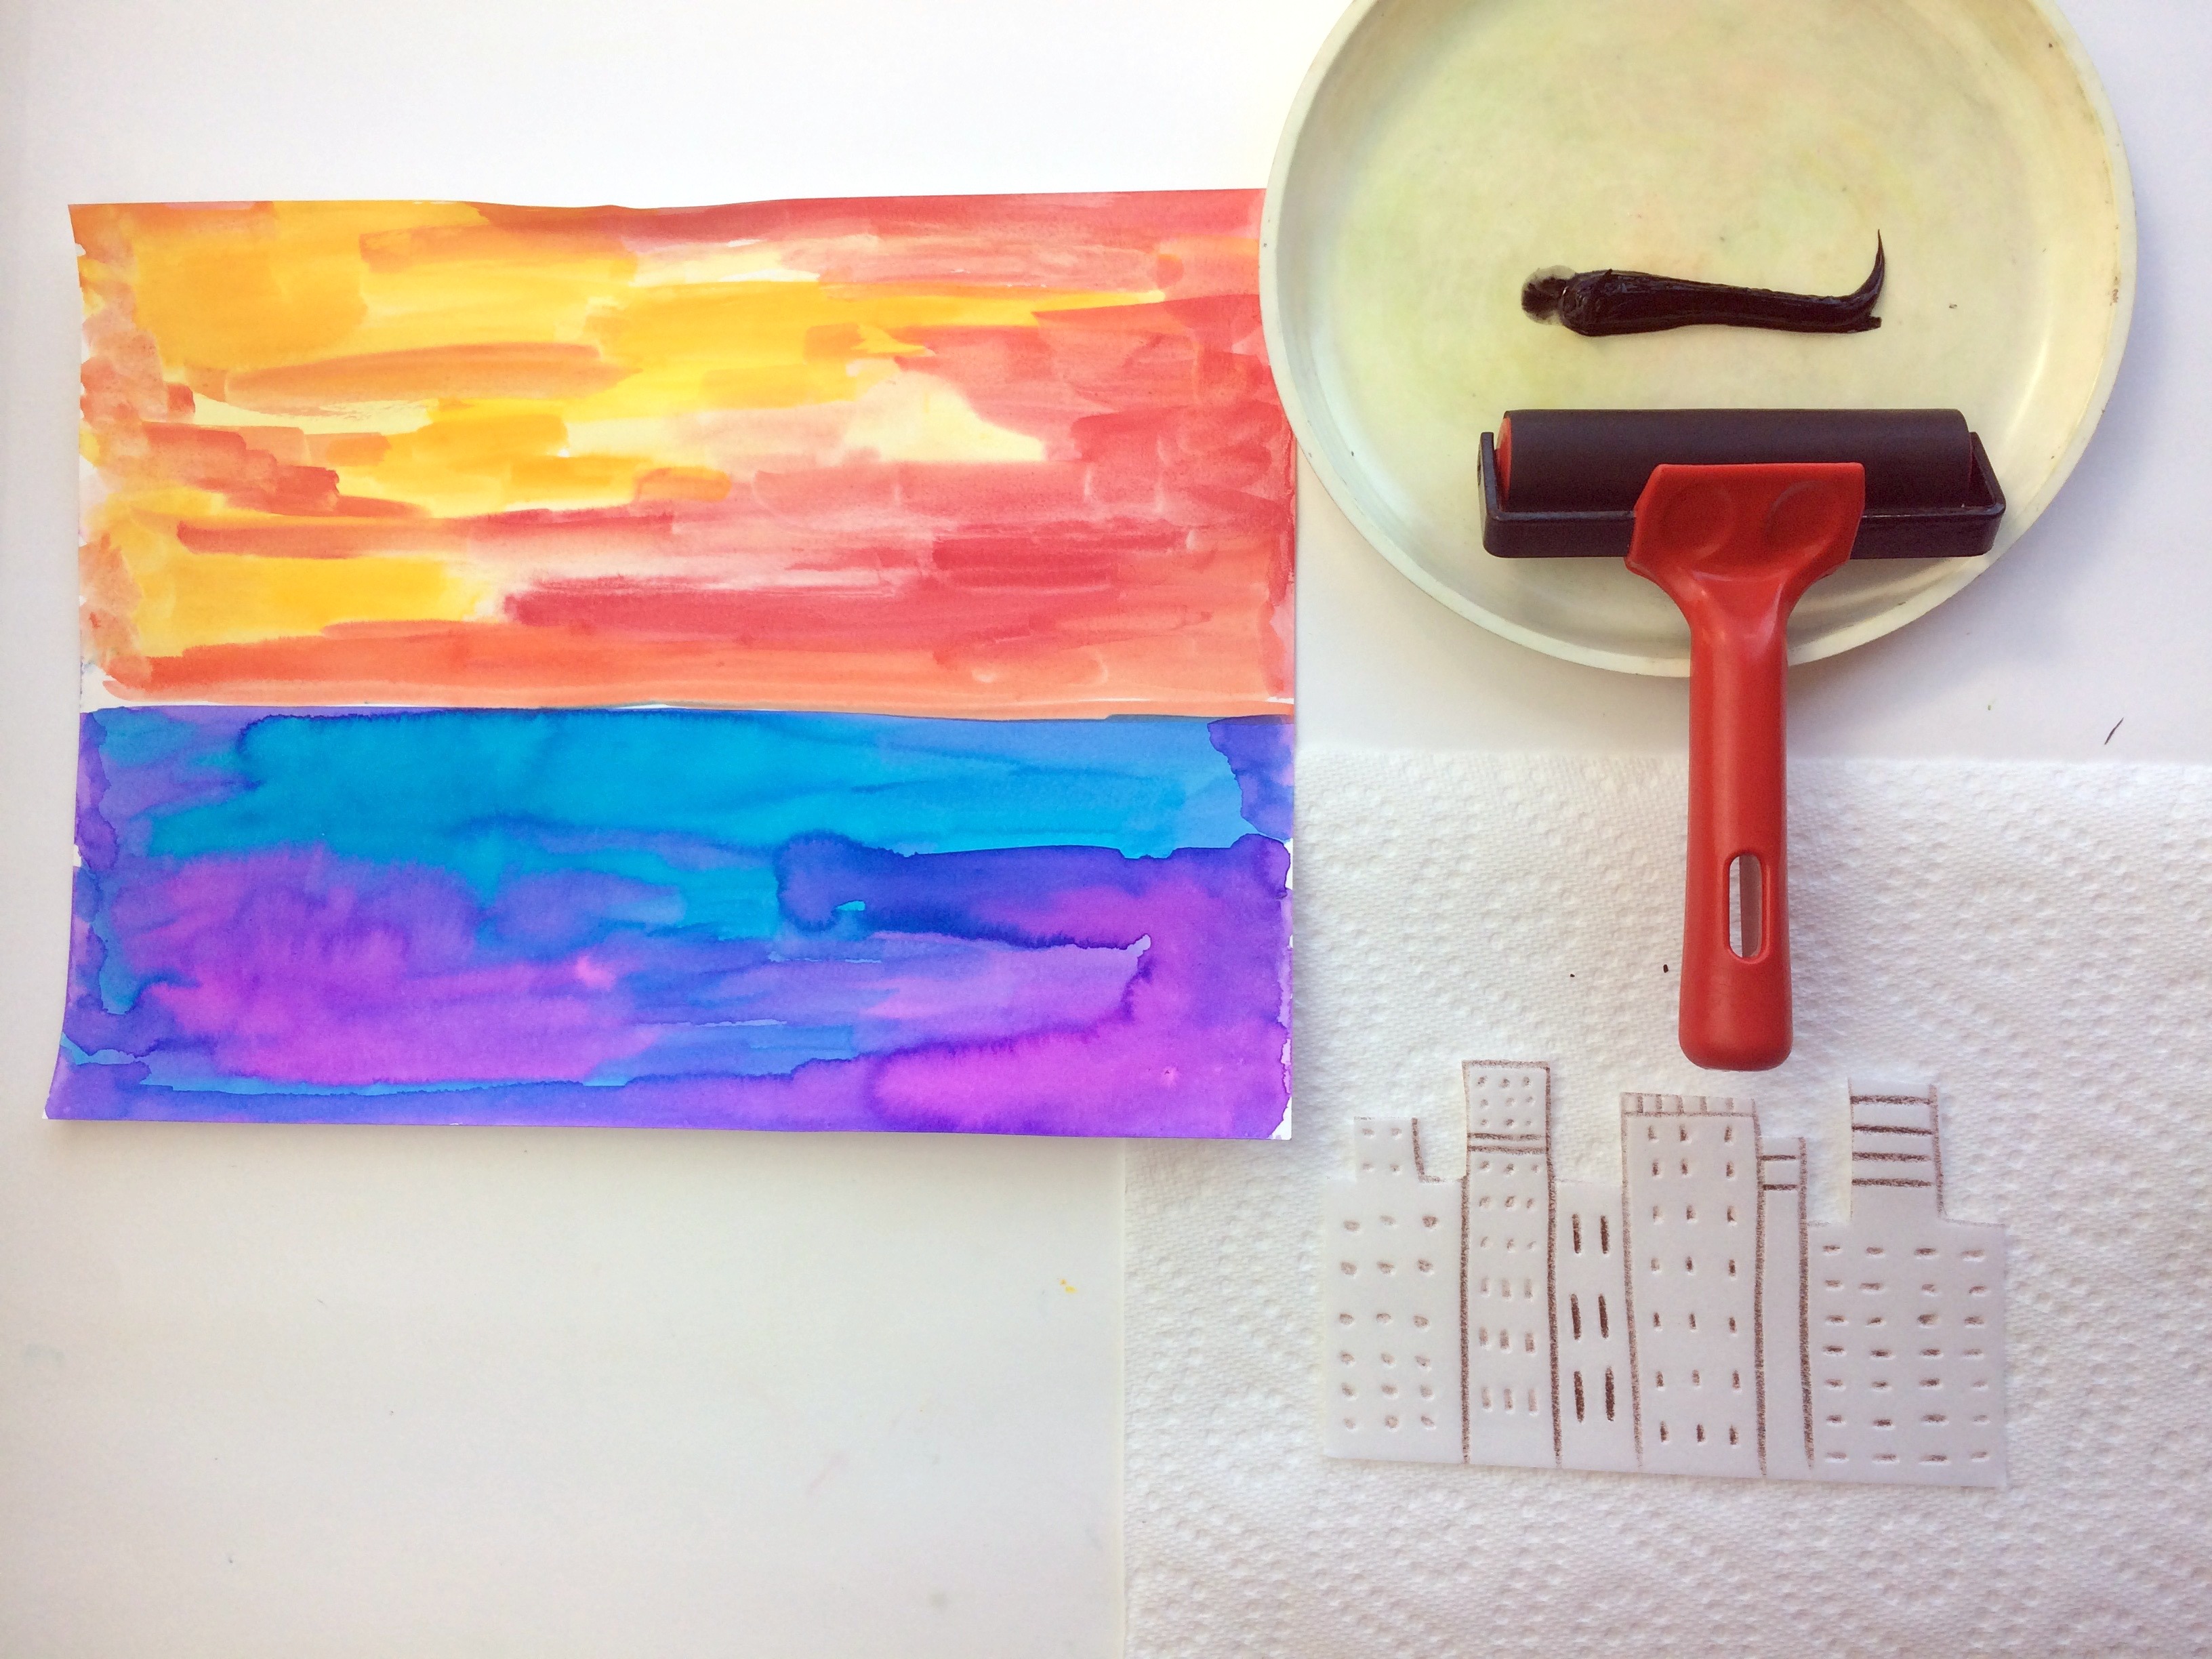
Roll the ink into a square inside the plate. This will coat the brayer for even coverage when applying to the plate.
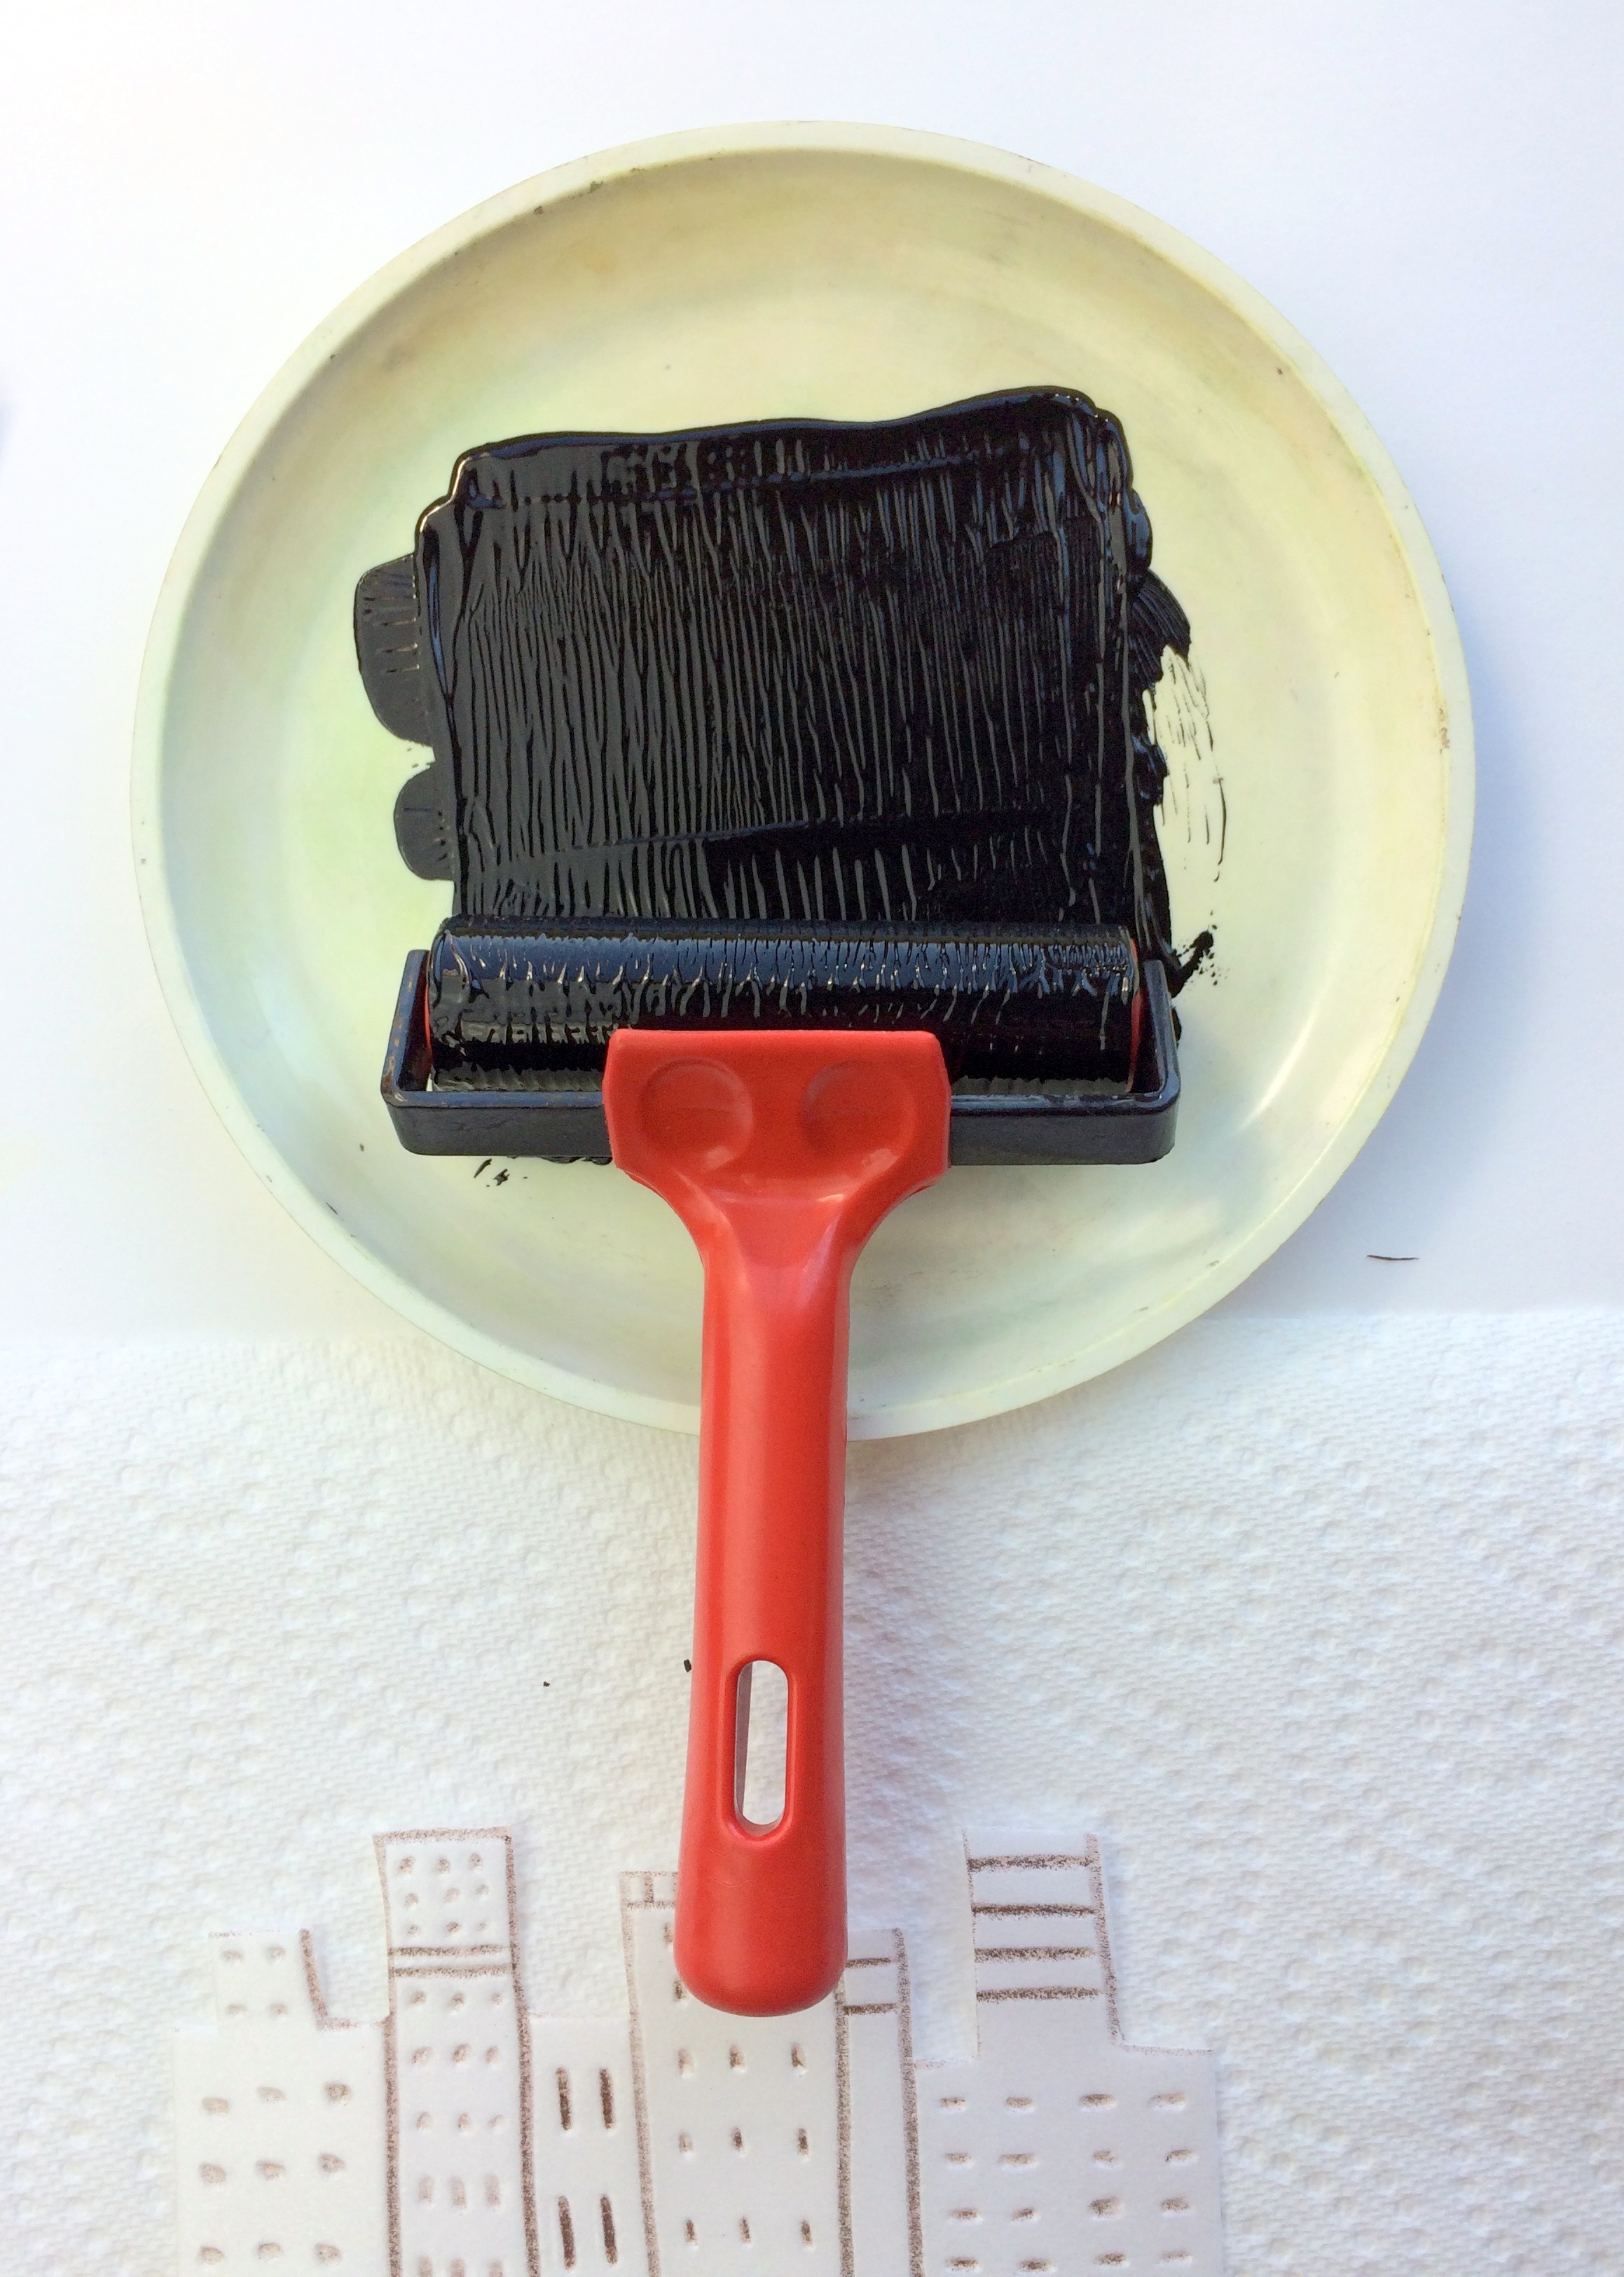
Spread the ink evenly across the printing plate.
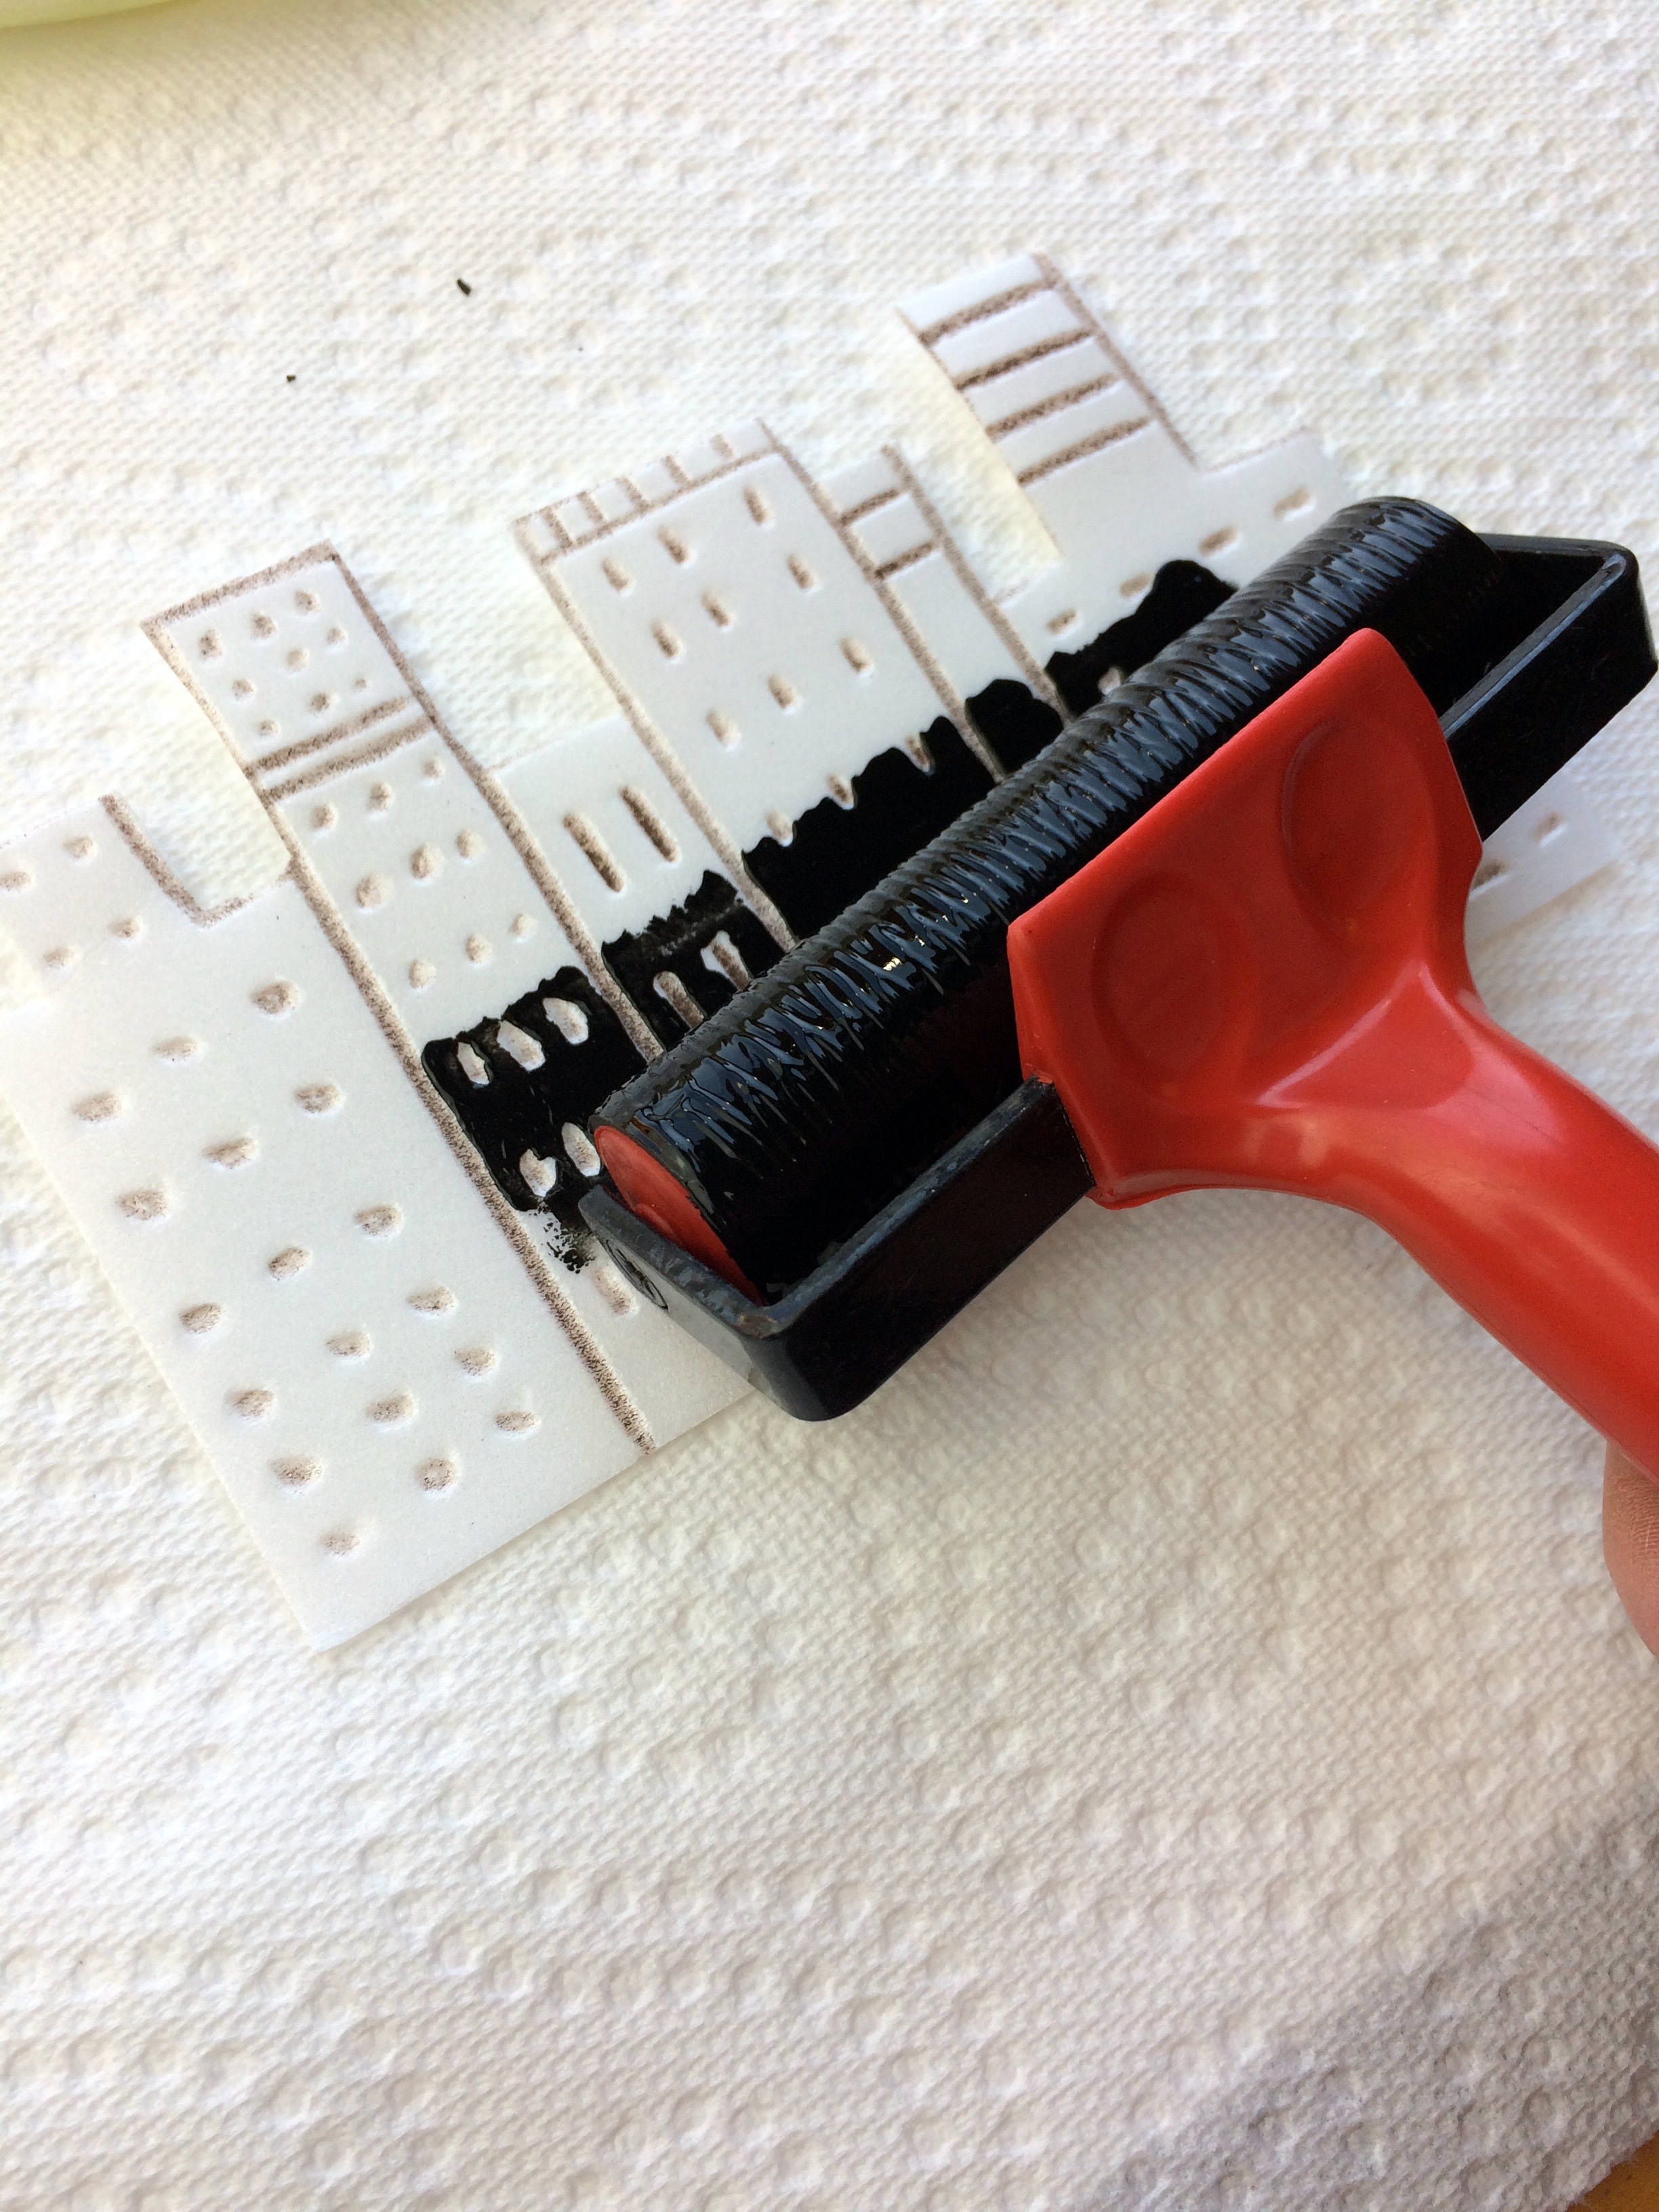
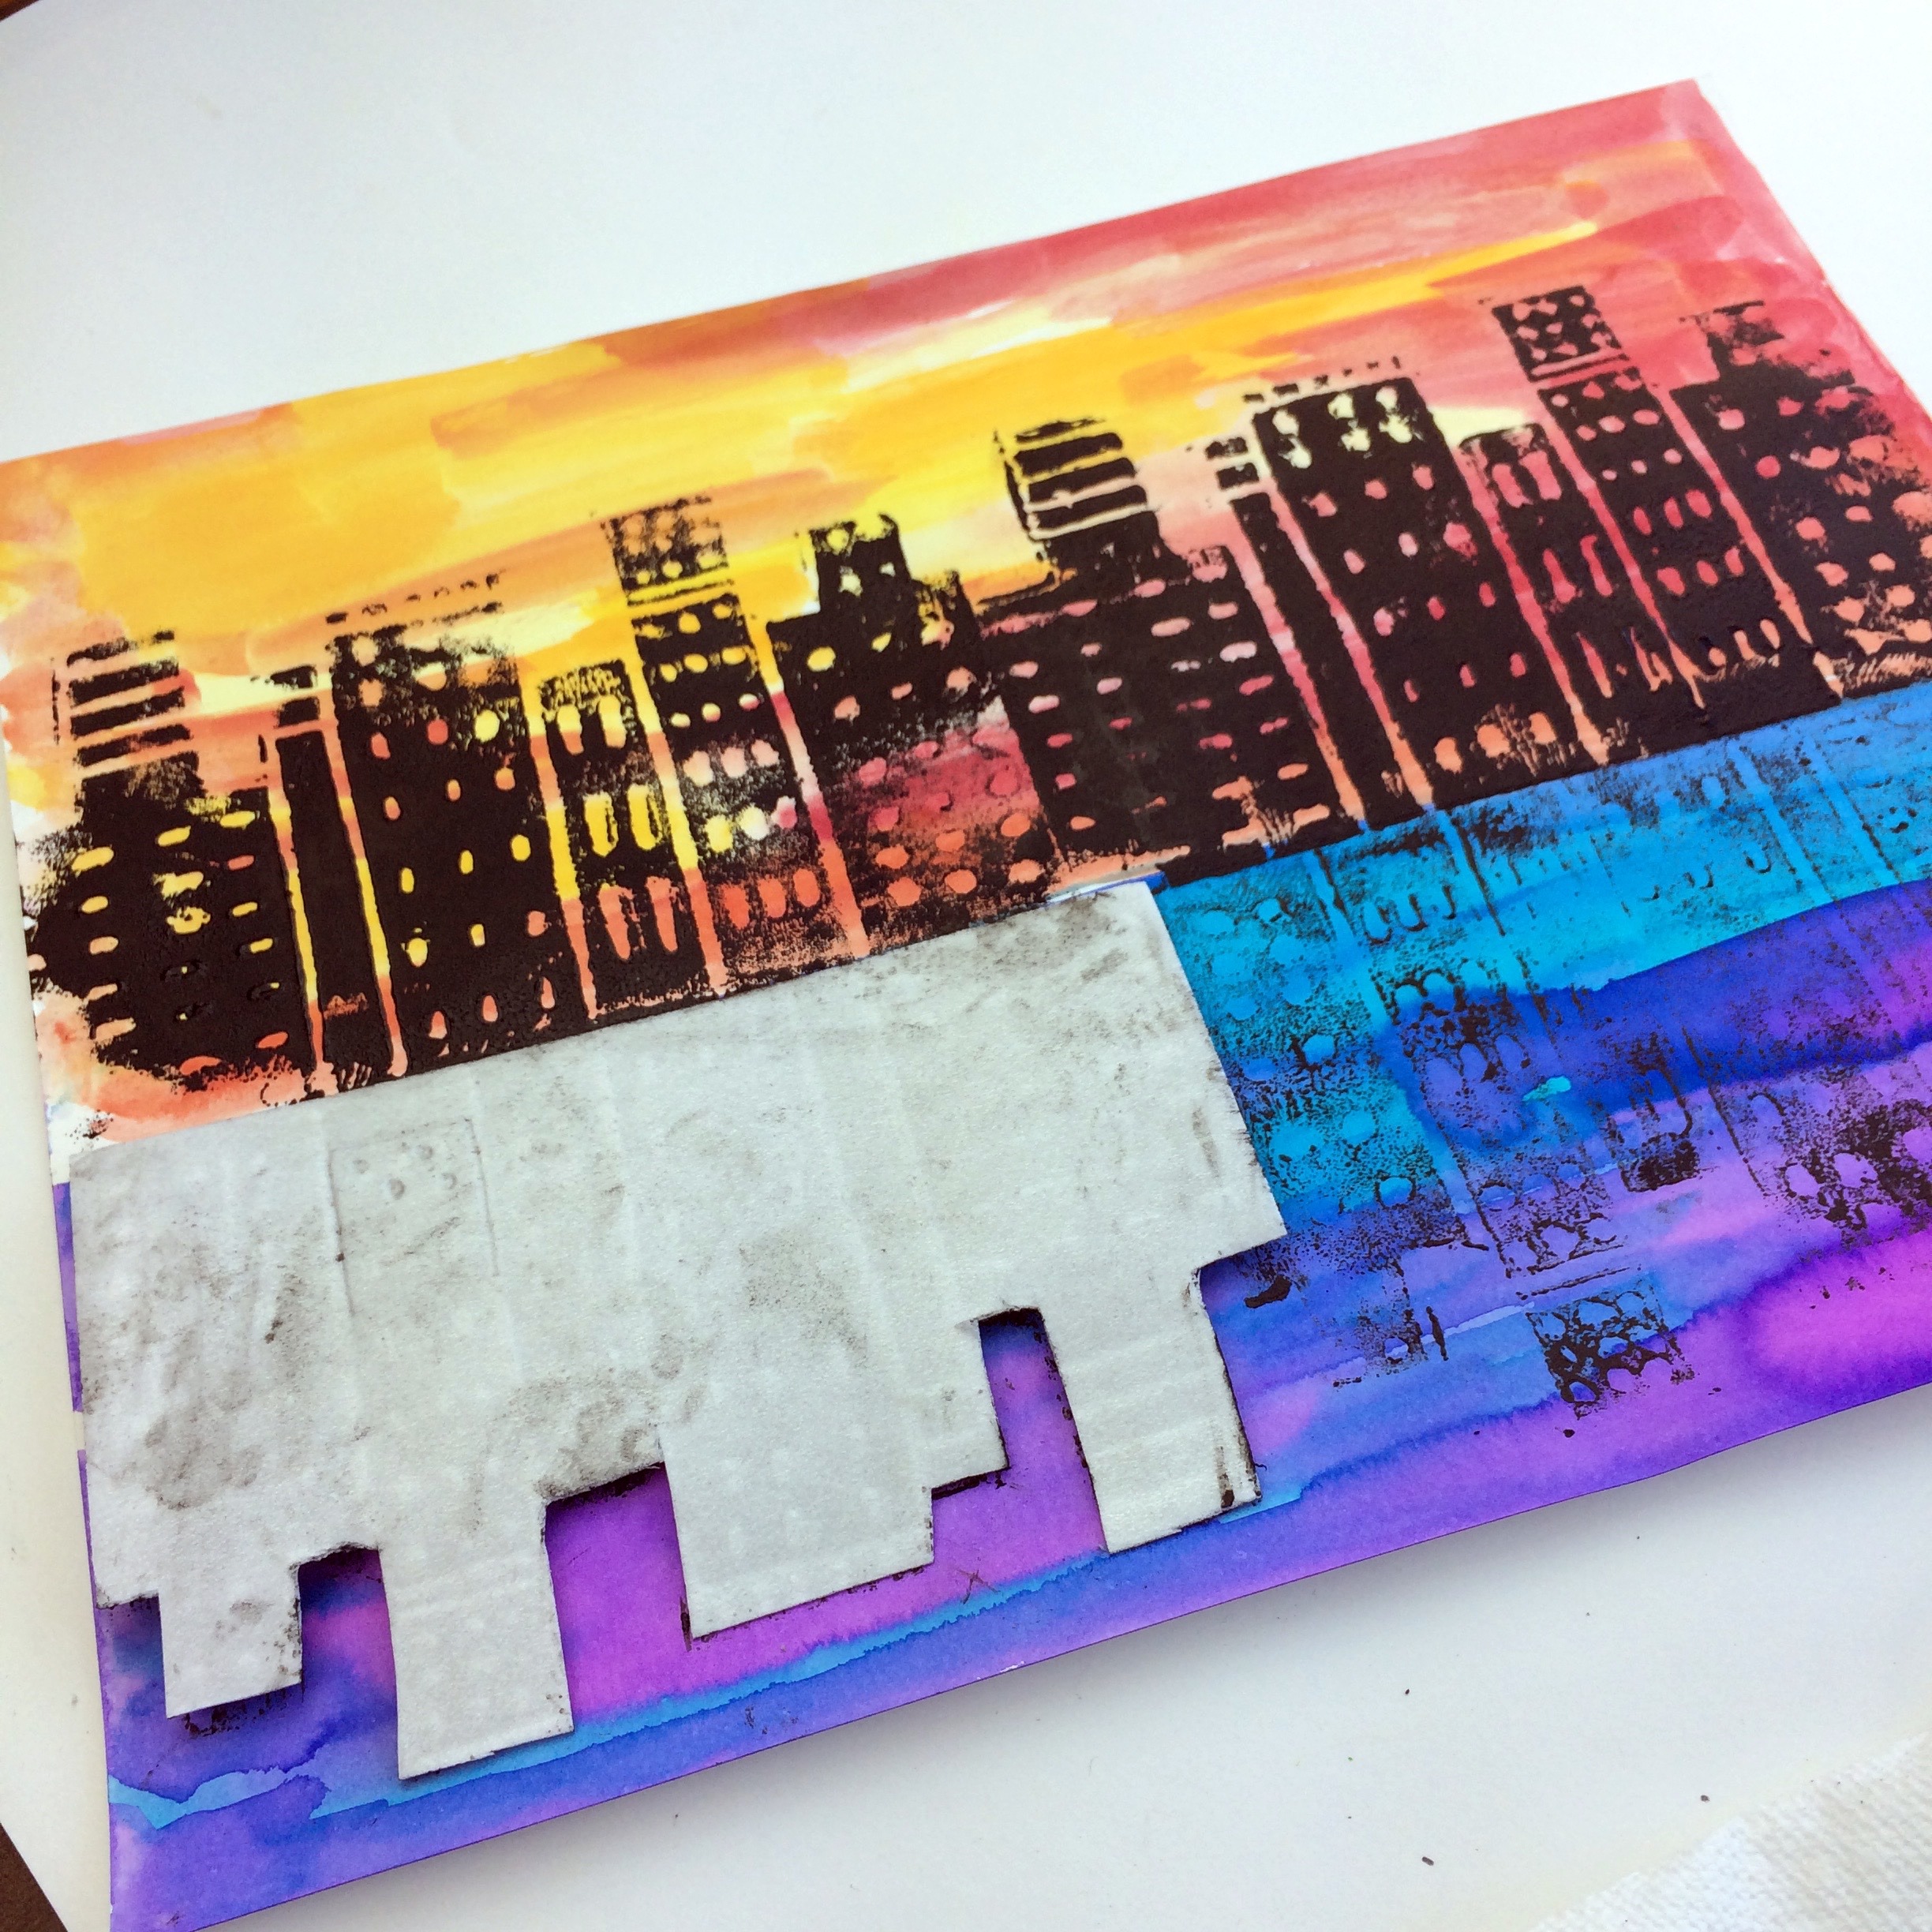
Flip the plate with ink over and place on the horizon line (where the sky and the water meet) Gently rub the back of the printing plate making sure to get all the edges.
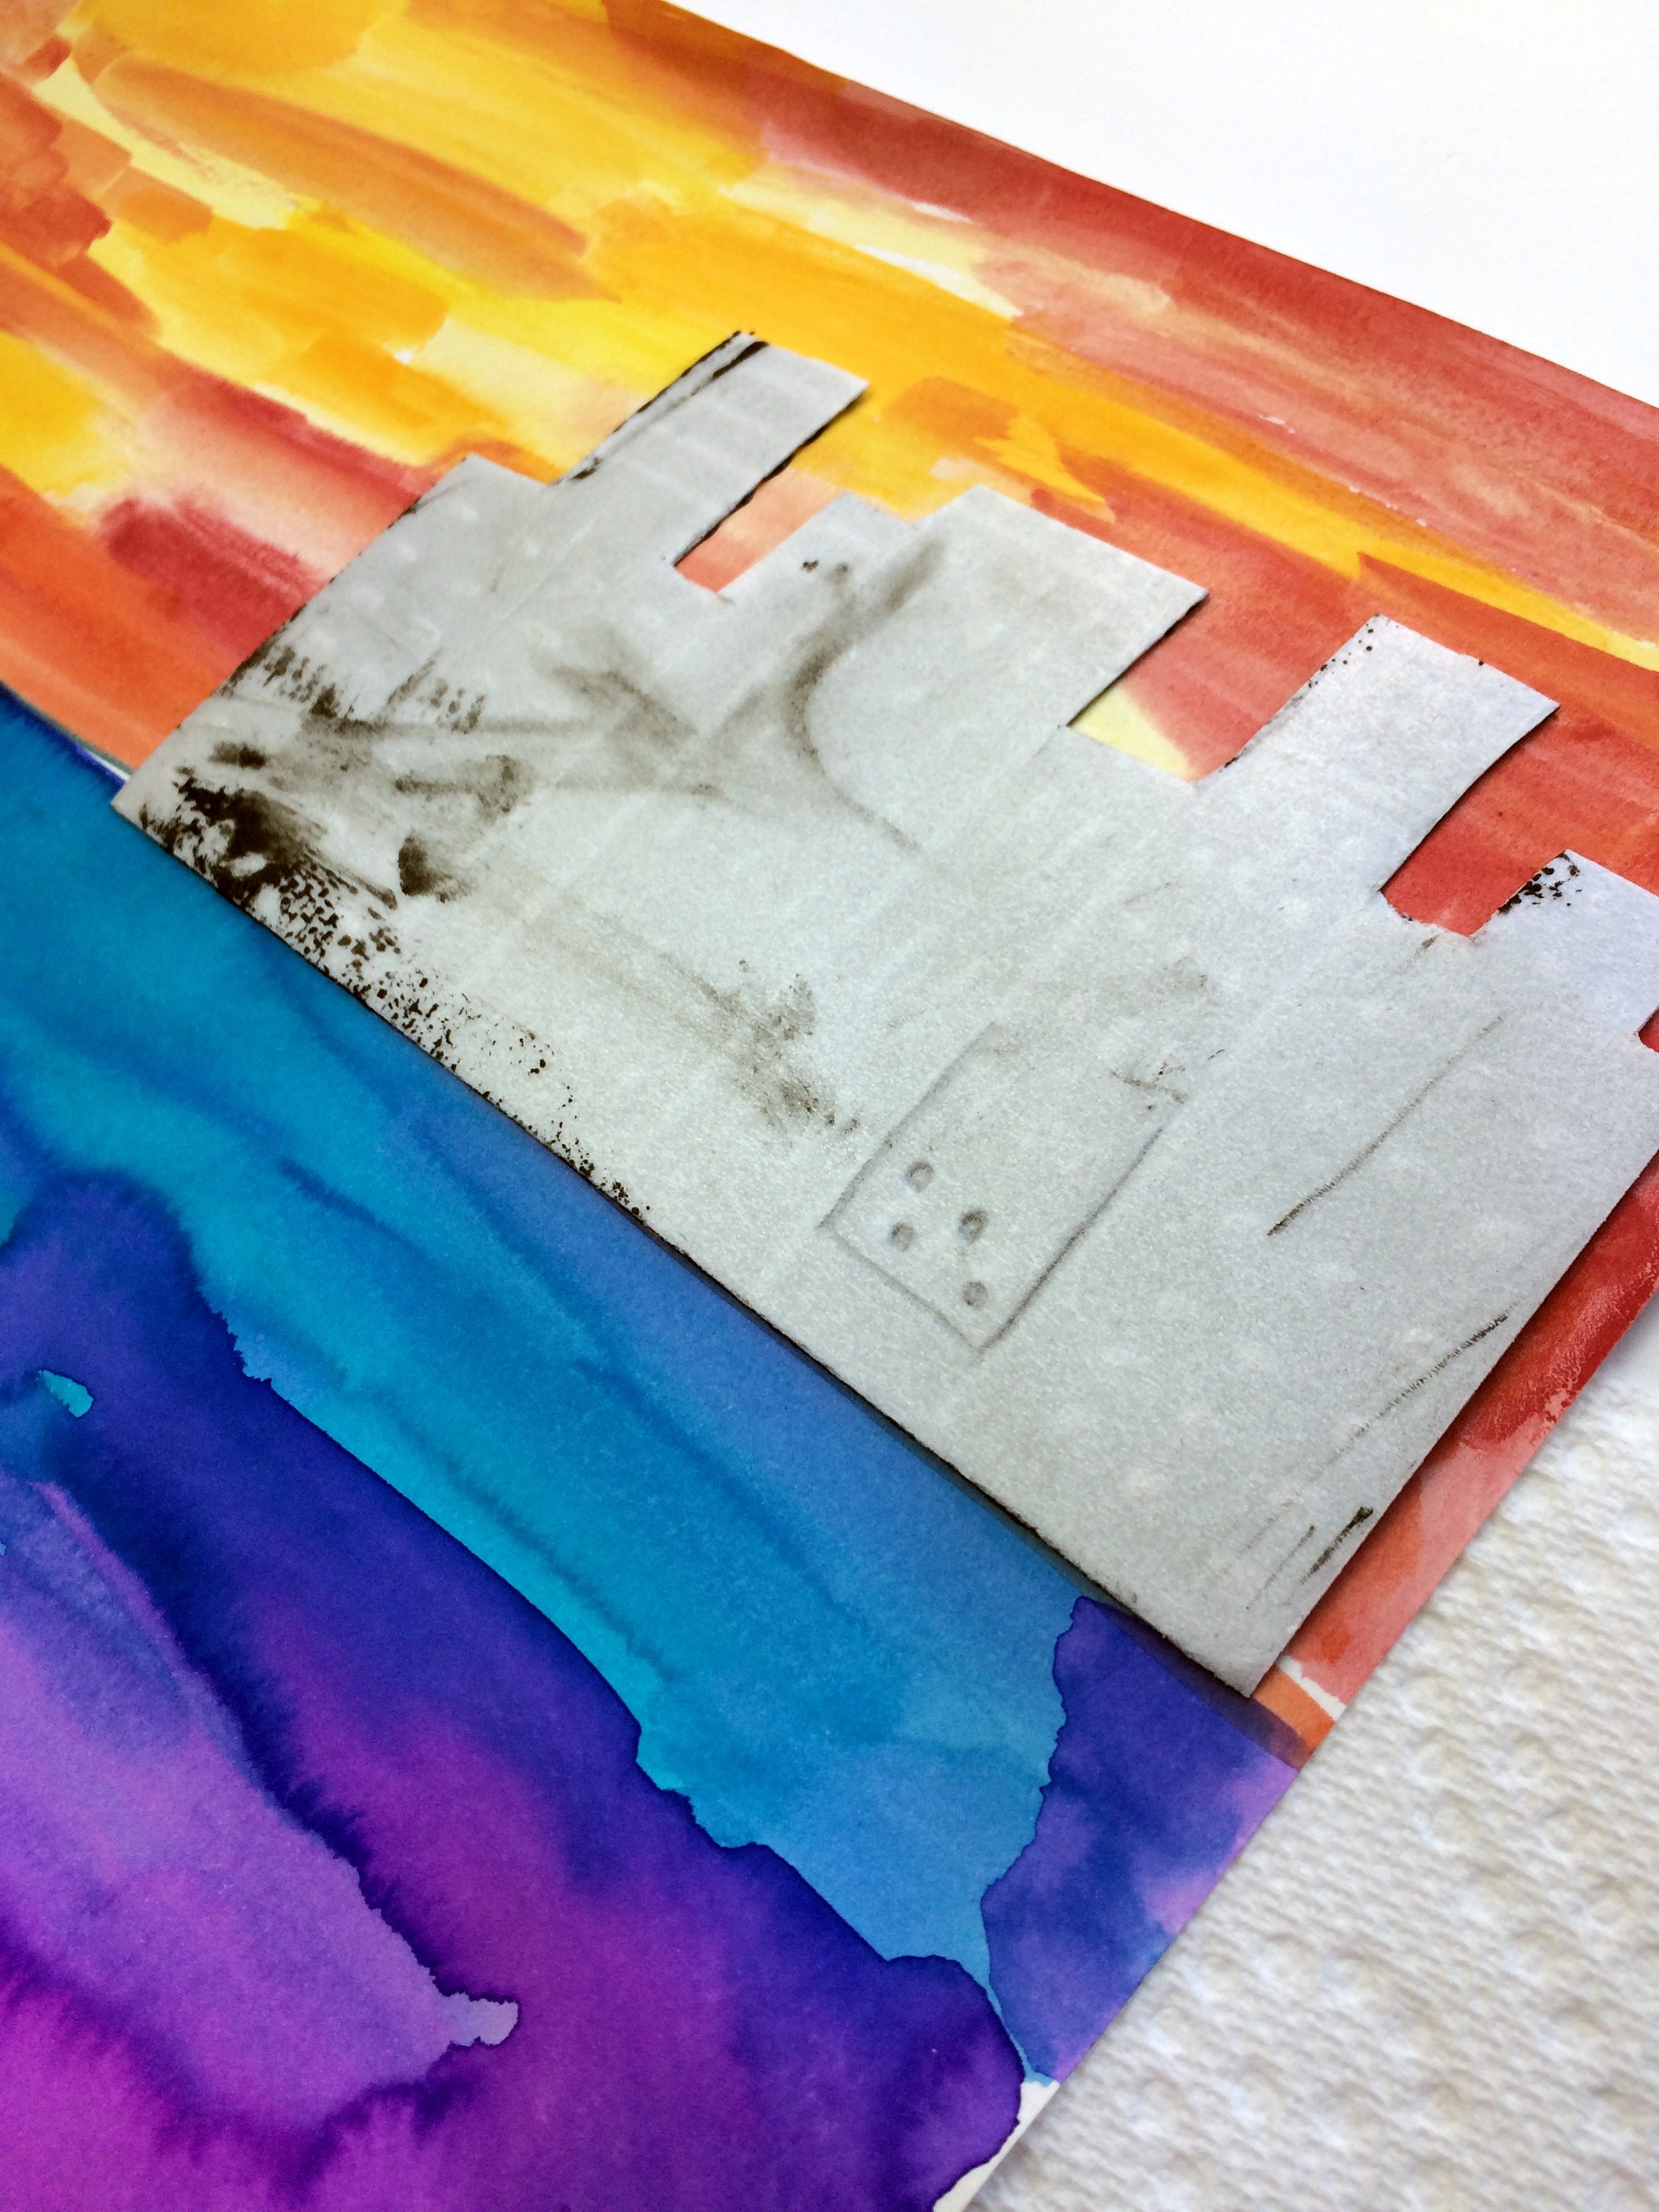
Lift up and flip over and gently rub. Since the printing plate is not coated with ink you will get a faded reflection of the city skyline.
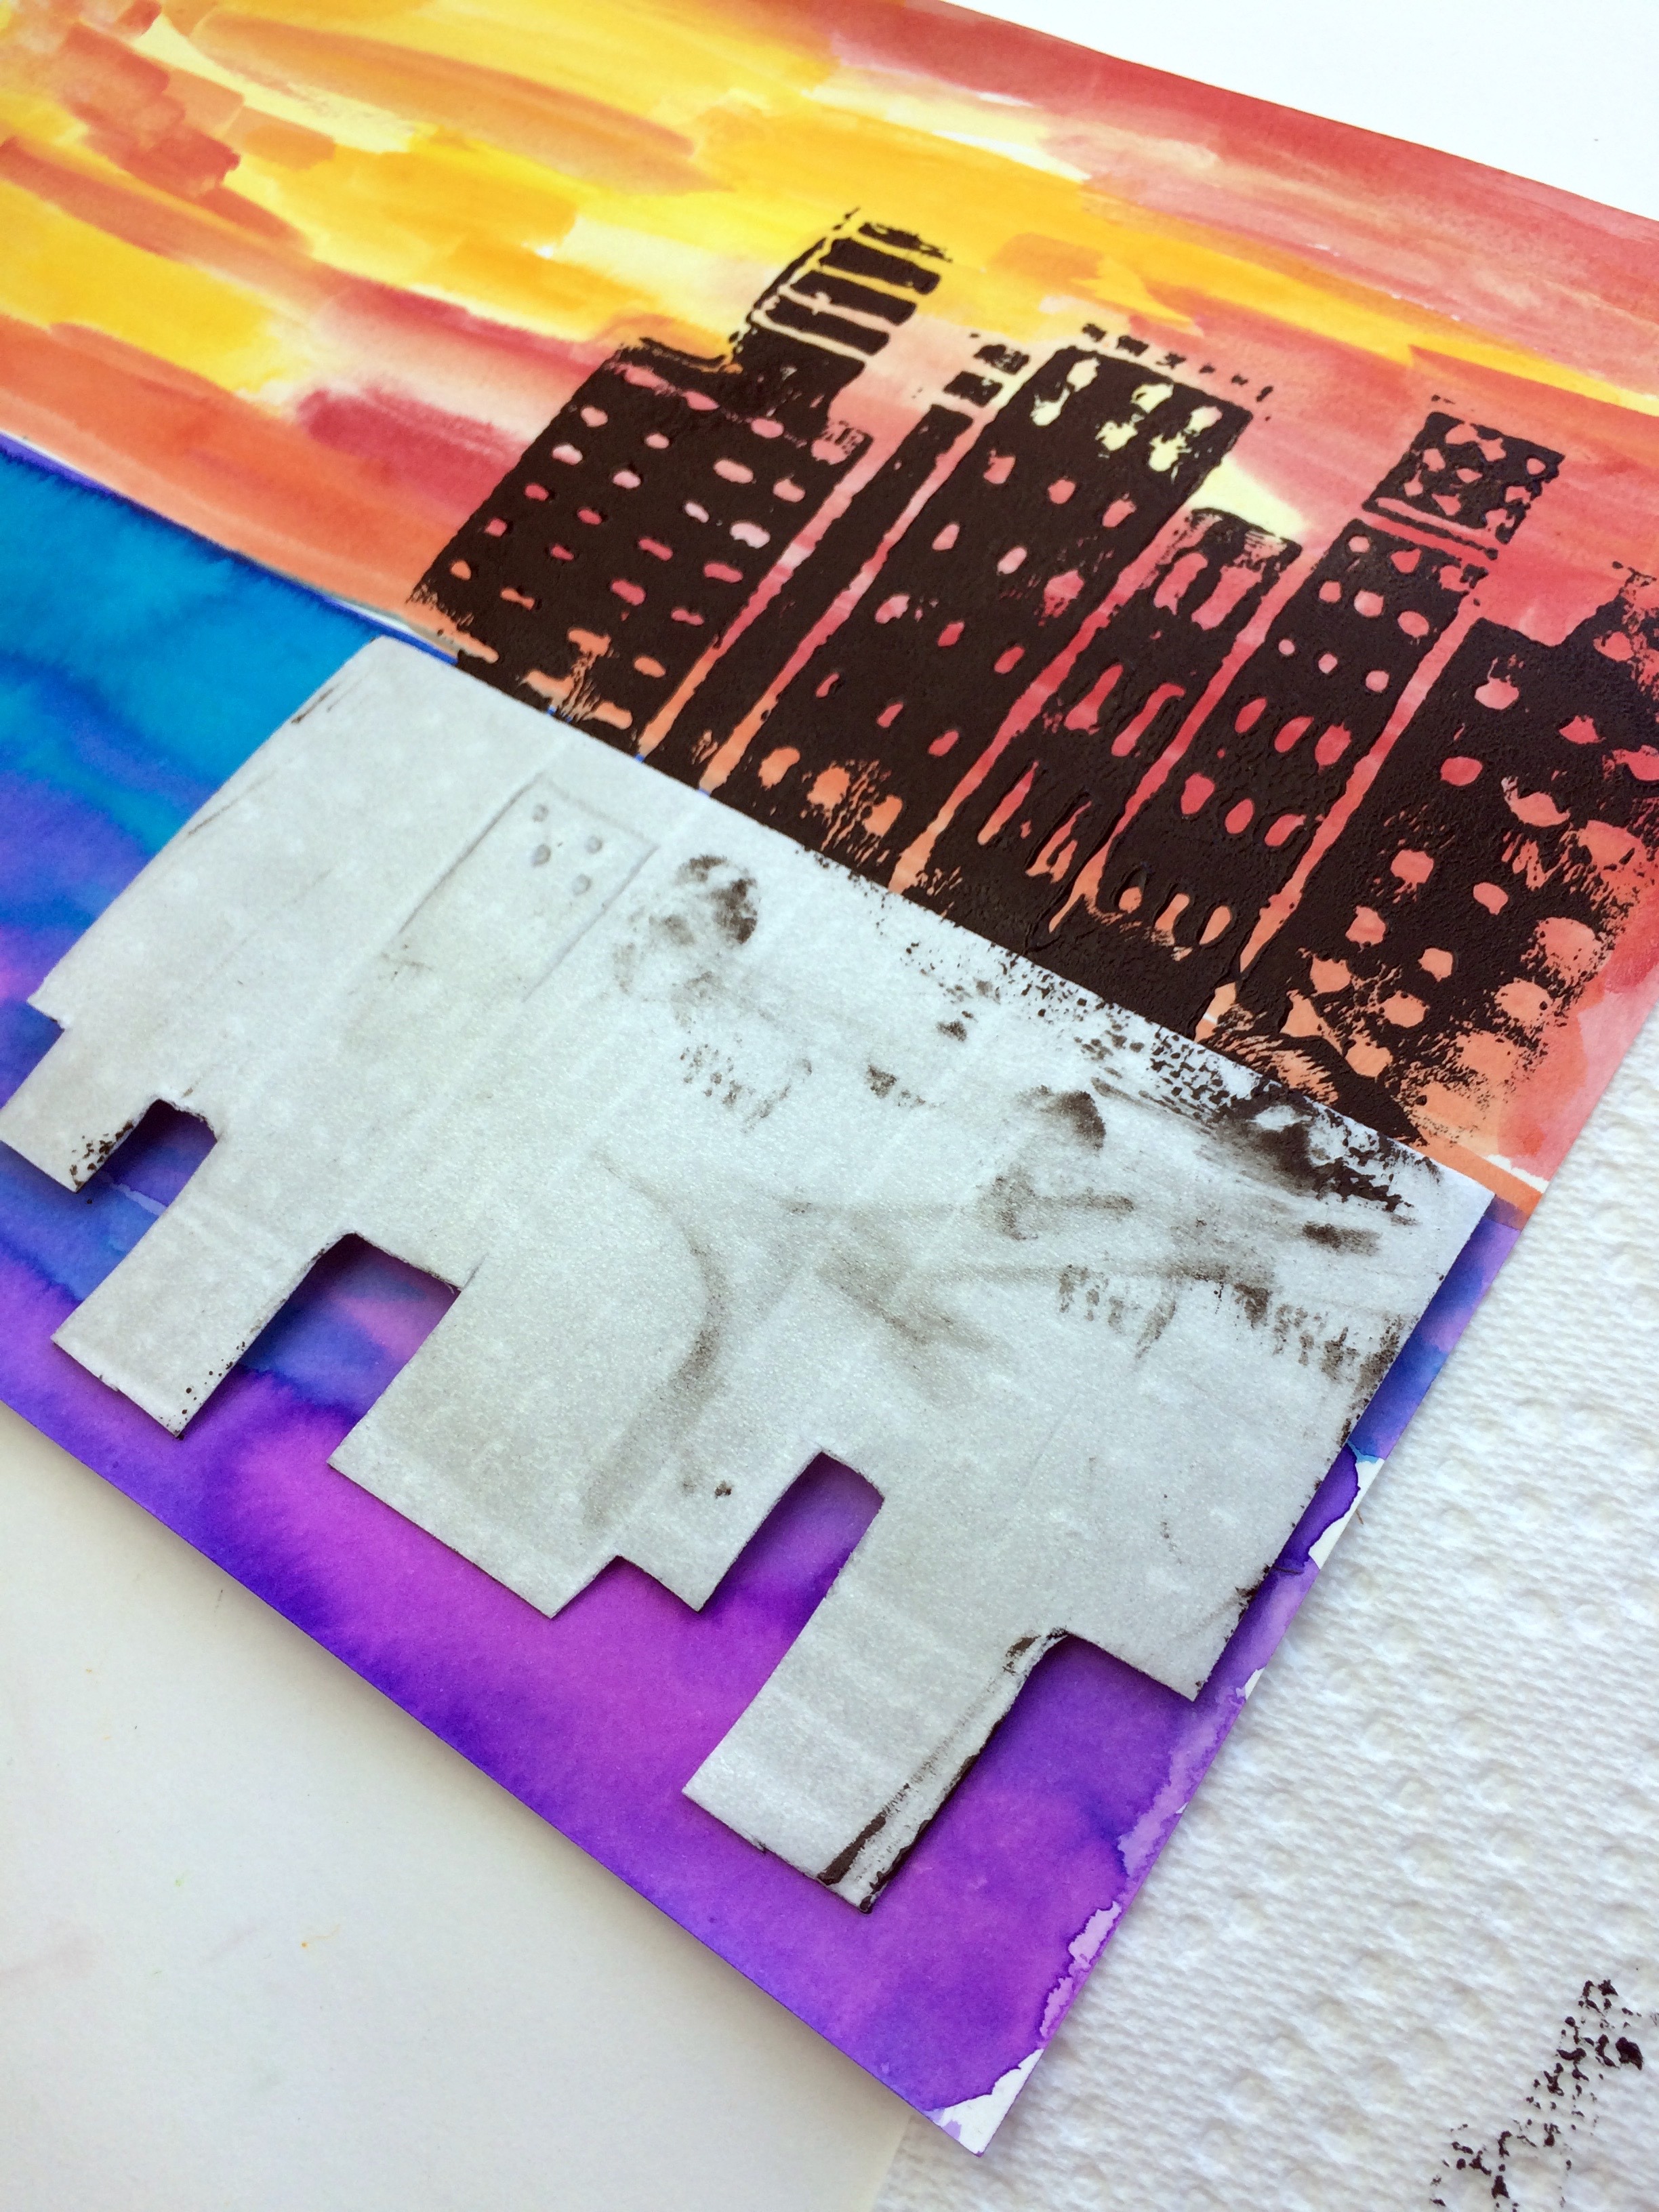
Repeat the process again on the other side.
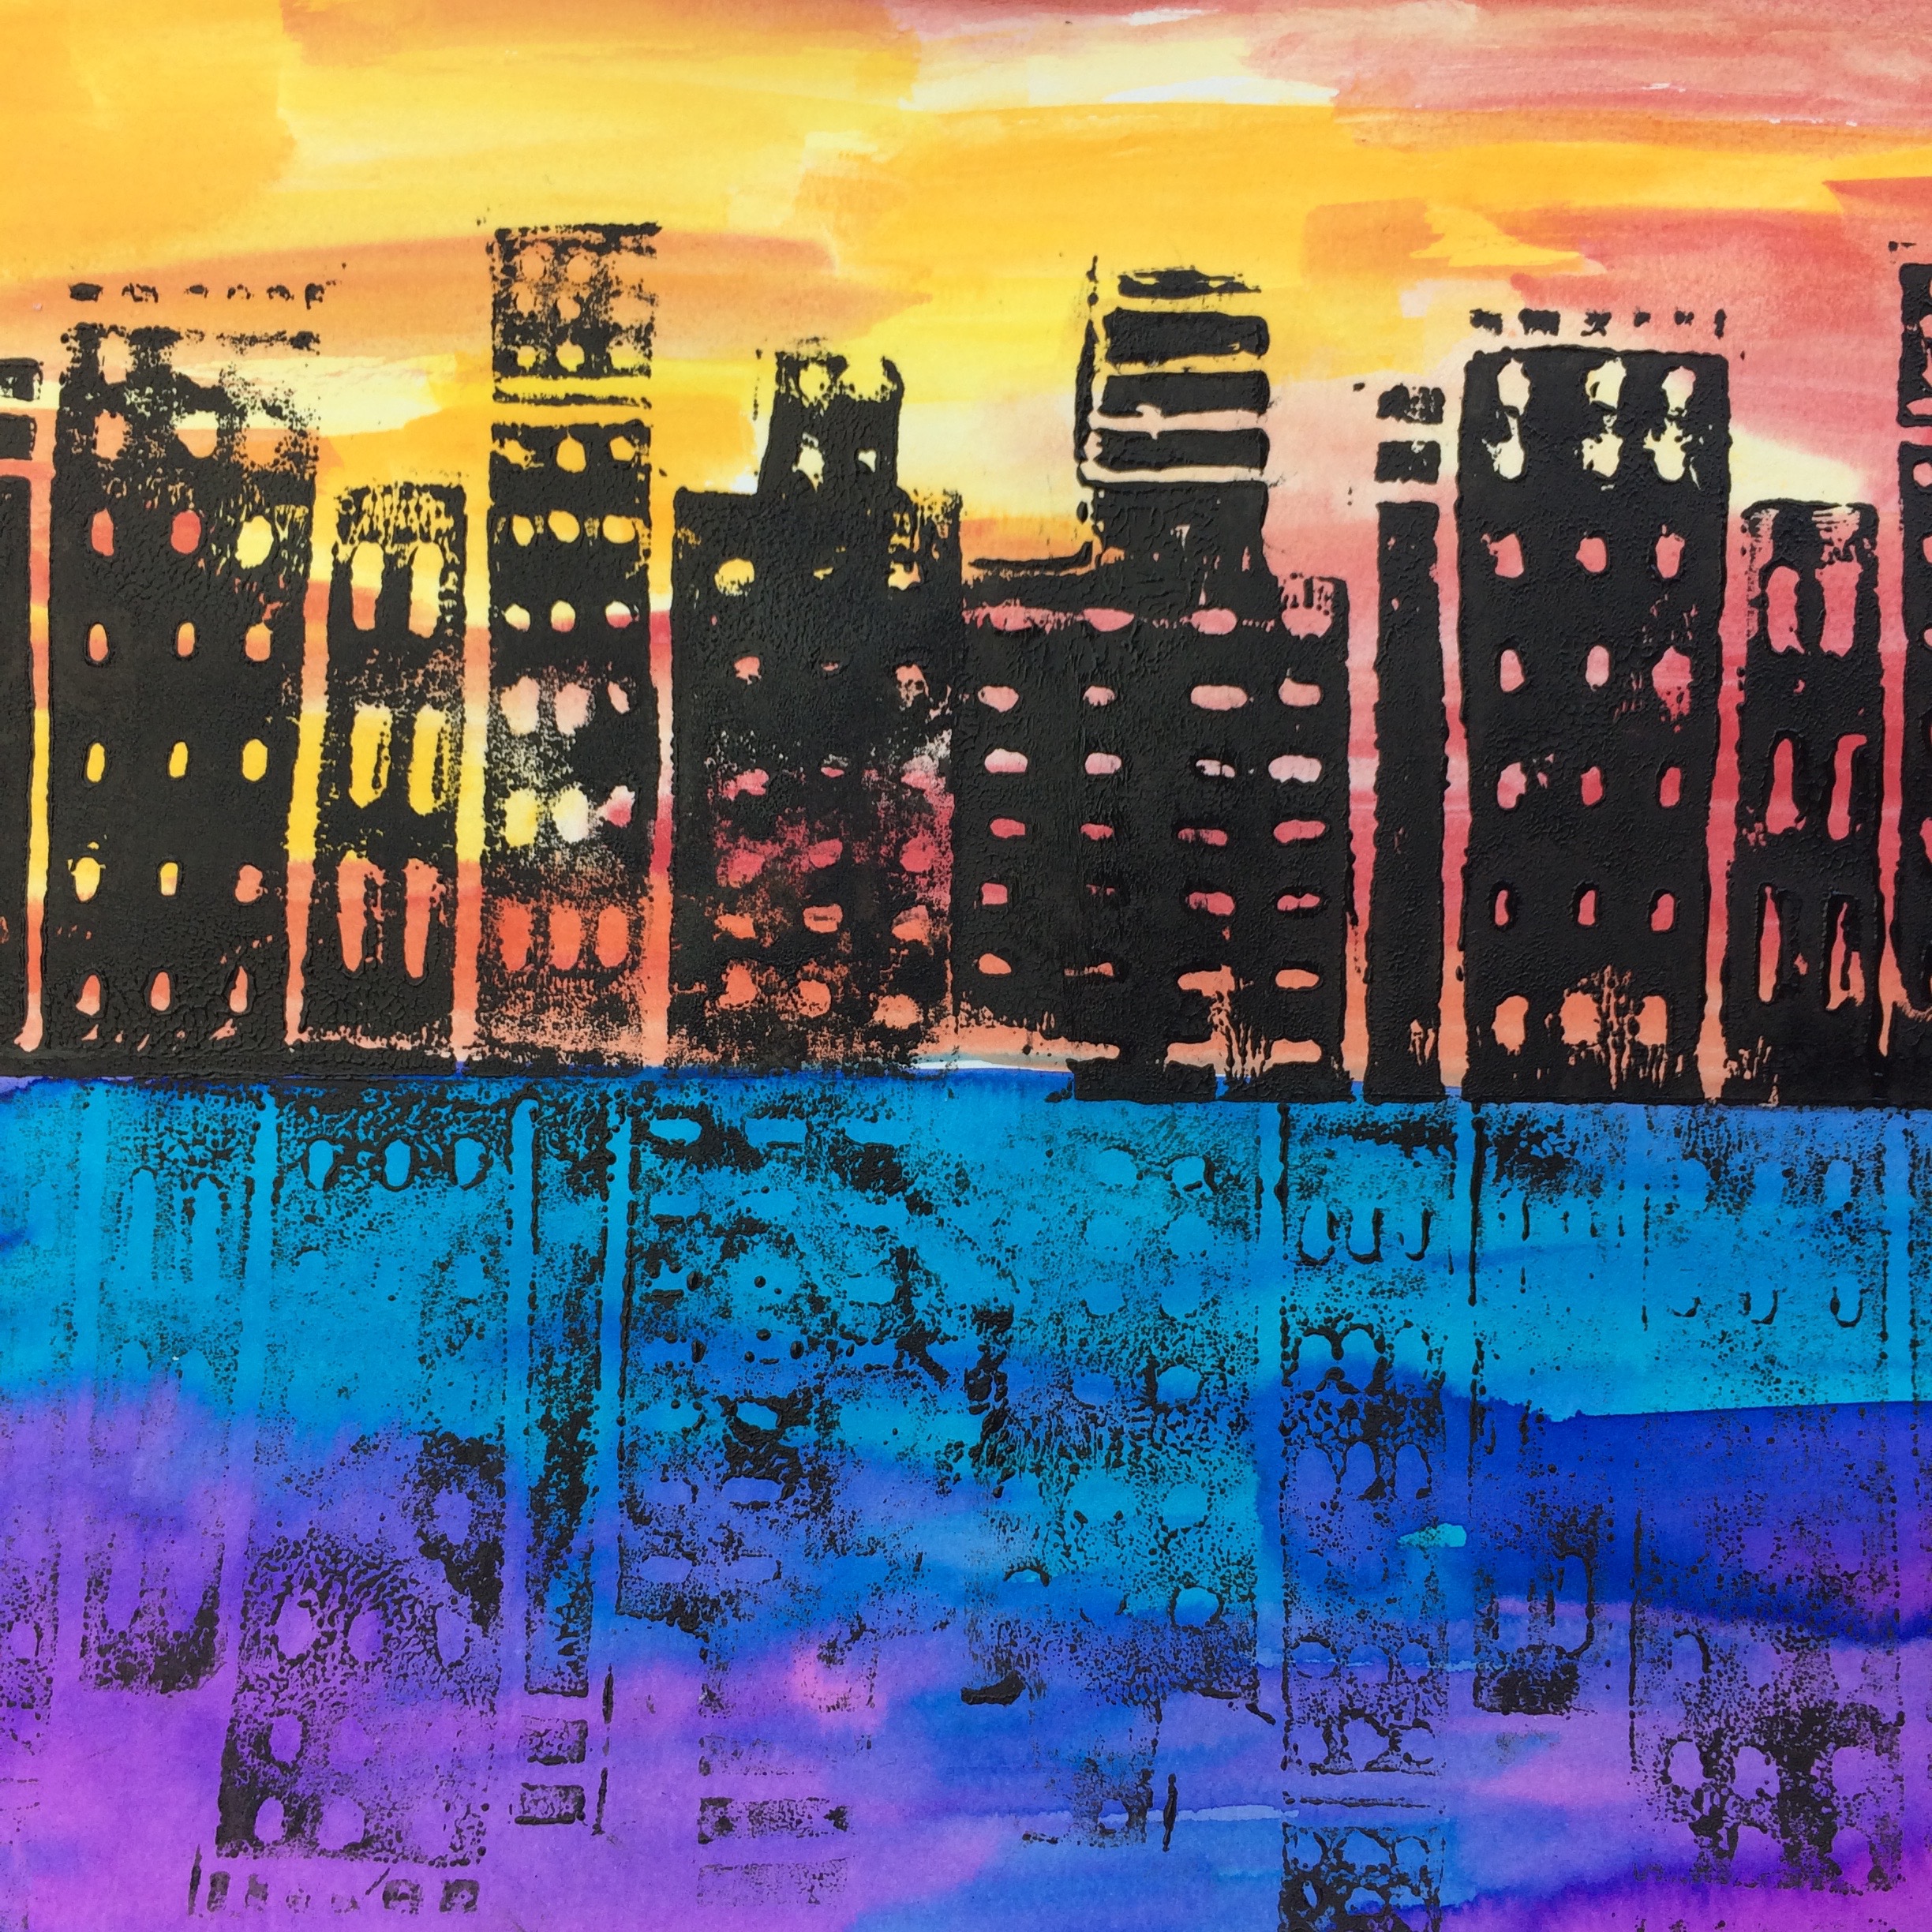
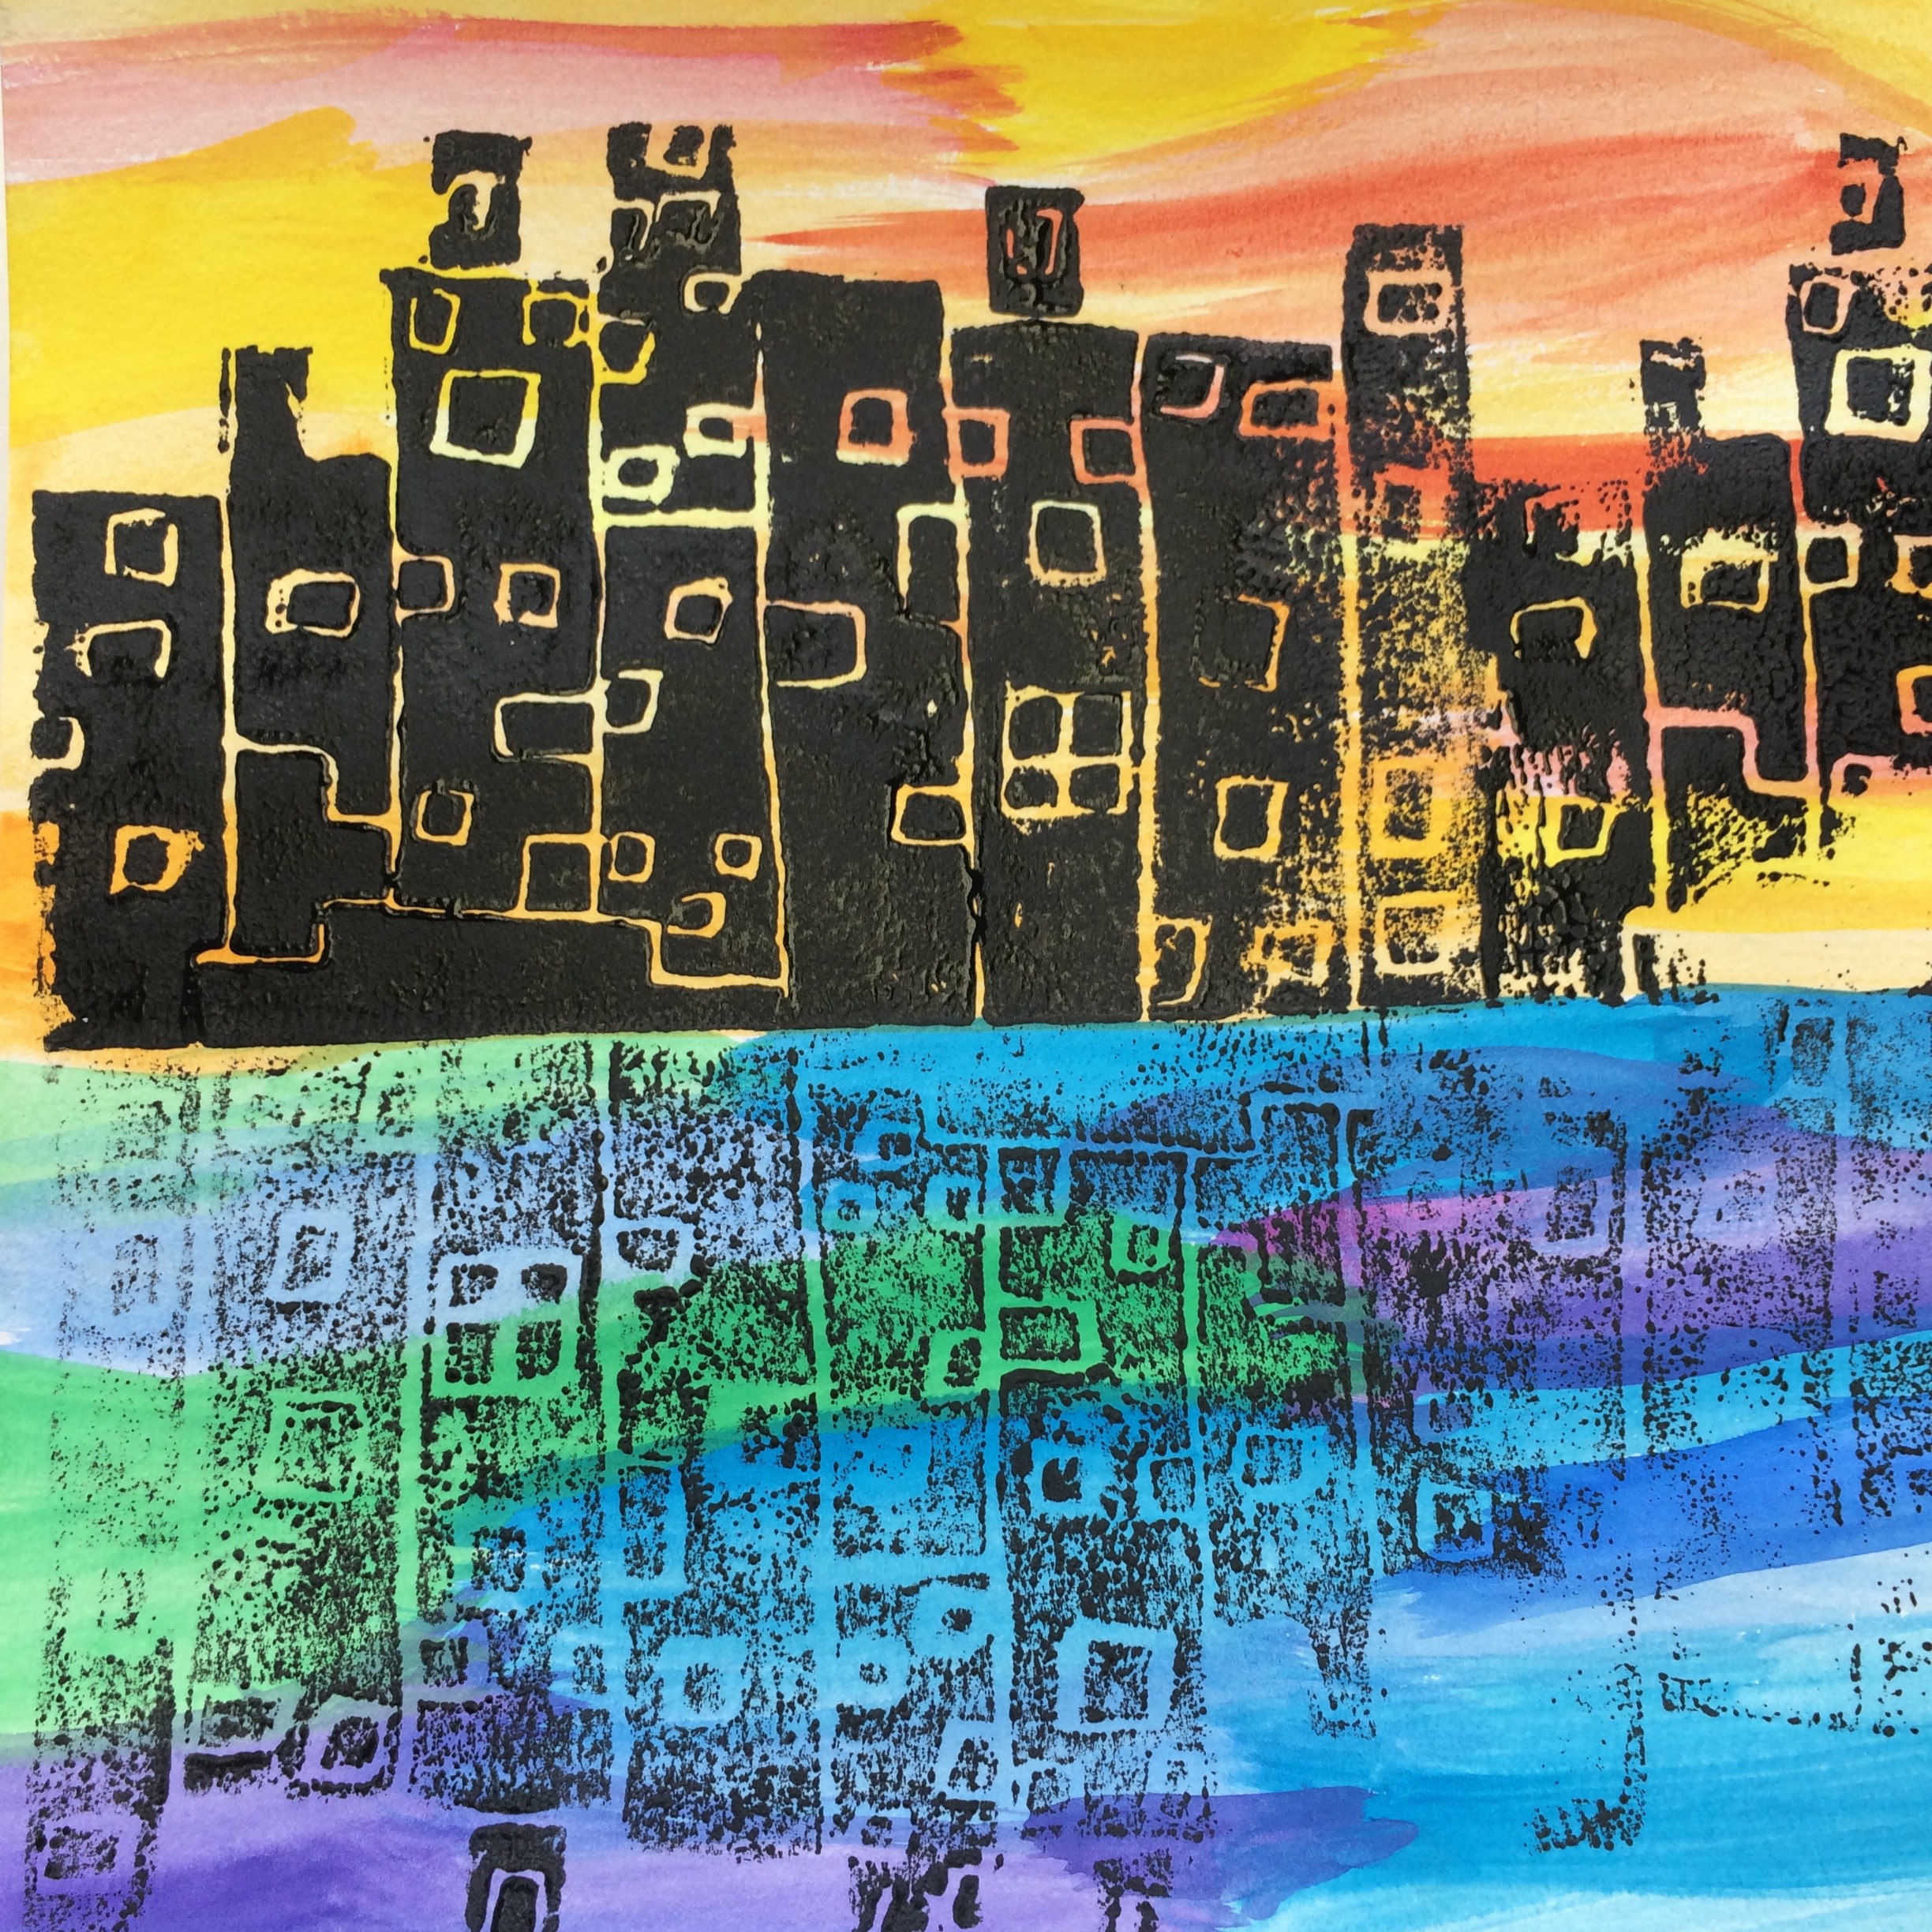
GALLERY

Option 2:
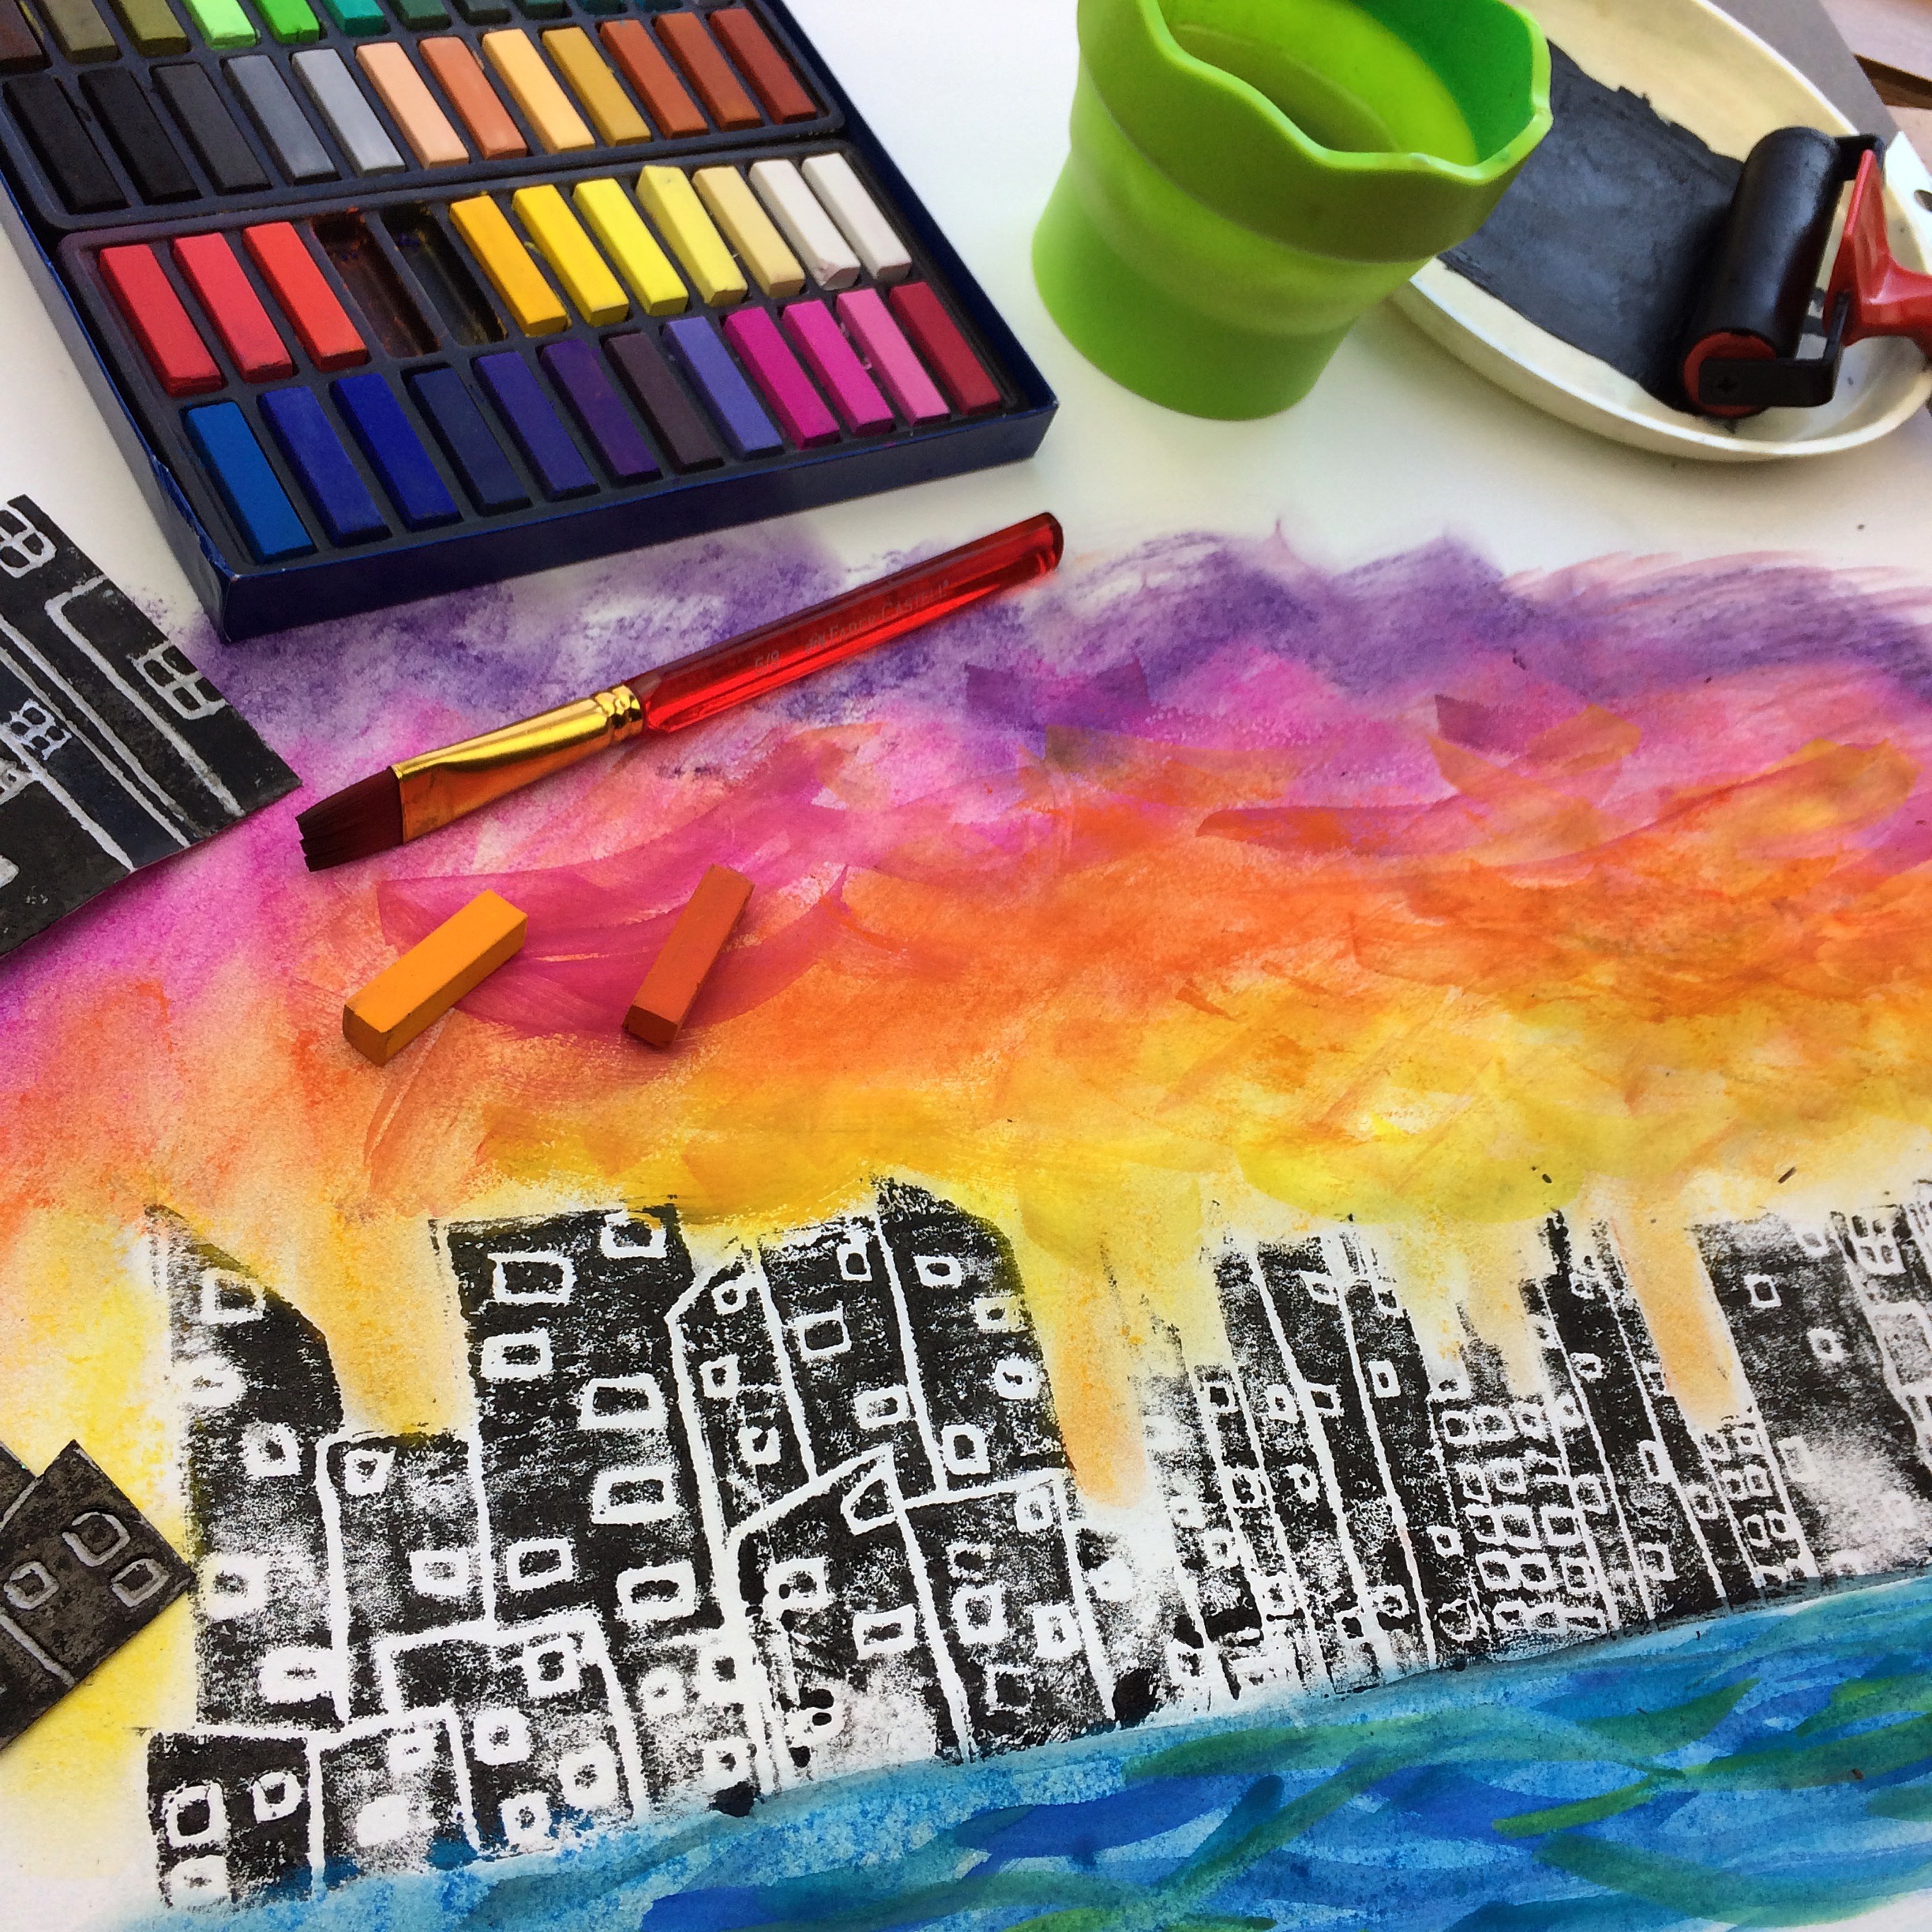
Using the plates already inked, re-ink and print a row of buildings at the bottom a large piece of white drawing paper 12 x 20.
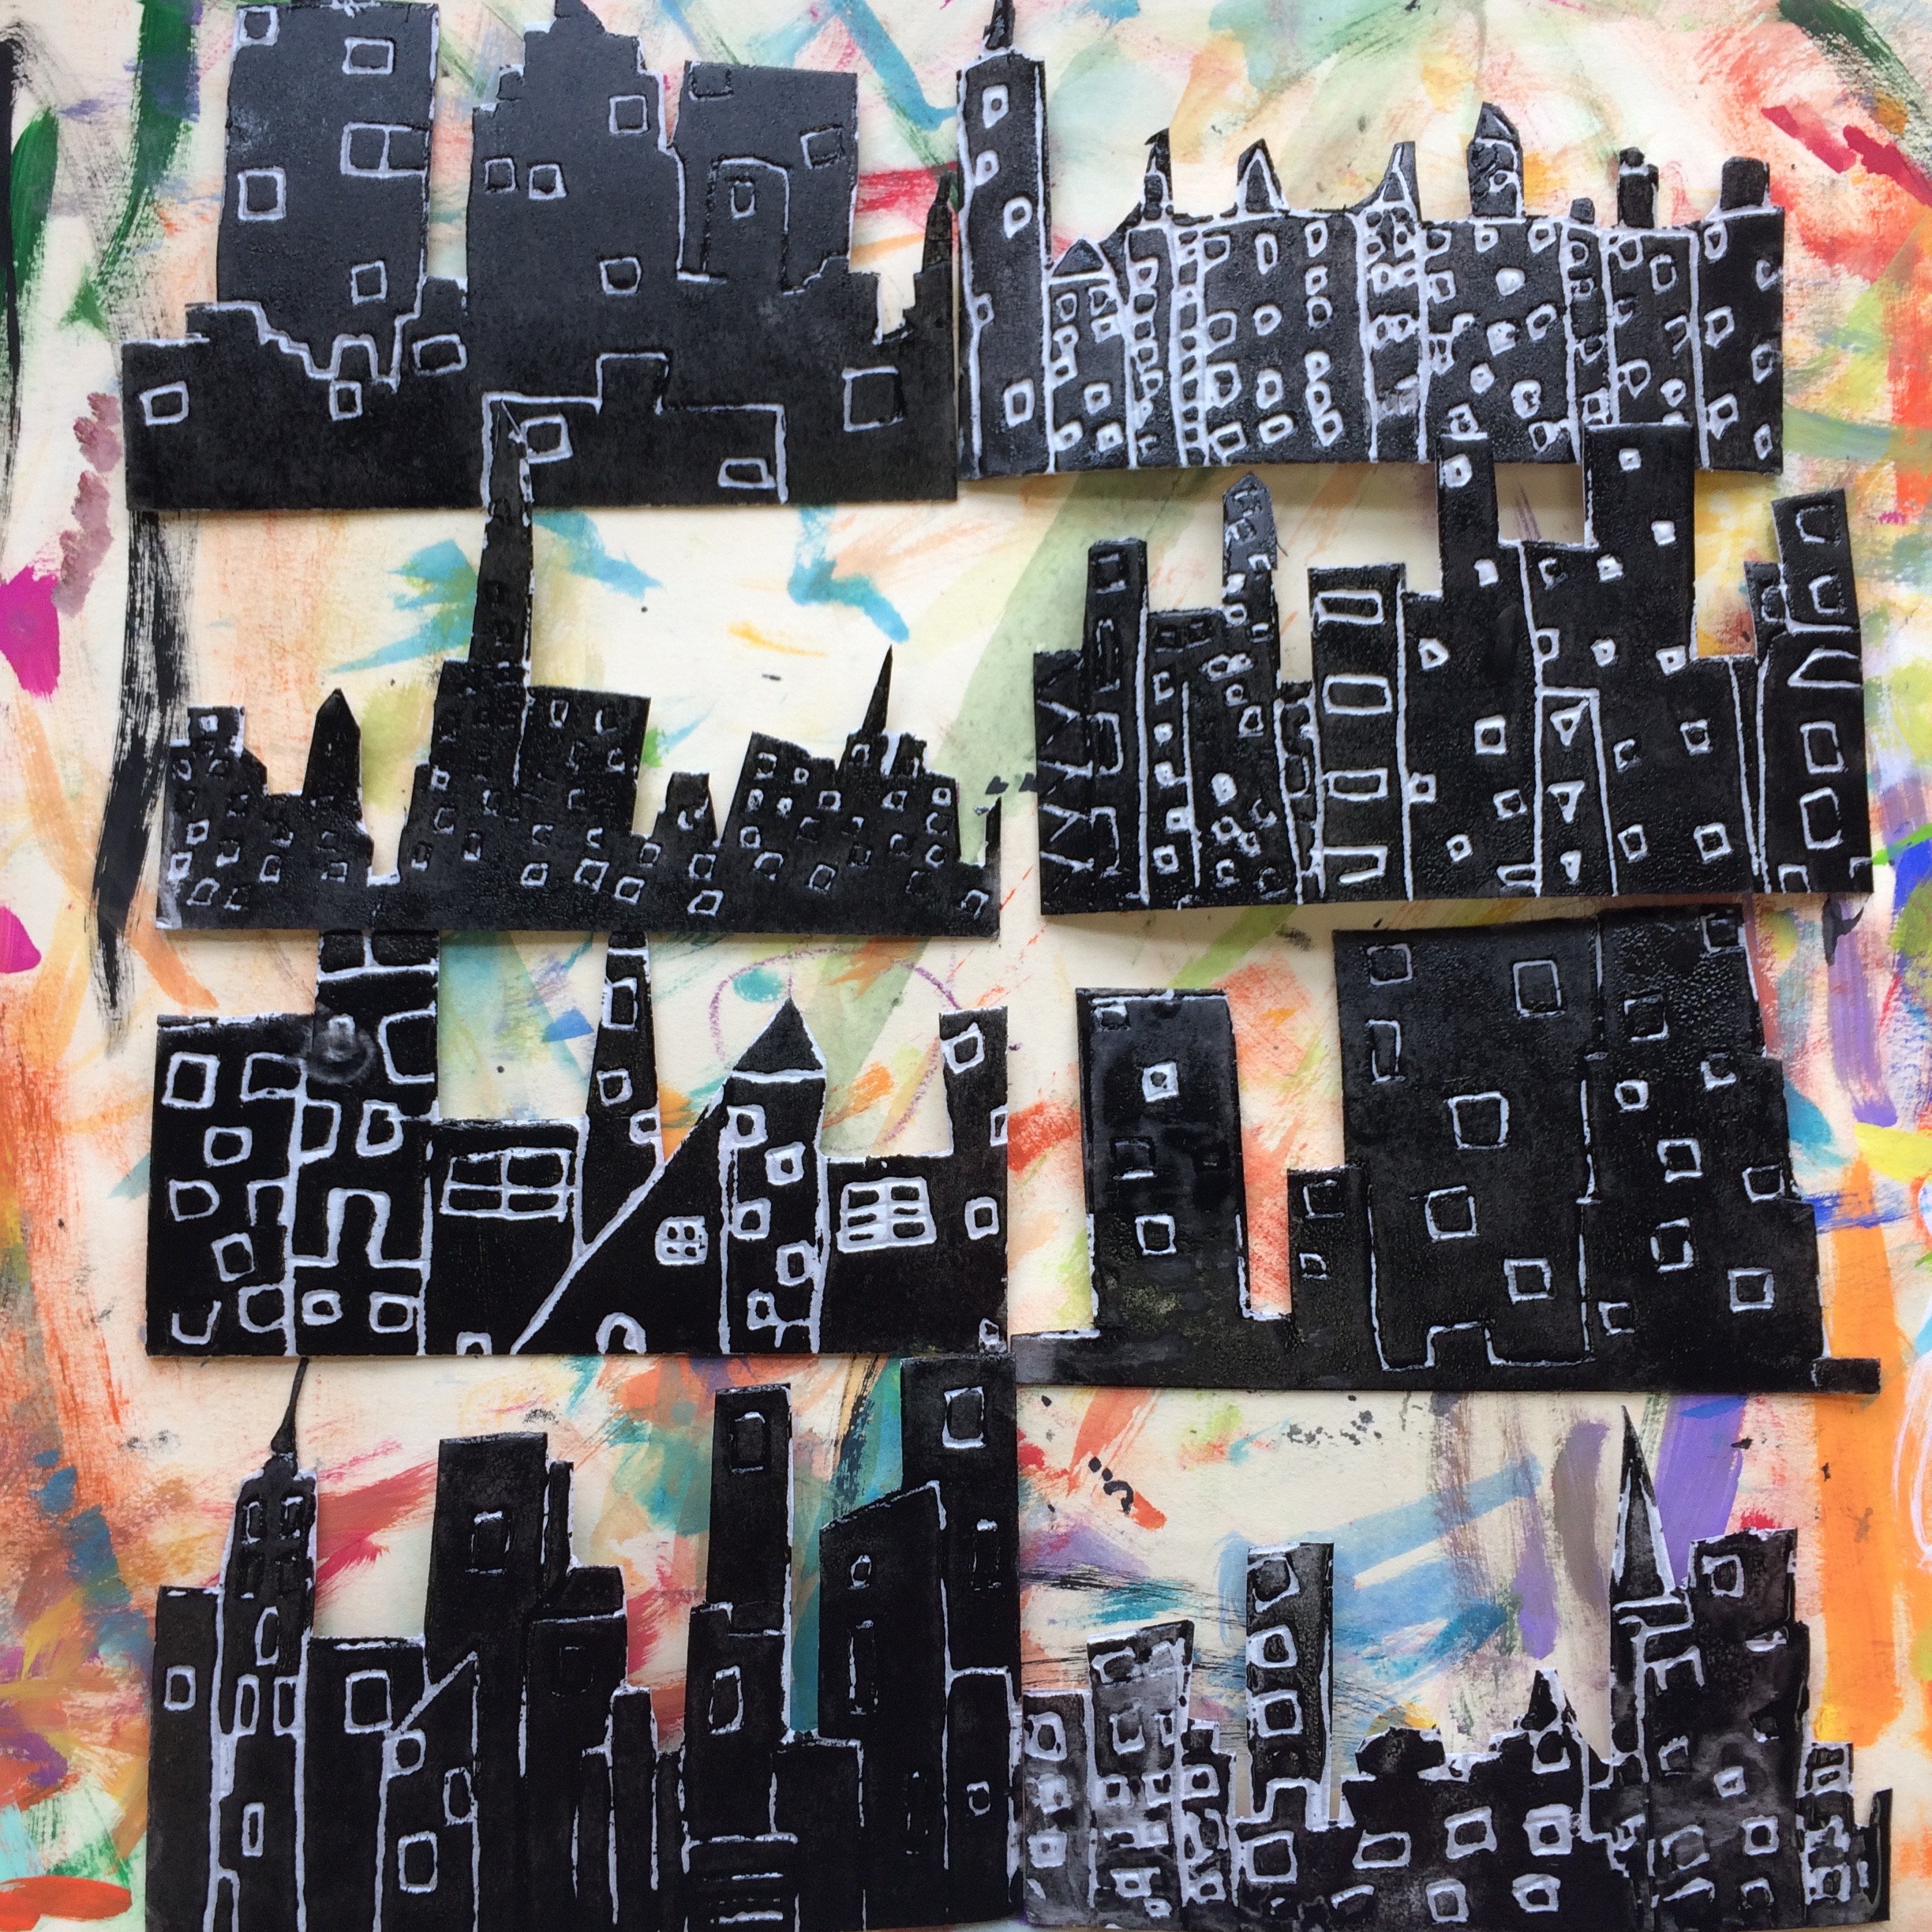
With chalk pastels lightly shade around the buildings, I love using analogous colors when applying chalk. Take a brush and gently paint over the chalk to blend the colors. If you desire a layered look, use the connector set (tempera cakes) from Faber Castell and paint additional color on top of chalk pastels.
1 Comments
Mary Dalzell
April 14, 2017 at 10:35 am
Awesome…loved this! Thanks for sharing!